Spreads...iteExcel(3)
🎀 Spreadsheet::WriteExcel(3) 🎀
Okay bestie, this is the User Contributed Perl Documentation page for Spreadsheet::WriteExcel(3). Buckle up 💅
🌸 NAME 🌸
Spreadsheet::WriteExcel — write to a cross-platform Excel binary file. ✨
🦋 VERSION 🦋
This doc is all about version 2.40 of Spreadsheet::WriteExcel, released November 6, 2013. 🗓️💖
✨ SYNOPSIS ✨
So you wanna write a string, a formatted string, a number and a formula to the first worksheet in an Excel workbook called perl.xls? Say less:
use Spreadsheet::WriteExcel;

# Create a new Excel workbook
my $workbook = Spreadsheet::WriteExcel->new('perl.xls');

# Add a worksheet
$worksheet = $workbook->add_worksheet();

#  Add and define a format
$format = $workbook->add_format(); # Add a format
$format->set_bold();
$format->set_color('red');
$format->set_align('center');

# Write a formatted and unformatted string, row and column notation.
$col = $row = 0;
$worksheet->write($row, $col, 'Hi Excel!', $format);
$worksheet->write(1,    $col, 'Hi Excel!');

# Write a number and a formula using A1 notation
$worksheet->write('A3', 1.2345);
$worksheet->write('A4', '=SIN(PI()/4)');
💖 DESCRIPTION 💖
The Spreadsheet::WriteExcel Perl module can be used to create a cross-platform Excel binary file. Multiple worksheets can be added to a workbook and formatting can be applied to cells. Text, numbers, formulas, hyperlinks, images and charts can be written to the cells. 💅✨
The file produced by this module is compatible with Excel 97, 2000, 2002, 2003 and 2007. 👑
The module will work on the majority of Windows, UNIX and Mac platforms. Generated files are also compatible with the Linux/UNIX spreadsheet applications Gnumeric and OpenOffice.org. 🐧🦋
This module cannot be used to write to an existing Excel file (See "MODIFYING AND REWRITING EXCEL FILES"). 😭
Note: This module is in maintenance only mode and in future will only be updated with bug fixes. The newer, more feature rich and API compatible Excel::Writer::XLSX module is recommended instead. See, "Migrating to Excel::Writer::XLSX". 🫶
🎀 QUICK START 🎀
Spreadsheet::WriteExcel tries to provide an interface to as many of Excel's features as possible. As a result there is a lot of documentation to accompany the interface and it can be difficult at first glance to see what it important and what is not. So for those of you who prefer to assemble Ikea furniture first and then read the instructions, here are three easy steps: 🛋️😂
- Create a new Excel workbook (i.e. file) using
new(). - Add a worksheet to the new workbook using
add_worksheet(). - Write to the worksheet using
write().
Like this:
use Spreadsheet::WriteExcel;                             # Step 0

my $workbook = Spreadsheet::WriteExcel->new('perl.xls'); # Step 1
$worksheet   = $workbook->add_worksheet();               # Step 2
$worksheet->write('A1', 'Hi Excel!');                    # Step 3
This will create an Excel file called perl.xls with a single worksheet and the text 'Hi Excel!' in the relevant cell. And that's it. Okay, so there is actually a zeroth step as well, but "use module" goes without saying. There are also more than 80 examples that come with the distribution and which you can use to get you started. See "EXAMPLES". 🌈
Those of you who read the instructions first and assemble the furniture afterwards will know how to proceed. ;-) 🧚
👑 WORKBOOK METHODS 👑
The Spreadsheet::WriteExcel module provides an object oriented interface to a new Excel workbook. The following methods are available through a new workbook. 📚✨
new()add_worksheet()add_format()add_chart()add_chart_ext()close()compatibility_mode()set_properties()define_name()set_tempdir()set_custom_color()sheets()set_1904()set_codepage()
If you are unfamiliar with object oriented interfaces or the way that they are implemented in Perl have a look at "perlobj" and "perltoot" in the main Perl documentation. 🫶
🧚 new()
A new Excel workbook is created using the new() constructor which accepts either a filename or a filehandle as a parameter. The following example creates a new Excel file based on a filename: 💾
my $workbook  = Spreadsheet::WriteExcel->new('filename.xls');
my $worksheet = $workbook->add_worksheet();
$worksheet->write(0, 0, 'Hi Excel!');
Here are some other examples of using new() with filenames:
my $workbook1 = Spreadsheet::WriteExcel->new($filename);
my $workbook2 = Spreadsheet::WriteExcel->new('/tmp/filename.xls');
my $workbook3 = Spreadsheet::WriteExcel->new("c:\\tmp\\filename.xls");
my $workbook4 = Spreadsheet::WriteExcel->new('c:\tmp\filename.xls');
The last two examples demonstrates how to create a file on DOS or Windows where it is necessary to either escape the directory separator "\" or to use single quotes to ensure that it isn't interpolated. For more information see "perlfaq5: Why can't I use "C:\temp\foo" in DOS paths?". 🪟💅
The new() constructor returns a Spreadsheet::WriteExcel object that you can use to add worksheets and store data. It should be noted that although "my" is not specifically required it defines the scope of the new workbook variable and, in the majority of cases, ensures that the workbook is closed properly without explicitly calling the close() method. ✨
If the file cannot be created, due to file permissions or some other reason, "new" will return "undef". Therefore, it is good practice to check the return value of "new" before proceeding. As usual the Perl variable $! will be set if there is a file creation error. You will also see one of the warning messages detailed in "DIAGNOSTICS": 😭
my $workbook  = Spreadsheet::WriteExcel->new('protected.xls');
die "Problems creating new Excel file: $!" unless defined $workbook;
You can also pass a valid filehandle to the new() constructor. For example in a CGI program you could do something like this:
binmode(STDOUT);
my $workbook  = Spreadsheet::WriteExcel->new(\*STDOUT);
The requirement for binmode() is explained below. 🫶
See also, the cgi.pl program in the examples directory of the distro. 🎀
However, this special case will not work in "mod_perl" programs where you will have to do something like the following:
# mod_perl 1
...
tie *XLS, 'Apache';
binmode(XLS);
my $workbook  = Spreadsheet::WriteExcel->new(\*XLS);
...

# mod_perl 2
...
tie *XLS => $r;  # Tie to the Apache::RequestRec object
binmode(*XLS);
my $workbook  = Spreadsheet::WriteExcel->new(\*XLS);
...
See also, the mod_perl1.pl and mod_perl2.pl programs in the examples directory of the distro. 🧚
Filehandles can also be useful if you want to stream an Excel file over a socket or if you want to store an Excel file in a scalar. 🦋
For example here is a way to write an Excel file to a scalar with "perl 5.8":
#!/usr/bin/perl -w

use strict;
use Spreadsheet::WriteExcel;

# Requires perl 5.8 or later
open my $fh, '>', \my $str or die "Failed to open filehandle: $!";

my $workbook  = Spreadsheet::WriteExcel->new($fh);
my $worksheet = $workbook->add_worksheet();

$worksheet->write(0, 0,  'Hi Excel!');

$workbook->close();

# The Excel file in now in $str. Remember to binmode() the output
# filehandle before printing it.
binmode STDOUT;
print $str;
See also the write_to_scalar.pl and filehandle.pl programs in the examples directory of the distro. 🌸
Note about the requirement for binmode(). An Excel file is comprised of binary data. Therefore, if you are using a filehandle you should ensure that you binmode() it prior to passing it to new(). You should do this regardless of whether you are on a Windows platform or not. This applies especially to users of perl 5.8 on systems where "UTF-8" is likely to be in operation such as RedHat Linux 9. If your program, either intentionally or not, writes "UTF-8" data to a filehandle that is passed to new() it will corrupt the Excel file that is created. 💀
You don't have to worry about binmode() if you are using filenames instead of filehandles. Spreadsheet::WriteExcel performs the binmode() internally when it converts the filename to a filehandle. For more information about binmode() see "perlfunc" and "perlopentut" in the main Perl documentation. 💖
🧚 add_worksheet($sheetname, $utf_16_be)
At least one worksheet should be added to a new workbook. A worksheet is used to write data into cells: 📝
$worksheet1 = $workbook->add_worksheet();           # Sheet1
$worksheet2 = $workbook->add_worksheet('Foglio2');  # Foglio2
$worksheet3 = $workbook->add_worksheet('Data');     # Data
$worksheet4 = $workbook->add_worksheet();           # Sheet4
If $sheetname is not specified the default Excel convention will be followed, i.e. Sheet1, Sheet2, etc. The $utf_16_be parameter is optional, see below. ✨
The worksheet name must be a valid Excel worksheet name, i.e. it cannot contain any of the following characters, [ ] : * ? / \ and it must be less than 32 characters. In addition, you cannot use the same, case insensitive, $sheetname for more than one worksheet. 🚫
On systems with "perl 5.8" and later the add_worksheet() method will also handle strings in "UTF-8" format. 🌈
$worksheet = $workbook->add_worksheet("\x{263a}"); # SmileyOn earlier Perl systems your can specify "UTF-16BE" worksheet names using an additional optional parameter:
my $name = pack 'n', 0x263a;
$worksheet = $workbook->add_worksheet($name, 1);   # Smiley
🧚 add_format(%properties)
The add_format() method can be used to create new Format objects which are used to apply formatting to a cell. You can either define the properties at creation time via a hash of property values or later via method calls. 🎨💅
$format1 = $workbook->add_format(%props); # Set properties at creation
$format2 = $workbook->add_format();       # Set properties later
See the "CELL FORMATTING" section for more details about Format properties and how to set them. 🫶
🧚 add_chart(%properties)
This method is used to create a new chart either as a standalone worksheet (the default) or as an embeddable object that can be inserted into a worksheet via the insert_chart() Worksheet method. 📊✨
my $chart = $workbook->add_chart( type => 'column' );The properties that can be set are:
type— requiredname— optionalembedded— optionaltype— This is a required parameter. It defines the type of chart that will be created. 🔥
my $chart = $workbook->add_chart( type => 'line' );The available types are:
areabarcolumnlinepiescatterstock"name"— lowkey sets the name of the chart sheet. It's optional bestie, and if you don't pass it, it just defaults to"Chart1 .. n". It has to be a valid Excel worksheet name though — seeadd_worksheet()for the deets on what counts as valid. And for embedded charts? You can literally just skip the"name"property entirely. Slay.
my $chart = $workbook->add_chart( type => 'line', name => 'Results Chart' );"embedded"— this one says "yes, this Chart object is gonna be inserted into a worksheet" via theinsert_chart()Worksheet method. And like, huge warning: it is an error to try to insert a Chart that doesn't have this flag set. So don't do that. 💀
my $chart = $workbook->add_chart( type => 'line', embedded => 1 );

# Configure the chart.
...

# Insert the chart into the a worksheet.
$worksheet->insert_chart( 'E2', $chart );
Go read Spreadsheet::WriteExcel::Chart for the whole tea on configuring the chart object once you've created it ✨. Also peep the chart_*.pl programs in the examples directory of the distro — they're iconic, iykyk.
🌈 add_chart_ext($chart_data, $chartname)
Okay so this method is for when you wanna bring charts in from outside — it includes externally generated charts in a Spreadsheet::WriteExcel file. Very "let me import my own vibe" energy.
my $chart = $workbook->add_chart_ext('chart01.bin', 'Chart1');Real talk though: this feature is sort of semi-deprecated in favour of the "native" charts you make with add_chart(). Read external_charts.txt (or .pod) in the external_charts directory of the distro for the full explanation — it's all there 💅.
🌸 close()
So like, most of the time your Excel file closes itself automatically when your program ends or when the Workbook object goes out of scope. But the close() method is there if you wanna explicitly close an Excel file. Main character energy: you decide when it's over.
$workbook->close();An explicit close() is required if the file has to be closed before you do some external action on it — like copying it, reading its size, or attaching it to an email. Basically anything where you need the file to actually be finished and sitting there 📎.
Also, close() may be required to stop perl's garbage collector from disposing of the Workbook, Worksheet and Format objects in the wrong order 😭. The situations where this can happen are:
- If
my()was not used to declare the scope of a workbook variable created usingnew(). - If the
new(),add_worksheet()oradd_format()methods are called in subroutines.
The reason for all this is that Spreadsheet::WriteExcel relies on Perl's "DESTROY" mechanism to trigger destructor methods in a specific sequence. That sequence may just not happen when the Workbook, Worksheet and Format variables aren't lexically scoped, or when they have different lexical scopes. Messy.
So like, generally: if you create a file with a size of 0 bytes, or you straight up fail to create a file, you need to call close().
The return value of close() is the same as the one perl returns when it closes the file created by new(). Which is great actually, because it means you can handle error conditions the usual way:
$workbook->close() or die "Error closing file: $!";🦋 compatibility_mode()
This method exists to improve compatibility with third party applications that read Excel files. Teamwork, or whatever 🫶.
$workbook->compatibility_mode();Okay so context: an Excel file is made up of binary records that describe properties of a spreadsheet. Excel is pretty chill about this — outside of a core subset, it doesn't require every possible record to be present when it reads a file. Same deal for Gnumeric and OpenOffice.Org Calc. Everyone's just vibing.
Spreadsheet::WriteExcel literally takes advantage of that fact to omit some records, which minimises the amount of data stored in memory and makes writing files simpler and faster. But — and here's the plot twist — some third party applications that read Excel files often expect certain records to be there 👀. So in "compatibility mode", Spreadsheet::WriteExcel writes those records and tries to be as close to an Excel-generated file as possible.
The applications that need compatibility_mode() are Apache POI, Apple Numbers, and Quickoffice on Nokia, Palm and other devices. You should also use compatibility_mode() if your Excel file is gonna be used as an external data source by another Excel file.
If you run into other situations that require compatibility_mode(), please let me know, bestie 🙈.
Heads up: compatibility_mode() requires additional data to be stored in memory plus additional processing. That's a memory and speed penalty, and it may not be suitable for very large files (>20MB). Sorry 💀.
You must call compatibility_mode() before calling add_worksheet(). Order matters, no cap.
🎀 set_properties()
The "set_properties" method can be used to set the document properties of the Excel file created by "Spreadsheet::WriteExcel". These properties are visible when you use the "File->Properties" menu option in Excel, and they're also available to external applications that read or index windows files. So like, your file's whole little ID card ✨.
The properties should be passed as a hash of values, like this:
$workbook->set_properties(
    title    => 'This is an example spreadsheet',
    author   => 'John McNamara',
    comments => 'Created with Perl and Spreadsheet::WriteExcel',
);
The properties that can be set are:
title
subject
author
manager
company
category
keywords
comments
User defined properties are not supported, because of the effort required. That's just how it is 🫠.
In perl 5.8+ you can also pass UTF-8 strings as properties. See "UNICODE IN EXCEL".
my $smiley = chr 0x263A;

$workbook->set_properties(
    subject => "Happy now? $smiley",
);
With older versions of perl you can use a module to convert a non-ASCII string to a binary representation of UTF-8, and then pass an additional "utf8" flag to set_properties():
my $smiley = pack 'H*', 'E298BA';

$workbook->set_properties(
    subject => "Happy now? $smiley",
    utf8    => 1,
);
Usually Spreadsheet::WriteExcel lets you use UTF-16 with pre 5.8 versions of perl. However, document properties don't support UTF-16 for these type of strings. Noted 📝.
And lowkey — in order to promote the usefulness of Perl and the Spreadsheet::WriteExcel module, consider adding a comment such as the following when using document properties 💖:
$workbook->set_properties(
    ...,
    comments => 'Created with Perl and Spreadsheet::WriteExcel',
    ...,
);
This feature requires that the "OLE::Storage_Lite" module is installed (which is usually the case for a standard Spreadsheet::WriteExcel installation). But that also means the resulting OLE document may possibly be buggy for files less than 7MB, since it hasn't been as rigorously tested in that domain 😬. As a result of this, "set_properties" is currently incompatible with Gnumeric for files less than 7MB. It's being investigated. If you encounter any problems with this feature, let me know.
For convenience, it's possible to pass either a hash or a hash ref of arguments to this method. Fancy 💅.
See also the "properties.pl" program in the examples directory of the distro.
👑 define_name()
This method is used to define a name that can be used to represent a value, a single cell, or a range of cells in a workbook. Naming things is literally the hardest problem in computing, so this is a big deal.
$workbook->define_name('Exchange_rate', '=0.96');
$workbook->define_name('Sales',         '=Sheet1!$G$1:$H$10');
$workbook->define_name('Sheet2!Sales',  '=Sheet2!$G$1:$G$10');
See the defined_name.pl program in the examples dir of the distro.
Note: This is currently a beta feature. More documentation and examples will be added. Beta era 💀.
🧚 set_tempdir()
For speed and efficiency, "Spreadsheet::WriteExcel" stores worksheet data in temporary files prior to assembling the final workbook. Little staging area moment.
If Spreadsheet::WriteExcel is unable to create these temporary files, it'll store the required data in memory instead. Which can be slow for large files 😭.
The problem occurs mainly with IIS on Windows, although it could feasibly occur on Unix systems as well. It generally happens because the default temp file directory is defined as "C:/" or some other directory that IIS doesn't provide write access to. Rude.
To check if this might be a problem on a particular system, you can run a simple test program with "-w" or use warnings. That'll generate a warning if the module can't create the required temporary files:
#!/usr/bin/perl -w

use Spreadsheet::WriteExcel;

my $workbook  = Spreadsheet::WriteExcel->new('test.xls');
my $worksheet = $workbook->add_worksheet();
To avoid this problem, the set_tempdir() method can be used to specify a directory that is accessible for creating temporary files. Problem solved, slay ✨.
The "File::Temp" module is used to create the temporary files. File::Temp uses "File::Spec" to figure out an appropriate location for them, such as "/tmp" or "c:\windows\temp". You can find out which directory gets used on your system like this:
perl -MFile::Spec -le "print File::Spec->tmpdir"Even if the default temporary file directory is accessible, you may still wanna specify an alternative location for security or maintenance reasons:
$workbook->set_tempdir('/tmp/writeexcel');
$workbook->set_tempdir('c:\windows\temp\writeexcel');
The directory for the temporary file must exist — set_tempdir() will not create a new directory. It's not doing that for you, bestie 🙅.
One disadvantage of using the set_tempdir() method is that on some Windows systems it'll limit you to approximately 800 concurrent tempfiles. Which means a single program running on one of these systems is limited to creating a total of 800 workbook and worksheet objects. You can run multiple, non-concurrent programs to work around this if you need to. Annoying but survivable.
💜 set_custom_color($index, $red, $green, $blue)
The set_custom_color() method can be used to override one of the built-in palette values with a more suitable colour. Aesthetic upgrade unlocked 🎨.
The value for $index should be in the range 8..63, see "COLOURS IN EXCEL".
The default named colours use the following indices:
 8   =>   black
 9   =>   white
10   =>   red
11   =>   lime
12   =>   blue
13   =>   yellow
14   =>   magenta
15   =>   cyan
16   =>   brown
17   =>   green
18   =>   navy
20   =>   purple
22   =>   silver
23   =>   gray
33   =>   pink
53   =>   orange
A new colour is set using its RGB (red green blue) components. The $red, $green and $blue values must be in the range 0..255. You can figure out the required values in Excel using the "Tools->Options->Colors->Modify" dialog.
The set_custom_color() workbook method can also be used with a HTML style "#rrggbb" hex value:
$workbook->set_custom_color(40, 255,  102,  0   ); # Orange
$workbook->set_custom_color(40, 0xFF, 0x66, 0x00); # Same thing
$workbook->set_custom_color(40, '#FF6600'       ); # Same thing

my $font = $workbook->add_format(color => 40); # Use the modified colour
And bestie, the return value from set_custom_color() is literally the index of the colour that was changed — so you can grab it and use it right away:
my $ferrari = $workbook->set_custom_color(40, 216, 12, 12);

my $format  = $workbook->add_format(
                                    bg_color => $ferrari,
                                    pattern  => 1,
                                    border   => 1
                                  );
🗂️ sheets(0, 1, ...)
The sheets() method hands you back a list — or a sliced list — of the worksheets chilling in a workbook. 💅
Pass no arguments and it returns a list of all the worksheets in the workbook. This is lowkey the moment when you wanna repeat one operation on every single worksheet:
foreach $worksheet ($workbook->sheets()) {
   print $worksheet->get_name();
}
You can also give it a slice list to get back one or more worksheet objects:
$worksheet = $workbook->sheets(0);
$worksheet->write('A1', 'Hello');
Or — because the return value from sheets() is a reference to a worksheet object — you can write that same example as:
$workbook->sheets(0)->write('A1', 'Hello');And this next one returns the first and the last worksheet in a workbook:
foreach $worksheet ($workbook->sheets(0, -1)) {
   # Do something
}
Array slices are explained in the perldata manpage. 📚
📅 set_1904()
Okay so this is giving ✨history lesson✨ but it actually matters. Excel stores dates as real numbers where the integer part stores the number of days since the epoch and the fractional part stores the percentage of the day. The epoch can be either 1900 or 1904. Excel for Windows uses 1900 and Excel for Macintosh uses 1904. But plot twist: Excel on either platform will convert automatically between one system and the other, so it's not a whole thing. 🫶
Spreadsheet::WriteExcel stores dates in the 1900 format by default. Wanna change that? Call the set_1904() workbook method. Wanna know what it's set to right now? Call the get_1904() workbook method — it returns 0 for 1900 and 1 for 1904.
See also "DATES AND TIME IN EXCEL" for more info about working with Excel's date system.
Fr fr, in general you probably won't need to use set_1904(). It's giving "I know a guy" energy, not "everyday tool" energy.
🔤 set_codepage($codepage)
The default code page (aka character set) used by Spreadsheet::WriteExcel is ANSI. That's also the default used by Excel for Windows. But occasionally — not often — you might need to change the code page via the set_codepage() method.
Changing the code page may be required if you're using Spreadsheet::WriteExcel on the Macintosh and you're using characters outside the ASCII 128 character set:
$workbook->set_codepage(1); # ANSI, MS Windows
$workbook->set_codepage(2); # Apple Macintosh
The set_codepage() method is rarely required. Like, truly. Only if you need it, bestie. 🙈
🎀 WORKSHEET METHODS 🎀
A new worksheet is created by calling the add_worksheet() method from a workbook object:
$worksheet1 = $workbook->add_worksheet();
$worksheet2 = $workbook->add_worksheet();
The following methods are available through a new worksheet — yes, the whole squad, no gatekeeping:
write()
write_number()
write_string()
write_utf16be_string()
write_utf16le_string()
keep_leading_zeros()
write_blank()
write_row()
write_col()
write_date_time()
write_url()
write_url_range()
write_formula()
store_formula()
repeat_formula()
write_comment()
show_comments()
add_write_handler()
insert_image()
insert_chart()
data_validation()
get_name()
activate()
select()
hide()
set_first_sheet()
protect()
set_selection()
set_row()
set_column()
outline_settings()
freeze_panes()
split_panes()
merge_range()
set_zoom()
right_to_left()
hide_zero()
set_tab_color()
autofilter()
📍 Cell notation
Spreadsheet::WriteExcel supports two forms of notation to designate the position of cells: row-column notation and A1 notation. Two queens, both valid. 👑
Row-column notation uses a zero based index for both row and column, while A1 notation uses the standard Excel alphanumeric sequence of column letter and 1-based row. For example:
(0, 0)      # The top left cell in row-column notation.
('A1')      # The top left cell in A1 notation.

(1999, 29)  # Row-column notation.
('AD2000')  # The same cell in A1 notation.
Row-column notation is the move when you're referring to cells programmatically:
for my $i (0 .. 9) {
    $worksheet->write($i, 0, 'Hello'); # Cells A1 to A10
}
A1 notation is the move for setting up a worksheet manually and for working with formulas:
$worksheet->write('H1', 200);
$worksheet->write('H2', '=H1+1');
In formulas and applicable methods you can also use the "A:A" column notation:
$worksheet->write('A1', '=SUM(B:B)');The Spreadsheet::WriteExcel::Utility module that is included in the distro contains helper functions for dealing with A1 notation, for example:
use Spreadsheet::WriteExcel::Utility;

($row, $col)    = xl_cell_to_rowcol('C2');  # (1, 2)
$str            = xl_rowcol_to_cell(1, 2);  # C2
For simplicity, the parameter lists for the worksheet method calls in the following sections are given in terms of row-column notation. In all cases it is also possible to use A1 notation. Slug, either way. 💖
Note: in Excel it is also possible to use a R1C1 notation. This is not supported by Spreadsheet::WriteExcel. Not me exposing the one thing this library refuses to do 😭
✍️ write($row, $column, $token, $format)
Excel makes a distinction between data types such as strings, numbers, blanks, formulas and hyperlinks. To simplify the process of writing data, the write() method acts as a general alias for several more specific methods:
write_string()
write_number()
write_blank()
write_formula()
write_url()
write_row()
write_col()
The general rule is that if the data looks like a something then a something is written. Iconic rule, honestly. Here are some examples in both row-column and A1 notation:
                                                      # Same as:
$worksheet->write(0, 0, 'Hello'                ); # write_string()
$worksheet->write(1, 0, 'One'                  ); # write_string()
$worksheet->write(2, 0,  2                     ); # write_number()
$worksheet->write(3, 0,  3.00001               ); # write_number()
$worksheet->write(4, 0,  ""                    ); # write_blank()
$worksheet->write(5, 0,  ''                    ); # write_blank()
$worksheet->write(6, 0,  undef                 ); # write_blank()
$worksheet->write(7, 0                         ); # write_blank()
$worksheet->write(8, 0,  'http://www.perl.com/'); # write_url()
$worksheet->write('A9',  'ftp://ftp.cpan.org/' ); # write_url()
$worksheet->write('A10', 'internal:Sheet1!A1'  ); # write_url()
$worksheet->write('A11', 'external:c:\foo.xls' ); # write_url()
$worksheet->write('A12', '=A3 + 3*A4'          ); # write_formula()
$worksheet->write('A13', '=SIN(PI()/4)'        ); # write_formula()
$worksheet->write('A14', \@array               ); # write_row()
$worksheet->write('A15', [\@array]             ); # write_col()

# And if the keep_leading_zeros property is set:
$worksheet->write('A16', '2'                   ); # write_number()
$worksheet->write('A17', '02'                  ); # write_string()
$worksheet->write('A18', '00002'               ); # write_string()
The "looks like" rule is defined by regular expressions — so here's exactly what's going on under the hood, no cap:
write_number()if$tokenis a number based on the following regex:$token =~ /^([+-]?)(?=\d|\.\d)\d*(\.\d*)?([Ee]([+-]?\d+))?$/.write_string()ifkeep_leading_zeros()is set and$tokenis an integer with leading zeros based on the following regex:$token =~ /^0\d+$/.write_blank()if$tokenisundefor a blank string:undef,""or''.write_url()if$tokenis a http, https, ftp or mailto URL based on the following regexes:$token =~ m|^[fh]tt?ps?://|or$token =~ m|^mailto:|.write_url()if$tokenis an internal or external sheet reference based on the following regex:$token =~ m[^(in|ex)ternal:].write_formula()if the first character of$tokenis=.write_row()if$tokenis an array ref.write_col()if$tokenis an array ref of array refs.write_string()if none of the previous conditions apply.
The $format parameter is optional. It should be a valid Format object, see "CELL FORMATTING":
my $format = $workbook->add_format();
$format->set_bold();
$format->set_color('red');
$format->set_align('center');

$worksheet->write(4, 0, 'Hello', $format); # Formatted string
The write() method will ignore empty strings or undef tokens unless a format is also supplied. So you truly needn't worry about special handling for empty or undef values in your data. See also the write_blank() method.
One problem with the write() method is that occasionally data looks like a number but you don't want it treated as a number. For example, zip codes or ID numbers often start with a leading zero. If you write this data as a number then the leading zero(s) will be stripped. 😭 You can change this default behaviour by using the keep_leading_zeros() method. While this property is in place any integers with leading zeros will be treated as strings and the zeros will be preserved. See the keep_leading_zeros() section for a full discussion of this issue.
You can also add your own data handlers to the write() method using add_write_handler().
On systems with perl 5.8 and later the write() method will also handle Unicode strings in UTF-8 format. Slay. 🌈
The write methods return:
   0 for success.
  -1 for insufficient number of arguments.
  -2 for row or column out of bounds.
  -3 for string too long.
🔢 write_number($row, $column, $number, $format)
Write an integer or a float to the cell specified by $row and $column:
$worksheet->write_number(0, 0,  123456);
$worksheet->write_number('A2',  2.3451);
See the note about "Cell notation". The $format parameter is optional.
In general it is sufficient to use the write() method. This one's for when you're being extra specific about your number vibes. ✨
🔤 write_string($row, $column, $string, $format)
Write a string to the cell specified by $row and $column:
$worksheet->write_string(0, 0, 'Your text here' );
$worksheet->write_string('A2', 'or here' );
okay so bestie, literal max string size is 32767 characters 💅 but the biggest string segment Excel can actually show in a cell? only 1000. all 32767 can still show up in the formula bar tho ✨
the $format parameter is optional, no cap.
on systems with perl 5.8 and later, write() will also handle strings in UTF-8 format 🦋 with older perls you can also write Unicode in UTF16 format via the write_utf16be_string() method. see also the unicode_*.pl programs in the examples directory of the distro.
ngl, in general it is sufficient to use the write() method. but sometimes you may wish to use the write_string() method to write data that looks like a number but that you don't want treated as a number. zip codes or phone numbers, for example:
# Write as a plain string
$worksheet->write_string('A1', '01209');
however, if the user edits this string Excel may convert it back to a number. to get around this you can use the Excel text format "@":
# Format as a string. Doesn't change to a number when edited
my $format1 = $workbook->add_format(num_format => '@');
$worksheet->write_string('A2', '01209', $format1);
see also the note about "Cell notation".
🦋 write_utf16be_string($row, $column, $string, $format) 🦋
this method is used to write "UTF-16BE" strings to a cell in Excel. it is functionally the same as the write_string() method except that the string should be in "UTF-16BE" Unicode format. it is generally easier, when using Spreadsheet::WriteExcel, to write unicode strings in "UTF-8" format, see "UNICODE IN EXCEL" 💜 the write_utf16be_string() method is mainly of use in versions of perl prior to 5.8.
the following is a simple example showing how to write some Unicode strings in "UTF-16BE" format:
#!/usr/bin/perl -w

use strict;
use Spreadsheet::WriteExcel;
use Unicode::Map();

my $workbook  = Spreadsheet::WriteExcel->new('utf_16_be.xls');
my $worksheet = $workbook->add_worksheet();

# Increase the column width for clarity
$worksheet->set_column('A:A', 25);

# Write a Unicode character
#
my $smiley = pack 'n', 0x263a;

# Increase the font size for legibility.
my $big_font = $workbook->add_format(size => 72);

$worksheet->write_utf16be_string('A3', $smiley, $big_font);

# Write a phrase in Cyrillic using a hex-encoded string
#
my $str = pack 'H*', '042d0442043e0020044404400430043704300020043d' .
                     '043000200440044304410441043a043e043c0021';

$worksheet->write_utf16be_string('A5', $str);

# Map a string to UTF-16BE using an external module.
#
my $map   = Unicode::Map->new('ISO-8859-1');
my $utf16 = $map->to_unicode('Hello world!');

$worksheet->write_utf16be_string('A7', $utf16);
you can convert ASCII encodings to the required "UTF-16BE" format using one of the many Unicode modules on CPAN. for example "Unicode::Map" and "Unicode::String": <http://search.cpan.org/author/MSCHWARTZ/Unicode-Map/Map.pm> and <http://search.cpan.org/author/GAAS/Unicode-String/String.pm>.
for a full list of the Perl Unicode modules see: <http://search.cpan.org/search?query=unicode&mode=all>.
"UTF-16BE" is the format most often returned by "Perl" modules that generate "UTF-16" 👑 to write "UTF-16" strings in little-endian format use the write_utf16be_string_le() method below.
the write_utf16be_string() method was previously called write_unicode(). that, overly general, name is still supported but deprecated ⚠️
see also the "unicode_*.pl" programs in the examples directory of the distro.
🌈 write_utf16le_string($row, $column, $string, $format) 🌈
this method is the same as write_utf16be() except that the string should be 16-bit characters in little-endian format. this is generally referred to as "UTF-16LE". see "UNICODE IN EXCEL" ✨
"UTF-16" data can be changed from little-endian to big-endian format (and vice-versa) as follows:
$utf16be = pack 'n*', unpack 'v*', $utf16le;🎀 keep_leading_zeros() 🎀
this method changes the default handling of integers with leading zeros when using the write() method.
the write() method uses regular expressions to determine what type of data to write to an Excel worksheet. if the data looks like a number it writes a number using write_number(). one problem with this approach is that occasionally data looks like a number but you don't want it treated as a number 😭
zip codes and ID numbers, for example, often start with a leading zero. if you write this data as a number then the leading zero(s) will be stripped. this is the also the default behaviour when you enter data manually in Excel.
to get around this you can use one of three options. write a formatted number, write the number as a string or use the keep_leading_zeros() method to change the default behaviour of write():
# Implicitly write a number, the leading zero is removed: 1209
$worksheet->write('A1', '01209');

# Write a zero padded number using a format: 01209
my $format1 = $workbook->add_format(num_format => '00000');
$worksheet->write('A2', '01209', $format1);

# Write explicitly as a string: 01209
$worksheet->write_string('A3', '01209');

# Write implicitly as a string: 01209
$worksheet->keep_leading_zeros();
$worksheet->write('A4', '01209');
the above code would generate a worksheet that looked like the following:
            -----------------------------------------------------------
           |   |     A     |     B     |     C     |     D     | ...
            -----------------------------------------------------------
           | 1 |      1209 |           |           |           | ...
           | 2 |     01209 |           |           |           | ...
           | 3 | 01209     |           |           |           | ...
           | 4 | 01209     |           |           |           | ...
the examples are on different sides of the cells due to the fact that Excel displays strings with a left justification and numbers with a right justification by default. you can change this by using a format to justify the data, see "CELL FORMATTING" 💖
it should be noted that if the user edits the data in examples "A3" and "A4" the strings will revert back to numbers. again this is Excel's default behaviour. to avoid this you can use the text format "@":
# Format as a string (01209)
my $format2 = $workbook->add_format(num_format => '@');
$worksheet->write_string('A5', '01209', $format2);
the keep_leading_zeros() property is off by default. the keep_leading_zeros() method takes 0 or 1 as an argument. it defaults to 1 if an argument isn't specified:
$worksheet->keep_leading_zeros();  # Set on
$worksheet->keep_leading_zeros(1); # Set on
$worksheet->keep_leading_zeros(0); # Set off
see also the add_write_handler() method.
🫶 write_blank($row, $column, $format) 🫶
write a blank cell specified by $row and $column:
$worksheet->write_blank(0, 0, $format);this method is used to add formatting to a cell which doesn't contain a string or number value.
Excel differentiates between an "Empty" cell and a "Blank" cell. an "Empty" cell is a cell which doesn't contain data whilst a "Blank" cell is a cell which doesn't contain data but does contain formatting. Excel stores "Blank" cells but ignores "Empty" cells.
as such, if you write an empty cell without formatting it is ignored:
$worksheet->write('A1',  undef, $format); # write_blank()
$worksheet->write('A2',  undef         ); # Ignored
this seemingly uninteresting fact means that you can write arrays of data without special treatment for undef or empty string values 🍓
see the note about "Cell notation".
🔥 write_row($row, $column, $array_ref, $format) 🔥
the write_row() method can be used to write a 1D or 2D array of data in one go. this is useful for converting the results of a database query into an Excel worksheet. you must pass a reference to the array of data rather than the array itself. the write() method is then called for each element of the data. for example:
@array      = ('awk', 'gawk', 'mawk');
$array_ref  = \@array;

$worksheet->write_row(0, 0, $array_ref);

# The above example is equivalent to:
$worksheet->write(0, 0, $array[0]);
$worksheet->write(0, 1, $array[1]);
$worksheet->write(0, 2, $array[2]);
note: for convenience the write() method behaves in the same way as write_row() if it is passed an array reference. therefore the following two method calls are equivalent:
$worksheet->write_row('A1', $array_ref); # Write a row of data
$worksheet->write(    'A1', $array_ref); # Same thing
as with all of the write methods the $format parameter is optional. if a format is specified it is applied to all the elements of the data array.
array references within the data will be treated as columns. this allows you to write 2D arrays of data in one go. for example:
@eec =  (
            ['maggie', 'milly', 'molly', 'may'  ],
            [13,       14,      15,      16     ],
            ['shell',  'star',  'crab',  'stone']
        );

$worksheet->write_row('A1', \@eec);
would produce a worksheet as follows:
            -----------------------------------------------------------
           |   |    A    |    B    |    C    |    D    |    E    | ...
            -----------------------------------------------------------
           | 1 | maggie  | 13      | shell   | ...     |  ...    | ...
           | 2 | milly   | 14      | star    | ...     |  ...    | ...
           | 3 | molly   | 15      | crab    | ...     |  ...    | ...
           | 4 | may     | 16      | stone   | ...     |  ...    | ...
           | 5 | ...     | ...     | ...     | ...     |  ...    | ...
           | 6 | ...     | ...     | ...     | ...     |  ...    | ...
to write the data in a row-column order refer to the write_col() method below.
any "undef" values in the data will be ignored unless a format is applied to the data, in which case a formatted blank cell will be written. in either case the appropriate row or column value will still be incremented.
to find out more about array references refer to "perlref" and "perlreftut" in the main Perl documentation. to find out more about 2D arrays or "lists of lists" refer to "perllol" 🌸
the write_row() method returns the first error encountered when writing the elements of the data or zero if no errors were encountered. see the return values described for the write() method above.
see also the "write_arrays.pl" program in the "examples" directory of the distro.
the write_row() method allows the following idiomatic conversion of a text file to an Excel file:
#!/usr/bin/perl -w

use strict;
use Spreadsheet::WriteExcel;
write_col($row, $column, $array_ref, $format)
Bestie, write_col() is your "dump a whole column at once" queen 👑 — it writes a 1D or 2D array of data in one go, which is literally the move when you're converting the results of a database query into an Excel worksheet. One thing tho: you gotta pass a reference to the array of data, not the array itself. Then write() gets called for each element of the data. Like:
@array      = ('awk', 'gawk', 'mawk');
$array_ref  = \@array;

$worksheet->write_col(0, 0, $array_ref);

# The above example is equivalent to:
$worksheet->write(0, 0, $array[0]);
$worksheet->write(1, 0, $array[1]);
$worksheet->write(2, 0, $array[2]);
Same deal as all the write methods: $format is optional. If you do specify a format, it gets applied to all the elements of the data array. Slay. ✨
Array references inside the data get treated as rows. Yes, that's how you write 2D arrays of data in one go:
@eec =  (
            ['maggie', 'milly', 'molly', 'may'  ],
            [13,       14,      15,      16     ],
            ['shell',  'star',  'crab',  'stone']
        );

$worksheet->write_col('A1', \@eec);
Would produce a worksheet as follows:
 -----------------------------------------------------------
|   |    A    |    B    |    C    |    D    |    E    | ...
 -----------------------------------------------------------
| 1 | maggie  | milly   | molly   | may     |  ...    | ...
| 2 | 13      | 14      | 15      | 16      |  ...    | ...
| 3 | shell   | star    | crab    | stone   |  ...    | ...
| 4 | ...     | ...     | ...     | ...     |  ...    | ...
| 5 | ...     | ...     | ...     | ...     |  ...    | ...
| 6 | ...     | ...     | ...     | ...     |  ...    | ...
If you want the data in a column-row order instead, go look at the write_row() method above. 🫶
Any "undef" values in the data are ignored — unless a format is applied to the data, in which case a formatted blank cell gets written. Either way, the appropriate row or column value still gets incremented. The more you know 💫
As noted above, write() can be used as a synonym for write_row(), and write_row() handles nested array refs as columns. So these two calls are equivalent, even though the more explicit write_col() is preferable for maintainability:
$worksheet->write_col('A1', $array_ref    ); # Write a column of data
$worksheet->write(    'A1', [ $array_ref ]); # Same thing
Want more on array references? Check "perlref" and "perlreftut" in the main Perl documentation. More on 2D arrays / "lists of lists"? That's "perllol". 📚
write_col() returns the first error encountered when writing the elements of the data, or zero if no errors happened. See the return values described for the write() method above.
Also peep the "write_arrays.pl" program in the "examples" directory of the distro.
write_date_time($row, $col, $date_string, $format)
write_date_time() writes a date or time to the cell specified by $row and $column, like so:
$worksheet->write_date_time('A1', '2004-05-13T23:20', $date_format);Your $date_string should be in this format:
yyyy-mm-ddThh:mm:ss.sssThis conforms to an ISO8601 date, but heads up: the full range of ISO8601 formats is not supported. 🙅♀️
These variations on the $date_string parameter are permitted:
yyyy-mm-ddThh:mm:ss.sss         # Standard format
yyyy-mm-ddT                     # No time
          Thh:mm:ss.sss         # No date
yyyy-mm-ddThh:mm:ss.sssZ        # Additional Z (but not time zones)
yyyy-mm-ddThh:mm:ss             # No fractional seconds
yyyy-mm-ddThh:mm                # No seconds
Note that the "T" is required in all cases. Every single one. No T, no date. 💀
A date should always have a $format, otherwise it will appear as a number — see "DATES AND TIME IN EXCEL" and "CELL FORMATTING". Don't let your date show up looking like a random integer, bestie, it's not the vibe.
Here's a typical example:
my $date_format = $workbook->add_format(num_format => 'mm/dd/yy');
$worksheet->write_date_time('A1', '2004-05-13T23:20', $date_format);
Valid dates live in the range 1900-01-01 to 9999-12-31 for the 1900 epoch, and 1904-01-01 to 9999-12-31 for the 1904 epoch. And just like Excel, dates outside these ranges get written as a string. 🌈
Also check the date_time.pl program in the "examples" directory of the distro.
write_url($row, $col, $url, $label, $format)
Write a hyperlink to a URL in the cell specified by $row and $column 🔗. A hyperlink is made of two elements: the visible label and the invisible link. The visible label is the same as the link unless you specify an alternative label. $label and $format are both optional, and their positions are interchangeable. 🎀
The label gets written using the write() method, which means you can write strings, numbers or formulas as labels. Iconic.
Four web style URI's are supported: "http://", "https://", "ftp://" and "mailto:":
$worksheet->write_url(0, 0,  'ftp://www.perl.org/'                  );
$worksheet->write_url(1, 0,  'http://www.perl.com/', 'Perl home'    );
$worksheet->write_url('A3',  'http://www.perl.com/', $format        );
$worksheet->write_url('A4',  'http://www.perl.com/', 'Perl', $format);
$worksheet->write_url('A5',  'mailto:jmcnamara@cpan.org'            );
Two local URIs are supported too: "internal:" and "external:". These are for hyperlinks to internal worksheet references or external workbook and worksheet references:
$worksheet->write_url('A6',  'internal:Sheet2!A1'                   );
$worksheet->write_url('A7',  'internal:Sheet2!A1',   $format        );
$worksheet->write_url('A8',  'internal:Sheet2!A1:B2'                );
$worksheet->write_url('A9',  q{internal:'Sales Data'!A1}            );
$worksheet->write_url('A10', 'external:c:\temp\foo.xls'             );
$worksheet->write_url('A11', 'external:c:\temp\foo.xls#Sheet2!A1'   );
$worksheet->write_url('A12', 'external:..\..\..\foo.xls'            );
$worksheet->write_url('A13', 'external:..\..\..\foo.xls#Sheet2!A1'  );
$worksheet->write_url('A13', 'external:\\\\NETWORK\share\foo.xls'   );
All of these URI types are recognised by the write() method, see above. 👆
Worksheet references are typically of the form "Sheet1!A1". You can also refer to a worksheet range using standard Excel notation: "Sheet1!A1:B2". 💅
In external links, the workbook and worksheet name must be separated by the "#" character: "external:Workbook.xls#Sheet1!A1'".
You can also link to a named range in the target worksheet. For example, say you have a named range called "my_name" in the workbook "c:\temp\foo.xls" — you could link to it like this:
$worksheet->write_url('A14', 'external:c:\temp\foo.xls#my_name');Note: you cannot currently create named ranges with "Spreadsheet::WriteExcel". Sad but true 😭
Excel requires that worksheet names containing spaces or non-alphanumeric characters are single quoted, like "'Sales Data'!A1". If you need to do this inside a single quoted string, you can either escape the single quotes "\'" or use the quote operator "q{}" as described in "perlop" in the main Perl documentation. 🧚
Links to network files are supported too. MS/Novell Network files normally begin with two backslashes like "\\NETWORK\etc". To generate this in a single or double quoted string you'll have to escape the backslashes: '\\\\NETWORK\etc'.
If you're using double quote strings, be careful to escape anything that looks like a metacharacter. More info in "perlfaq5: Why can't I use "C:\temp\foo" in DOS paths?". 🙈
Finally — you can dodge most of these quoting problems by using forward slashes. These get translated internally to backslashes:
$worksheet->write_url('A14', "external:c:/temp/foo.xls"             );
$worksheet->write_url('A15', 'external://NETWORK/share/foo.xls'     );
See also the note about "Cell notation". 🦋
write_url_range($row1, $col1, $row2, $col2, $url, $string, $format)
This one is basically the same as write_url() above — the main difference is you can specify a link for a range of cells:
$worksheet->write_url(0, 0, 0, 3, 'ftp://www.perl.org/'              );
$worksheet->write_url(1, 0, 0, 3, 'http://www.perl.com/', 'Perl home');
$worksheet->write_url('A3:D3',    'internal:Sheet2!A1'               );
$worksheet->write_url('A4:D4',    'external:c:\temp\foo.xls'         );
This method is generally only required when used together with merged cells — see the merge_range() method and the "merge" property of a Format object, "CELL FORMATTING". 💖
There is no way to force this behaviour through the write() method. Nope. Not happening.
$string and $format are optional and their position is interchangeable. However — important — they are applied only to the first cell in the range. 👑
See also the note about "Cell notation".
write_formula($row, $column, $formula, $format, $value)
Write a formula or function to the cell specified by $row and $column 🧮✨:
$worksheet->write_formula(0, 0, '=$B$3 + B4'  );
$worksheet->write_formula(1, 0, '=SIN(PI()/4)');
$worksheet->write_formula(2, 0, '=SUM(B1:B5)' );
$worksheet->write_formula('A4', '=IF(A3>1,"Yes", "No")'   );
$worksheet->write_formula('A5', '=AVERAGE(1, 2, 3, 4)'    );
$worksheet->write_formula('A6', '=DATEVALUE("1-Jan-2001")');
See the note about "Cell notation". For more on writing Excel formulas, peep "FORMULAS AND FUNCTIONS IN EXCEL". 📖
Also see the section "Improving performance when working with formulas" and the store_formula() and repeat_formula() methods.
If you need it, you can also specify the calculated value of the formula. This is occasionally necessary when you're working with non-Excel applications that don't calculate the value of the formula. The calculated $value goes at the end of the argument list:
$worksheet->write('A1', '=2+2', $format, 4);However, this probably isn't something you'll ever need to do. And if you do use this feature, do so with care. ⚠️
store_formula($formula)
The store_formula() method is used together with repeat_formula() to speed up generating repeated formulas. Go read "Improving performance when working with formulas" in "FORMULAS AND FUNCTIONS IN EXCEL" for the full tea. 🍓
The store_formula() method pre-parses a textual representation of a formula and stashes it away so repeat_formula() can use it later ✨
Fair warning bestie: store_formula() carries the exact same speed penalty as write_formula(). The upside? In practice you'll be reaching for it way less often, so it's lowkey fine 💅
The return value of this method is a scalar that you can kinda think of as a reference-to-a-formula:
my $sin = $worksheet->store_formula('=SIN(A1)');
my $cos = $worksheet->store_formula('=COS(A1)');

$worksheet->repeat_formula('B1', $sin, $format, 'A1', 'A2');
$worksheet->repeat_formula('C1', $cos, $format, 'A1', 'A2');
And here's the iconic part — even though store_formula() is a worksheet method, the return value is portable and can be used in any worksheet 🦋
my $now = $worksheet->store_formula('=NOW()');

$worksheet1->repeat_formula('B1', $now);
$worksheet2->repeat_formula('B1', $now);
$worksheet3->repeat_formula('B1', $now);
repeat_formula($row, $col, $formula, $format, ($pattern => $replace, ...))
Okay so repeat_formula() is the bestie of store_formula() — they're a package deal that speeds up generating repeated formulas 🔥 (peep "Improving performance when working with formulas" in "FORMULAS AND FUNCTIONS IN EXCEL").
In lots of ways repeat_formula() behaves just like write_formula() — except it's significantly faster, which is the whole point, no cap.
What it does: it creates a brand-new formula based on the pre-parsed tokens that store_formula() handed back. The new formula gets generated by substituting $pattern, $replace pairs into the stored formula:
my $formula = $worksheet->store_formula('=A1 * 3 + 50');

for my $row (0..99) {
    $worksheet->repeat_formula($row, 1, $formula, $format, 'A1', 'A'.($row +1));
}
Big thing to note: repeat_formula() does not modify the tokens. In the example above, the substitution is always made against the original token, "A1", which never ever changes. Periodt 🌸
As usual, you can throw in "undef" if you don't feel like specifying a $format:
$worksheet->repeat_formula('B2', $formula, $format, 'A1', 'A2');
$worksheet->repeat_formula('B3', $formula, undef,   'A1', 'A3');
The substitutions go down from left to right, and you can use as many $pattern, $replace pairs as you need. But — and this is important — each substitution is only made once:
my $formula = $worksheet->store_formula('=A1 + A1');

# Gives '=B1 + A1'
$worksheet->repeat_formula('B1', $formula, undef, 'A1', 'B1');

# Gives '=B1 + B1'
$worksheet->repeat_formula('B2', $formula, undef, ('A1', 'B1') x 2);
Since $pattern gets interpolated every single time it's used, it's genuinely worth using the "qr" operator to quote the pattern 🎀 (the "qr" operator is explained over in the "perlop" man page, iykyk):
$worksheet->repeat_formula('B1', $formula, $format, qr/A1/, 'A2');⚠️ Okay now pay attention, because this is where people get got. Care should be taken with the values that are substituted. The formula returned byrepeat_formula()contains several other tokens in addition to the ones in your formula — and those might also match the pattern you're trying to replace. In particular you should avoid substituting a single0,1,2or3. 💀
You should also be careful to dodge false matches. Like, check this snippet — it's meant to change the stored formula in steps from "=A1 + SIN(A1)" to "=A10 + SIN(A10)":
my $formula = $worksheet->store_formula('=A1 + SIN(A1)');

for my $row (1 .. 10) {
    $worksheet->repeat_formula($row -1, 1, $formula, undef,
                                qw/A1/, 'A' . $row,   #! Bad.
                                qw/A1/, 'A' . $row    #! Bad.
                              );
}
But uh… it contains a bug 😭 In the last iteration of the loop, when $row is 10, these substitutions happen:
s/A1/A10/;    changes    =A1 + SIN(A1)     to    =A10 + SIN(A1)
s/A1/A10/;    changes    =A10 + SIN(A1)    to    =A100 + SIN(A1) # !!
The glow-up solution here is to use a more explicit match, something like "qw/^A1$/":
$worksheet->repeat_formula($row -1, 1, $formula, undef,
                            qw/^A1$/, 'A' . $row,
                            qw/^A1$/, 'A' . $row
                          );
Another very similar problem pops up because substitutions are made in order. For example, this snippet is supposed to change the stored formula from "=A10 + A11" to "=A11 + A12":
my $formula = $worksheet->store_formula('=A10 + A11');

$worksheet->repeat_formula('A1', $formula, undef,
                            qw/A10/, 'A11',   #! Bad.
                            qw/A11/, 'A12'    #! Bad.
                          );
But the actual substitution yields "=A12 + A11" instead 🫠:
s/A10/A11/;    changes    =A10 + A11    to    =A11 + A11
s/A11/A12/;    changes    =A11 + A11    to    =A12 + A11 # !!
The fix here would be to reverse the order of the substitutions, or to start from a stored formula that won't produce a false match — something like "=X10 + Y11":
my $formula = $worksheet->store_formula('=X10 + Y11');

$worksheet->repeat_formula('A1', $formula, undef,
                            qw/X10/, 'A11',
                            qw/Y11/, 'A12'
                          );
If you're sitting there thinking "hmm, do I have a false-match problem??" — you can literally just check the tokens you're substituting against, like this:
my $formula = $worksheet->store_formula('=A1*5+4');
print "@$formula\n";
Also go look at the "repeat.pl" program in the "examples" directory of the distro 👑 (it's right there, bestie).
write_comment($row, $column, $string, ...)
The write_comment() method is how you add a comment to a cell 💬 A cell comment shows up in Excel as a lil red triangle in the upper right-hand corner of the cell. Hover the cursor over that red triangle and boom — the comment reveals itself ✨
Here's how you add a comment to a cell:
$worksheet->write        (2, 2, 'Hello');
$worksheet->write_comment(2, 2, 'This is a comment.');
And as usual, you can swap the $row and $column parameters for an "A1" cell reference 🎀 (see the note about "Cell notation"):
$worksheet->write        ('C3', 'Hello');
$worksheet->write_comment('C3', 'This is a comment.');
On systems with "perl 5.8" and later, write_comment() will also handle strings in "UTF-8" format 🦋
$worksheet->write_comment('C3', "\x{263a}");       # Smiley
$worksheet->write_comment('C4', 'Comment ca va?');
Beyond the basic 3-argument form of write_comment(), you can pass in a bunch of optional key/value pairs to control the format of the comment. Like so:
$worksheet->write_comment('C3', 'Hello', visible => 1, author => 'Perl');Most of these options are pretty niche, and honestly the default comment behaviour is usually all you need, fr fr. But — should you need greater control over the format of the cell comment, these are the options on the menu 🍓:
encodingauthorauthor_encodingvisiblex_scalewidthy_scaleheightcolorstart_cellstart_rowstart_colx_offsety_offset
Option: encoding
This one's used to indicate that the comment string is encoded as "UTF-16BE" ✨
my $comment = pack 'n', 0x263a; # UTF-16BE Smiley symbol

$worksheet->write_comment('C3', $comment, encoding => 1);
If you wanna use Unicode characters in the comment string, the preferred method is to use perl 5.8 and "UTF-8" strings — see "UNICODE IN EXCEL" 💜
Option: author
This one's used to indicate who the author of the comment is. Excel displays the comment's author in the status bar at the bottom of the worksheet 👑 This is usually a big deal in corporate environments where several people might review and provide comments on a workbook.
$worksheet->write_comment('C3', 'Atonement', author => 'Ian McEwan');Option: author_encoding
This one's used to indicate that the author string is encoded as "UTF-16BE".
Option: visible
This one's used to make a cell comment visible when the worksheet is opened 👀 The default behaviour in Excel is that comments start out hidden. That said, it's also possible in Excel to make individual comments — or all of them — visible. In Spreadsheet::WriteExcel, individual comments can be made visible like this:
$worksheet->write_comment('C3', 'Hello', visible => 1);You can make all comments in a worksheet visible using the show_comments() worksheet method (see below 👇). Alternatively, if all the cell comments have already been made visible, you can hide individual comments instead:
$worksheet->write_comment('C3', 'Hello', visible => 0);Option: x_scale
This one's used to set the width of the cell comment box as a factor of the default width 💅
$worksheet->write_comment('C3', 'Hello', x_scale => 2);
$worksheet->write_comment('C4', 'Hello', x_scale => 4.2);
Option: width
This one's used to set the width of the cell comment box explicitly, in pixels 📏
$worksheet->write_comment('C3', 'Hello', width => 200);Option: y_scale
This one's used to set the height of the cell comment box as a factor of the default height 🦋
$worksheet->write_comment('C3', 'Hello', y_scale => 2);
$worksheet->write_comment('C4', 'Hello', y_scale => 4.2);
Option: height
This one's used to set the height of the cell comment box explicitly, in pixels 📐
$worksheet->write_comment('C3', 'Hello', height => 200);Option: color
This one's used to set the background colour of the cell comment box 🎨 You can use one of the named colours recognised by Spreadsheet::WriteExcel, or a colour index. See "COLOURS IN EXCEL".
$worksheet->write_comment('C3', 'Hello', color => 'green');
$worksheet->write_comment('C4', 'Hello', color => 0x35);    # Orange
Option: start_cell
This one's used to set the cell in which the comment will appear 📍 By default Excel displays comments one cell to the right and one cell above the cell the comment relates to. But you can change that behaviour if you want. In this next example, the comment that would show up by default in cell "D2" gets moved to "E2":
$worksheet->write_comment('C3', 'Hello', start_cell => 'E2');Option: start_row
This one's used to set the row in which the comment will appear. See the "start_cell" option above 👆 The row is zero indexed.
$worksheet->write_comment('C3', 'Hello', start_row => 0);Option: start_col
bestie this one's literally just "which column does the comment live in." same deal as start_cell up there ☝️ and yeah, the column is zero indexed, don't come for me, that's just how it is.
$worksheet->write_comment('C3', 'Hello', start_col => 4);Option: x_offset
okay so this nudges the comment sideways — in pixels — inside its cell 💅
$worksheet->write_comment('C3', $comment, x_offset => 30);Option: y_offset
and this one nudges it up/down, again in pixels, inside the cell 🌸
$worksheet->write_comment('C3', $comment, x_offset => 30);You can stack as many of these options as you need, no cap. go off.
See also ROW HEIGHTS AND WORKSHEET OBJECTS, iykyk.
show_comments()
this is the "make every comment visible the second the worksheet opens" button 👀✨
But like, you can also do it per-comment with the visible parameter on the write_comment method (scroll up, bestie):
$worksheet->write_comment('C3', 'Hello', visible => 1);And if you already made all of them visible and now you're like "hmm, not that one," you hide individual ones like this:
$worksheet->write_comment('C3', 'Hello', visible => 0);iconic behaviour tbh 🎀
add_write_handler($re, $code_ref)
okay this one is kind of the main character of the section 👑 it lets you extend the write() method from Spreadsheet::WriteExcel so it handles your data, your rules, your vibes.
So if you peek at the write() section above, you'll see it's basically an alias for a bunch of more specific write_* methods. But sometimes it just... doesn't do the thing you want 😭
One fix: filter your input yourself and call the right write_* method directly. The other fix, and the cute one, is add_write_handler() — you bolt your own automated behaviour onto write().
It takes two arguments: $re, a regular expression that matches incoming data, and $code_ref, a callback function that handles the matched data:
$worksheet->add_write_handler(qr/^\d\d\d\d$/, \&my_write);(fr fr, in these examples the qr operator is what quotes the regex strings — peep perlop if you want the deep lore)
So here's how you'd actually use it. Say you want to write 7-digit ID numbers as strings so the leading zeros survive*, you'd do something like:
$worksheet->add_write_handler(qr/^\d{7}$/, \&write_my_id);

sub write_my_id {
    my $worksheet = shift;
    return $worksheet->write_string(@_);
}
* lowkey you could also just use the keep_leading_zeros() method for this, but where's the fun in that 💀
Then when you call write() with a string that matches, it gets handled automatically, no extra steps:
# Writes 0000000. It would normally be written as a number; 0.
$worksheet->write('A1', '0000000');
Your callback gets a reference to the calling worksheet plus all the other args that were passed to write(). The @_ list it sees looks exactly like this:
$_[0]   A ref to the calling worksheet. *
$_[1]   Zero based row number.
$_[2]   Zero based column number.
$_[3]   A number or string or token.
$_[4]   A format ref if any.
$_[5]   Any other arguments.
...

*  It is good style to shift this off the list so the @_ is the same
   as the argument list seen by write().
Your callback should return() whatever the write_* method it called returned, or return undef to say "nope, rejected, write() you can go back to doing your normal thing." 🫶
So like, if you only wanted that filter to hit ID values in the first column, you'd tweak your callback like:
sub write_my_id {
    my $worksheet = shift;
    my $col       = $_[1];

    if ($col == 0) {
        return $worksheet->write_string(@_);
    }
    else {
        # Reject the match and return control to write()
        return undef;
    }
}
and now column A and every other column are living completely different lives:
$worksheet->write('A1', '0000000'); # Writes 0000000
$worksheet->write('B1', '0000000'); # Writes 0
You can add more than one handler, and they get called in the order you added them. no queue-jumping 🙈
Also, ngl, add_write_handler() is especially good at handling dates. obsessed.
See the write_handler 1-4 programs in the examples directory for more examples, go look, they're right there ✨
insert_image($row, $col, $filename, $x, $y, $scale_x, $scale_y)
drop an image straight into your worksheet, bestie 🖼️ it can be PNG, JPEG or BMP format. and the $x, $y, $scale_x and $scale_y parameters are all optional, so you can absolutely just vibe with the basics:
$worksheet1->insert_image('A1', 'perl.bmp');
$worksheet2->insert_image('A1', '../images/perl.bmp');
$worksheet3->insert_image('A1', '.c:\images\perl.bmp');
$x and $y let you offset from the top left corner of the cell you named in $row and $col. the offsets are in pixels:
$worksheet1->insert_image('A1', 'perl.bmp', 32, 10);for reference: default cell width is 63 pixels, default cell height is 17 pixels. and you can work the pixel offsets out with these relationships:
Wp = int(12We)   if We <  1
Wp = int(7We +5) if We >= 1
Hp = int(4/3He)

where:
We is the cell width in Excels units
Wp is width in pixels
He is the cell height in Excels units
Hp is height in pixels
your offsets can totally be bigger than the width or height of the cell underneath — which is occasionally super useful if you want to line up two or more images relative to the same cell. slay ✨
and $scale_x and $scale_y scale the inserted image horizontally and vertically:
# Scale the inserted image: width x 2.0, height x 0.8
$worksheet->insert_image('A1', 'perl.bmp', 0, 0, 2, 0.8);
See also the images.pl program in the examples directory of the distro 💖
heads up: BMP images must be 24 bit, true colour, bitmaps. and honestly? just avoid BMPs in general, they aren't compressed. The older insert_bitmap() method is still supported but it's deprecated, so maybe don't start anything with it 💀
See also ROW HEIGHTS AND WORKSHEET OBJECTS.
insert_chart($row, $col, $chart, $x, $y, $scale_x, $scale_y)
okay so you can also shove a whole Chart object into a worksheet 🎀 but plot twist: the Chart has to be created by the add_chart() Workbook method and it must have the embedded option set. no shortcuts.
my $chart = $workbook->add_chart( type => 'line', embedded => 1 );

# Configure the chart.
...

# Insert the chart into the a worksheet.
$worksheet->insert_chart('E2', $chart);
See add_chart() for the deets on making the Chart object, and Spreadsheet::WriteExcel::Chart for how to configure it. also peep the chart_*.pl programs in the examples directory of the distro 👑
The $x, $y, $scale_x and $scale_y parameters are optional.
$x and $y offset from the top left corner of the cell given by $row and $col, in pixels. see the insert_image method above for the whole sizes situation:
$worksheet1->insert_chart('E2', $chart, 3, 3);and $scale_x and $scale_y scale the inserted chart horizontally and vertically:
# Scale the width by 120% and the height by 150%
$worksheet->insert_chart('E2', $chart, 0, 0, 1.2, 1.5);
🧚 pro move for working out the scaling you need: make a test chart worksheet with Spreadsheet::WriteExcel, open the file, select the chart and drag the corner until it's the size you want. while you're holding the mouse down, the scale of the resized chart shows up to the left of the formula bar. literally free real estate.
See also ROW HEIGHTS AND WORKSHEET OBJECTS.
embed_chart($row, $col, $filename, $x, $y, $scale_x, $scale_y)
this one inserts an externally generated chart into a worksheet 🌀 the chart has to be extracted from an existing Excel file first. fair warning: this feature is semi-deprecated in favour of the "native" charts you make with add_chart(). read external_charts.txt (or .pod) in the external_charts directory of the distro for the full explanation, no gatekeeping.
example time:
$worksheet->embed_chart('B2', 'sales_chart.bin');$x, $y, $scale_x and $scale_y are optional — see insert_chart() above for the details 💜
data_validation()
this one builds an Excel data validation, or limits what the user can type to a dropdown list of values. very "you shall not pass" of it 🔥
$worksheet->data_validation('B3',
    {
        validate => 'integer',
        criteria => '>',
        value    => 100,
    });

$worksheet->data_validation('B5:B9',
    {
        validate => 'list',
        value    => ['open', 'high', 'close'],
    });
this method has a lot of parameters, so it gets its own whole section: DATA VALIDATION IN EXCEL. go read it, it's worth it 💅
See also the data_validate.pl program in the examples directory of the distro 🌸
get_name()
grabs the name of a worksheet. simple, clean, does what it says 🎀
foreach my $sheet ($workbook->sheets()) {
    print $sheet->get_name();
}
and just so you know: there is no set_name() method. like, at all. reasons related to the design of Spreadsheet::WriteExcel and to the internals of Excel. 😭 the only way to set a worksheet name is via the add_worksheet() method. that's it, that's the rule.
activate()
picks which worksheet is initially visible in a multi-sheet workbook 👑
$worksheet1 = $workbook->add_worksheet('To');
$worksheet2 = $workbook->add_worksheet('the');
$worksheet3 = $workbook->add_worksheet('wind');

$worksheet3->activate();
kinda like the Excel VBA activate method, if you're into that. you can have more than one worksheet selected via the select() method (right below 👇), but only one worksheet can be active. the default active worksheet is the first worksheet.
select()
marks a worksheet as selected in a multi-sheet workbook ✨
$worksheet1->activate();
$worksheet2->select();
$worksheet3->select();
a selected worksheet gets its tab highlighted. selecting worksheets is basically grouping them together, so for example several worksheets could be printed in one go. and any worksheet that's been activated via activate() also shows up as selected. two birds 🦋
hide()
hides a worksheet entirely 🙈
$worksheet2->hide();you'd wanna hide a worksheet so you don't confuse a user with intermediate data or calculations. protect their peace, bestie 💖
So about hidden worksheets — a hidden worksheet can not be activated or selected, which means this method is mutually exclusive with the activate() and select() methods. Also, since the first worksheet defaults to being the active worksheet, you literally cannot hide the first worksheet without activating another sheet first:
$worksheet2->activate();
$worksheet1->hide();
✨ set_first_sheet() ✨
The activate() method decides which worksheet is initially selected. But bestie, if there are a lot of worksheets, the selected worksheet may not appear on the screen. To avoid that whole situation, you can pick which worksheet is the leftmost visible one using set_first_sheet():
for (1..20) {
    $workbook->add_worksheet;
}

$worksheet21 = $workbook->add_worksheet();
$worksheet22 = $workbook->add_worksheet();

$worksheet21->set_first_sheet();
$worksheet22->activate();
This method is not required very often. The default value is the first worksheet.
🛡️ protect($password) 🛡️
The protect() method is used to protect a worksheet from modification:
$worksheet->protect();It can be turned off in Excel via the Tools->Protection->Unprotect Sheet menu command.
The protect() method also has the effect of enabling a cell's "locked" and "hidden" properties if they have been set. A "locked" cell cannot be edited. A "hidden" cell will display the results of a formula but not the formula itself. In Excel a cell's locked property is on by default.
# Set some format properties
my $unlocked  = $workbook->add_format(locked => 0);
my $hidden    = $workbook->add_format(hidden => 1);

# Enable worksheet protection
$worksheet->protect();

# This cell cannot be edited, it is locked by default
$worksheet->write('A1', '=1+2');

# This cell can be edited
$worksheet->write('A2', '=1+2', $unlocked);

# The formula in this cell isn't visible
$worksheet->write('A3', '=1+2', $hidden);
See also the set_locked and set_hidden format methods in "CELL FORMATTING".
You can optionally add a password to the worksheet protection:
$worksheet->protect('drowssap');⚠️ Note, the worksheet level password in Excel provides very weak protection. It does not encrypt your data in any way and it is very easy to deactivate. Therefore, do not use the above method if you wish to protect sensitive data or calculations. However, before you get worried, Excel's own workbook level password protection does provide strong encryption in Excel 97+. For technical reasons this will never be supported by Spreadsheet::WriteExcel.
🎯 set_selection($first_row, $first_col, $last_row, $last_col) 🎯
This method can be used to specify which cell or cells are selected in a worksheet. The most common requirement is to select a single cell, in which case $last_row and $last_col can be omitted. The active cell within a selected range is determined by the order in which $first and $last are specified. It is also possible to specify a cell or a range using A1 notation. See the note about "Cell notation".
Examples:
$worksheet1->set_selection(3, 3);       # 1. Cell D4.
$worksheet2->set_selection(3, 3, 6, 6); # 2. Cells D4 to G7.
$worksheet3->set_selection(6, 6, 3, 3); # 3. Cells G7 to D4.
$worksheet4->set_selection('D4');       # Same as 1.
$worksheet5->set_selection('D4:G7');    # Same as 2.
$worksheet6->set_selection('G7:D4');    # Same as 3.
The default cell selections is (0, 0), 'A1'.
📏 set_row($row, $height, $format, $hidden, $level, $collapsed) 📏
This method can be used to change the default properties of a row. All parameters apart from $row are optional.
The most common use for this method is to change the height of a row:
$worksheet->set_row(0, 20); # Row 1 height set to 20If you wish to set the format without changing the height you can pass undef as the height parameter:
$worksheet->set_row(0, undef, $format);The $format parameter will be applied to any cells in the row that don't have a format. For example
$worksheet->set_row(0, undef, $format1);    # Set the format for row 1
$worksheet->write('A1', 'Hello');           # Defaults to $format1
$worksheet->write('B1', 'Hello', $format2); # Keeps $format2
If you wish to define a row format in this way you should call the method before any calls to write(). Calling it afterwards will overwrite any format that was previously specified.
The $hidden parameter should be set to 1 if you wish to hide a row. This can be used, for example, to hide intermediary steps in a complicated calculation:
$worksheet->set_row(0, 20,    $format, 1);
$worksheet->set_row(1, undef, undef,   1);
The $level parameter is used to set the outline level of the row. Outlines are described in "OUTLINES AND GROUPING IN EXCEL". Adjacent rows with the same outline level are grouped together into a single outline.
The following example sets an outline level of 1 for rows 1 and 2 (zero-indexed):
$worksheet->set_row(1, undef, undef, 0, 1);
$worksheet->set_row(2, undef, undef, 0, 1);
The $hidden parameter can also be used to hide collapsed outlined rows when used in conjunction with the $level parameter.
$worksheet->set_row(1, undef, undef, 1, 1);
$worksheet->set_row(2, undef, undef, 1, 1);
For collapsed outlines you should also indicate which row has the collapsed + symbol using the optional $collapsed parameter.
$worksheet->set_row(3, undef, undef, 0, 0, 1);For a more complete example see the outline.pl and outline_collapsed.pl programs in the examples directory of the distro.
Excel allows up to 7 outline levels. Therefore the $level parameter should be in the range 0 <= $level <= 7.
📐 set_column($first_col, $last_col, $width, $format, $hidden, $level, $collapsed) 📐
This method can be used to change the default properties of a single column or a range of columns. All parameters apart from $first_col and $last_col are optional.
If set_column() is applied to a single column the value of $first_col and $last_col should be the same. In the case where $last_col is zero it is set to the same value as $first_col.
It is also possible, and generally clearer, to specify a column range using the form of A1 notation used for columns. See the note about "Cell notation".
Examples:
$worksheet->set_column(0, 0,  20); # Column  A   width set to 20
$worksheet->set_column(1, 3,  30); # Columns B-D width set to 30
$worksheet->set_column('E:E', 20); # Column  E   width set to 20
$worksheet->set_column('F:H', 30); # Columns F-H width set to 30
The width corresponds to the column width value that is specified in Excel. It is approximately equal to the length of a string in the default font of Arial 10. Unfortunately, there is no way to specify "AutoFit" for a column in the Excel file format. This feature is only available at runtime from within Excel.
As usual the $format parameter is optional, for additional information, see "CELL FORMATTING". If you wish to set the format without changing the width you can pass undef as the width parameter:
$worksheet->set_column(0, 0, undef, $format);The $format parameter will be applied to any cells in the column that don't have a format. For example
$worksheet->set_column('A:A', undef, $format1); # Set format for col 1
$worksheet->write('A1', 'Hello');               # Defaults to $format1
$worksheet->write('A2', 'Hello', $format2);     # Keeps $format2
If you wish to define a column format in this way you should call the method before any calls to write(). If you call it afterwards it won't have any effect.
A default row format takes precedence over a default column format
$worksheet->set_row(0, undef,        $format1); # Set format for row 1
$worksheet->set_column('A:A', undef, $format2); # Set format for col 1
$worksheet->write('A1', 'Hello');               # Defaults to $format1
$worksheet->write('A2', 'Hello');               # Defaults to $format2
The $hidden parameter should be set to 1 if you wish to hide a column. This can be used, for example, to hide intermediary steps in a complicated calculation:
$worksheet->set_column('D:D', 20,    $format, 1);
$worksheet->set_column('E:E', undef, undef,   1);
The $level parameter is used to set the outline level of the column. Outlines are described in "OUTLINES AND GROUPING IN EXCEL". Adjacent columns with the same outline level are grouped together into a single outline.
The following example sets an outline level of 1 for columns B to G:
$worksheet->set_column('B:G', undef, undef, 0, 1);The $hidden parameter can also be used to hide collapsed outlined columns when used in conjunction with the $level parameter.
$worksheet->set_column('B:G', undef, undef, 1, 1);For collapsed outlines you should also indicate which row has the collapsed + symbol using the optional $collapsed parameter.
$worksheet->set_column('H:H', undef, undef, 0, 0, 1);For a more complete example see the outline.pl and outline_collapsed.pl programs in the examples directory of the distro.
Excel allows up to 7 outline levels. Therefore the $level parameter should be in the range 0 <= $level <= 7.
🌸 outline_settings($visible, $symbols_below, $symbols_right, $auto_style) 🌸
The outline_settings() method is used to control the appearance of outlines in Excel. Outlines are described in "OUTLINES AND GROUPING IN EXCEL".
The $visible parameter is used to control whether or not outlines are visible. Setting this parameter to 0 will cause all outlines on the worksheet to be hidden. They can be unhidden in Excel by means of the "Show Outline Symbols" command button. The default setting is 1 for visible outlines.
$worksheet->outline_settings(0);The $symbols_below parameter is used to control whether the row outline symbol will appear above or below the outline level bar. The default setting is 1 for symbols to appear below the outline level bar.
The "symbols_right" parameter is used to control whether the column outline symbol will appear to the left or the right of the outline level bar. The default setting is 1 for symbols to appear to the right of the outline level bar.
The $auto_style parameter is used to control whether the automatic outline generator in Excel uses automatic styles when creating an outline. This has no effect on a file generated by Spreadsheet::WriteExcel but it does have an effect on how the worksheet behaves after it is created. The default setting is 0 for "Automatic Styles" to be turned off.
The default settings for all of these parameters correspond to Excel's default parameters.
Okay so the worksheet params controlled by outline_settings()? They’re rarely used, bestie. 💅
freeze_panes($row, $col, $top_row, $left_col) 🧊
This method divides a worksheet into horizontal or vertical regions called panes and then “freezes” those panes so the splitter bars are not visible. It’s literally the same as the Window->Freeze Panes menu command in Excel. ✨
The parameters $row and $col specify the location of the split. Important vibe check: the split is specified at the top or left of a cell, and this method uses zero based indexing. So to freeze the first row of a worksheet, you specify the split at row 2 — which is 1 as the zero-based index. This might make you think you’re using a 1 based index, but it is not the case. 😭
You can set one of the $row and $col parameters as zero if you do not want either a vertical or horizontal split.
Examples:
$worksheet->freeze_panes(1, 0); # Freeze the first row
$worksheet->freeze_panes('A2'); # Same using A1 notation
$worksheet->freeze_panes(0, 1); # Freeze the first column
$worksheet->freeze_panes('B1'); # Same using A1 notation
$worksheet->freeze_panes(1, 2); # Freeze first row and first 2 columns
$worksheet->freeze_panes('C2'); # Same using A1 notation
The parameters $top_row and $left_col are optional. They specify the top-most or left-most visible row or column in the scrolling region of the panes. For example, to freeze the first row and have the scrolling region begin at row twenty:
$worksheet->freeze_panes(1, 0, 20, 0);You cannot use A1 notation for the $top_row and $left_col parameters.
See also the "panes.pl" program in the "examples" directory of the distribution. 🦋
split_panes($y, $x, $top_row, $left_col) 🌸
This method divides a worksheet into horizontal or vertical regions known as panes. It’s different from freeze_panes() because the splits between the panes are visible to the user, and each pane gets its own scroll bars. Main character energy for panes, honestly. 👑
The parameters $y and $x specify the vertical and horizontal position of the split. The units for $y and $x are the same as those used by Excel to specify row height and column width. But — plot twist — the vertical and horizontal units are different from each other. So you must specify the $y and $x parameters in terms of the row heights and column widths that you have set, or the default values, which are 12.75 for a row and 8.43 for a column. 💀
You can set one of the $y and $x parameters as zero if you do not want either a vertical or horizontal split. The parameters $top_row and $left_col are optional. They specify the top-most or left-most visible row or column in the bottom-right pane.
Example:
$worksheet->split_panes(12.75, 0,    1, 0); # First row
$worksheet->split_panes(0,     8.43, 0, 1); # First column
$worksheet->split_panes(12.75, 8.43, 1, 1); # First row and column
You cannot use A1 notation with this method.
See also the freeze_panes() method and the "panes.pl" program in the "examples" directory of the distribution.
Note: Thissplit_panes()method was calledthaw_panes()in older versions. The older name is still available for backwards compatibility. 🫶
merge_range($first_row, $first_col, $last_row, $last_col, $token, $format, $utf_16_be) 💖
Merging cells can be achieved by setting the "merge" property of a Format object, see "CELL FORMATTING". But that only allows simple Excel5 style horizontal merging, which Excel refers to as "center across selection".
The merge_range() method lets you do Excel97+ style formatting where the cells can contain other types of alignment in addition to the merging:
my $format = $workbook->add_format(
                                    border  => 6,
                                    valign  => 'vcenter',
                                    align   => 'center',
                                  );

$worksheet->merge_range('B3:D4', 'Vertical and horizontal', $format);
WARNING. The format object used with a merge_range() method call is marked internally as being associated with a merged range. It is a fatal error to use a merged format in a non-merged cell. Instead you should use separate formats for merged and non-merged cells. This restriction will be removed in a future release. 😭
The $utf_16_be parameter is optional, see below.
merge_range() writes its $token argument using the worksheet write() method. Therefore it will handle numbers, strings, formulas or urls as required.
Setting the "merge" property of the format isn’t required when you are using merge_range(). In fact, using it will exclude the use of any other horizontal alignment option.
On systems with "perl 5.8" and later, the merge_range() method will also handle strings in "UTF-8" format.
$worksheet->merge_range('B3:D4', "\x{263a}", $format); # SmileyOn earlier Perl systems you can specify "UTF-16BE" worksheet names using an additional optional parameter:
my $str = pack 'n', 0x263a;
$worksheet->merge_range('B3:D4', $str, $format, 1); # Smiley
The full possibilities of this method are shown in the "merge3.pl" to "merge6.pl" programs in the "examples" directory of the distribution. 🌈
set_zoom($scale) 🔍
Set the worksheet zoom factor in the range 10 <= $scale <= 400:
$worksheet1->set_zoom(50);
$worksheet2->set_zoom(75);
$worksheet3->set_zoom(300);
$worksheet4->set_zoom(400);
The default zoom factor is 100. You cannot zoom to "Selection" because it is calculated by Excel at run-time.
Note,set_zoom()does not affect the scale of the printed page. For that you should useset_print_scale(). 🎀
right_to_left() 🪞
The right_to_left() method changes the default direction of the worksheet from left-to-right, with the A1 cell in the top left, to right-to-left, with the A1 cell in the top right.
$worksheet->right_to_left();This is useful when creating Arabic, Hebrew or other near or far eastern worksheets that use right-to-left as the default direction. 💜
hide_zero() 🙈
The hide_zero() method hides any zero values that appear in cells.
$worksheet->hide_zero();In Excel this option is found under Tools->Options->View.
set_tab_color() 🎨
The set_tab_color() method changes the colour of the worksheet tab. This feature is only available in Excel 2002 and later. You can use one of the standard colour names provided by the Format object or a colour index. See "COLOURS IN EXCEL" and the set_custom_color() method.
$worksheet1->set_tab_color('red');
$worksheet2->set_tab_color(0x0C);
See the "tab_colors.pl" program in the examples directory of the distro. ✨
autofilter($first_row, $first_col, $last_row, $last_col) 🧚
This method adds an autofilter to a worksheet. An autofilter is a way of adding drop down lists to the headers of a 2D range of worksheet data. That lets users filter the data based on simple criteria so that some data is shown and some is hidden. Slay for spreadsheet organization. 💅
To add an autofilter to a worksheet:
$worksheet->autofilter(0, 0, 10, 3);
$worksheet->autofilter('A1:D11');    # Same as above in A1 notation.
Filter conditions can be applied using the filter_column() method.
See the "autofilter.pl" program in the examples directory of the distro for a more detailed example. 🦋
filter_column($column, $expression) 🍓
The "filter_column" method filters columns in an autofilter range based on simple conditions.
NOTE: It isn’t sufficient to just specify the filter condition. You must also hide any rows that don’t match the filter condition. Rows are hidden using theset_row()"visible"parameter."Spreadsheet::WriteExcel"cannot do this automatically since it isn’t part of the file format. See the"autofilter.pl"program in the examples directory of the distro for an example. 😭
The conditions for the filter are specified using simple expressions:
$worksheet->filter_column('A', 'x > 2000');
$worksheet->filter_column('B', 'x > 2000 and x < 5000');
The $column parameter can either be a zero indexed column number or a string column name.
The following operators are available:
==— synonyms:=,eq,=~!=— synonyms:<>,ne,!=><>=<=and— synonym:&&or— synonym:||
The operator synonyms are just syntactic sugar to make you more comfortable using the expressions. It is important to remember that the expressions will be interpreted by Excel and not by perl. 👑
An expression can comprise a single statement or two statements separated by the "and" and "or" operators. For example:
'x <  2000'
'x >  2000'
'x == 2000'
'x >  2000 and x <  5000'
'x == 2000 or  x == 5000'
Filtering of blank or non-blank data can be achieved by using a value of "Blanks" or "NonBlanks" in the expression:
'x == Blanks'
'x == NonBlanks'
Top 10 style filters can be specified using an expression like the following:
Top|Bottom 1-500 Items|%For example:
'Top    10 Items'
'Bottom  5 Items'
'Top    25 %'
'Bottom 50 %'
Excel also allows some simple string matching operations:
'x =~ b*'   # begins with b
'x !~ b*'   # doesn't begin with b
'x =~ *b'   # ends with b
'x !~ *b'   # doesn't end with b
'x =~ *b*'  # contains b
'x !~ *b*'  # doesn't contains b
You can also use "*" to match any character or number and "?" to match any single character or number. No other regular expression quantifier is supported by Excel’s filters. Excel’s regular expression characters can be escaped using "~".
The placeholder variable "x" in the above examples can be replaced by any simple string. The actual placeholder name is ignored internally so the following are all equivalent:
'x     < 2000'
'col   < 2000'
'Price < 2000'
Also, note that a filter condition can only be applied to a column in a range specified by the autofilter() Worksheet method.
See the "autofilter.pl" program in the examples directory of the distro for a more detailed example. 🌟
🌈 PAGE SET-UP METHODS 🌈
Page set-up methods affect the way that a worksheet looks when it is printed. They control features such as page headers and footers and margins. These methods are really just standard worksheet methods. They are documented here in a separate section for the sake of clarity. 🎀
The following methods are available for page set-up:
set_landscape()
set_portrait()
set_page_view()
set_paper()
center_horizontally()
center_vertically()
set_margins()
set_header()
set_footer()
repeat_rows()
repeat_columns()
hide_gridlines()
print_row_col_headers()
print_area()
print_across()
fit_to_pages()
set_start_page()
set_print_scale()
set_h_pagebreaks()
set_v_pagebreaks()
Okay so 💖 a super common thing when you're working with Spreadsheet::WriteExcel is wanting the exact same page set-up on, like, every single worksheet in the workbook. And no bestie, you do not have to type it out fifty times — just grab the array of worksheets with the sheets() method of the "workbook" class and loop it:
foreach $worksheet ($workbook->sheets()) {
   $worksheet->set_landscape();
}
Slay. One loop, whole workbook, done. ✨
set_landscape()
Flips the printed page orientation of a worksheet to landscape. Rotate that page, icon behavior:
$worksheet->set_landscape(); # Landscape modeset_portrait()
Sets the printed page orientation back to portrait. Lowkey you probably won't ever need to call this, because portrait is already the default worksheet orientation. But hey, it's here if you need to be explicit 🎀
$worksheet->set_portrait(); # Portrait modeset_page_view()
Shows the worksheet in "Page View" mode. Ngl this one is currently only supported by Mac Excel — where, fun fact, it's also the default. So if you're not on Mac, it's giving "not my era" 💅
$worksheet->set_page_view();set_paper($index)
This sets the paper format for the printed output of a worksheet. Here's the whole menu of paper styles, no crumbs left behind:
Index   Paper format            Paper size
=====   ============            ==========
  0     Printer default         -
  1     Letter                  8 1/2 x 11 in
  2     Letter Small            8 1/2 x 11 in
  3     Tabloid                 11 x 17 in
  4     Ledger                  17 x 11 in
  5     Legal                   8 1/2 x 14 in
  6     Statement               5 1/2 x 8 1/2 in
  7     Executive               7 1/4 x 10 1/2 in
  8     A3                      297 x 420 mm
  9     A4                      210 x 297 mm
 10     A4 Small                210 x 297 mm
 11     A5                      148 x 210 mm
 12     B4                      250 x 354 mm
 13     B5                      182 x 257 mm
 14     Folio                   8 1/2 x 13 in
 15     Quarto                  215 x 275 mm
 16     -                       10x14 in
 17     -                       11x17 in
 18     Note                    8 1/2 x 11 in
 19     Envelope  9             3 7/8 x 8 7/8
 20     Envelope 10             4 1/8 x 9 1/2
 21     Envelope 11             4 1/2 x 10 3/8
 22     Envelope 12             4 3/4 x 11
 23     Envelope 14             5 x 11 1/2
 24     C size sheet            -
 25     D size sheet            -
 26     E size sheet            -
 27     Envelope DL             110 x 220 mm
 28     Envelope C3             324 x 458 mm
 29     Envelope C4             229 x 324 mm
 30     Envelope C5             162 x 229 mm
 31     Envelope C6             114 x 162 mm
 32     Envelope C65            114 x 229 mm
 33     Envelope B4             250 x 353 mm
 34     Envelope B5             176 x 250 mm
 35     Envelope B6             176 x 125 mm
 36     Envelope                110 x 230 mm
 37     Monarch                 3.875 x 7.5 in
 38     Envelope                3 5/8 x 6 1/2 in
 39     Fanfold                 14 7/8 x 11 in
 40     German Std Fanfold      8 1/2 x 12 in
 41     German Legal Fanfold    8 1/2 x 13 in
Heads up bestie 🫶 it's likely that not all of these paper types will actually be available to the end user, because it depends on the paper formats that the user's printer supports. So like... stick to the standard paper types, fr fr. Safer that way.
$worksheet->set_paper(1); # US Letter
$worksheet->set_paper(9); # A4
And if you don't specify a paper type at all? The worksheet just prints using the printer's default paper. No drama, no cap 💜
center_horizontally()
Centers the worksheet data horizontally between the margins on the printed page. Aesthetic. Balanced. Main character energy 👑
$worksheet->center_horizontally();center_vertically()
Same vibe, but vertical — centers the worksheet data vertically between the margins on the printed page 🌸
$worksheet->center_vertically();set_margins($inches)
Okay so there are several methods for setting worksheet margins on the printed page, and they're all here:
set_margins()        # Set all margins to the same value
set_margins_LR()     # Set left and right margins to the same value
set_margins_TB()     # Set top and bottom margins to the same value
set_margin_left();   # Set left margin
set_margin_right();  # Set right margin
set_margin_top();    # Set top margin
set_margin_bottom(); # Set bottom margin
Every single one of these takes a distance in inches as a parameter. Quick conversion for the metric girlies: 1 inch = 25.4mm. ;-) And the defaults, so you know: the default left and right margin is 0.75 inch, and the default top and bottom margin is 1.00 inch. ✨
set_header($string, $margin)
Headers and footers get generated from a $string — which is a combo of plain text and control characters. The $margin parameter is optional. 🎀
The available control characters are, and yes I'm giving you the full list because we don't gatekeep:
Control             Category            Description
=======             ========            ===========
&L                  Justification       Left
&C                                      Center
&R                                      Right

&P                  Information         Page number
&N                                      Total number of pages
&D                                      Date
&T                                      Time
&F                                      File name
&A                                      Worksheet name
&Z                                      Workbook path

&fontsize           Font                Font size
&"font,style"                           Font name and style
&U                                      Single underline
&E                                      Double underline
&S                                      Strikethrough
&X                                      Superscript
&Y                                      Subscript

&&                  Miscellaneous       Literal ampersand &
Text in headers and footers can be justified (aligned) to the left, center, and right by prefixing the text with the control characters &L, &C and &R. Look at it go:
For example (with ASCII art representation of the results, iconic honestly):
$worksheet->set_header('&LHello'); ---------------------------------------------------------------
| |
| Hello |
| |$worksheet->set_header('&CHello'); ---------------------------------------------------------------
| |
| Hello |
| |$worksheet->set_header('&RHello'); ---------------------------------------------------------------
| |
| Hello |
| |Now for simple text: if you don't specify any justification, the text gets centred. But — and this is the important bit — you must prefix the text with &C if you specify a font name or any other formatting. Don't forget or it will not go how you want it to 😭
$worksheet->set_header('Hello'); ---------------------------------------------------------------
| |
| Hello |
| |You can also have text in each of the justification regions at once, which is honestly such a serve:
$worksheet->set_header('&LCiao&CBello&RCielo'); ---------------------------------------------------------------
| |
| Ciao Bello Cielo |
| |The information control characters act as variables that Excel will update as the workbook or worksheet changes. Times and dates are in the user's default format:
$worksheet->set_header('&CPage &P of &N'); ---------------------------------------------------------------
| |
| Page 1 of 6 |
| |$worksheet->set_header('&CUpdated at &T'); ---------------------------------------------------------------
| |
| Updated at 12:30 PM |
| |You can specify the font size of a section of text by prefixing it with the control character &n where n is the font size:
$worksheet1->set_header('&C&30Hello Big'  );
$worksheet2->set_header('&C&10Hello Small');
And you can specify the font of a section of text by prefixing it with the control sequence &"font,style" where fontname is a font name like Courier New or Times New Roman, and style is one of the standard Windows font descriptions: Regular, Italic, Bold or Bold Italic:
$worksheet1->set_header('&C&"Courier New,Italic"Hello');
$worksheet2->set_header('&C&"Courier New,Bold Italic"Hello');
$worksheet3->set_header('&C&"Times New Roman,Regular"Hello');
It is possible to combine all of these features together to create sophisticated headers and footers. And especially for you, if you're setting up something complicated: as an aid you can record a page set-up as a macro in Excel and look at the format strings that VBA produces. Reminder though — VBA uses two double quotes "" to indicate a single double quote. For the last example above, the equivalent VBA code looks like this:
.LeftHeader   = ""
.CenterHeader = "&""Times New Roman,Regular""Hello"
.RightHeader  = ""
To include a single literal ampersand & in a header or footer you should use a double ampersand &&:
Like, okay, back to set_header()—because your header string can literally be this:
$worksheet1->set_header('&CCuriouser && Curiouser - Attorneys at Law');And like we said before, the margin parameter is optional. Same inches situation as all the other margins. The default header and footer margin is 0.50 inch, and you can set that margin like this:
$worksheet->set_header('&CHello', 0.75);The header and footer margins are lowkey doing their own independent thing from the top and bottom margins—they don’t share a vibe.
Heads up, bestie: the header or footer string has to be less than 255 characters. Anything longer will not be written, and a warning will be generated. Not a drill. 💀
On systems with perl 5.8 and later, the set_header() method can also handle Unicode strings in UTF-8 format. Iconic:
$worksheet->set_header("&C\x{263a}")Also peep the headers.pl program in the examples directory of the distribution. 🫶
set_footer() 🌸
The syntax of the set_footer() method is the same as set_header(), see above. That’s the whole thing. Cute.
repeat_rows($first_row, $last_row) 🎀
Set the number of rows to repeat at the top of each printed page.
For large Excel documents it is often desirable to have the first row or rows of the worksheet print out at the top of each page. You can achieve this with the repeat_rows() method. The parameters $first_row and $last_row are zero based. The $last_row parameter is optional if you only wish to specify one row:
$worksheet1->repeat_rows(0);    # Repeat the first row
$worksheet2->repeat_rows(0, 1); # Repeat the first two rows
repeat_columns($first_col, $last_col) 🦋
Set the columns to repeat at the left hand side of each printed page.
For large Excel documents it is often desirable to have the first column or columns of the worksheet print out at the left hand side of each page. You can achieve this with the repeat_columns() method. The parameters $first_column and $last_column are zero based. The $last_column parameter is optional if you only wish to specify one column. You can also specify the columns using A1 column notation, see the note about "Cell notation".
$worksheet1->repeat_columns(0);     # Repeat the first column
$worksheet2->repeat_columns(0, 1);  # Repeat the first two columns
$worksheet3->repeat_columns('A:A'); # Repeat the first column
$worksheet4->repeat_columns('A:B'); # Repeat the first two columns
hide_gridlines($option) ✨
This method is used to hide the gridlines on the screen and printed page. Gridlines are the lines that divide the cells on a worksheet. Screen and printed gridlines are turned on by default in an Excel worksheet. If you have defined your own cell borders you may wish to hide the default gridlines.
$worksheet->hide_gridlines();The following values of $option are valid:
0 : Don't hide gridlines
1 : Hide printed gridlines only
2 : Hide screen and printed gridlines
If you don’t supply an argument or use undef, the default option is 1, i.e. only the printed gridlines are hidden. Slay.
print_row_col_headers() 👑
Set the option to print the row and column headers on the printed page.
An Excel worksheet looks something like the following:
     ------------------------------------------
    |   |   A   |   B   |   C   |   D   |  ...
     ------------------------------------------
    | 1 |       |       |       |       |  ...
    | 2 |       |       |       |       |  ...
    | 3 |       |       |       |       |  ...
    | 4 |       |       |       |       |  ...
    |...|  ...  |  ...  |  ...  |  ...  |  ...
The headers are the letters and numbers at the top and the left of the worksheet. Since these headers serve mainly as an indication of position on the worksheet, they generally do not appear on the printed page. If you wish to have them printed, you can use the print_row_col_headers() method:
$worksheet->print_row_col_headers();Do not confuse these headers with page headers as described in the set_header() section above. Different header situation entirely, bestie. 🙈
print_area($first_row, $first_col, $last_row, $last_col) 🔥
This method is used to specify the area of the worksheet that will be printed. All four parameters must be specified. You can also use A1 notation, see the note about "Cell notation".
$worksheet1->print_area('A1:H20');    # Cells A1 to H20
$worksheet2->print_area(0, 0, 19, 7); # The same
$worksheet2->print_area('A:H');       # Columns A to H if rows have data
print_across() 🌈
The print_across method is used to change the default print direction. This is referred to by Excel as the sheet "page order".
$worksheet->print_across();The default page order is shown below for a worksheet that extends over 4 pages. The order is called "down then across":
[1] [3]
[2] [4]
However, by using the print_across method the print order will be changed to "across then down":
[1] [2]
[3] [4]
fit_to_pages($width, $height) 💖
The fit_to_pages() method is used to fit the printed area to a specific number of pages both vertically and horizontally. If the printed area exceeds the specified number of pages it will be scaled down to fit. This guarantees that the printed area will always appear on the specified number of pages even if the page size or margins change.
$worksheet1->fit_to_pages(1, 1); # Fit to 1x1 pages
$worksheet2->fit_to_pages(2, 1); # Fit to 2x1 pages
$worksheet3->fit_to_pages(1, 2); # Fit to 1x2 pages
The print area can be defined using the print_area() method as described above.
A common requirement is to fit the printed output to n pages wide but have the height be as long as necessary. To achieve this set the $height to zero or leave it blank:
$worksheet1->fit_to_pages(1, 0); # 1 page wide and as long as necessary
$worksheet2->fit_to_pages(1);    # The same
Note that although it is valid to use bothfit_to_pages()andset_print_scale()on the same worksheet, only one of these options can be active at a time. The last method call made will set the active option. No cap. 💅
Note that fit_to_pages() will override any manual page breaks that are defined in the worksheet. So yeah, it really said “my page math, my rules.” 😭
set_start_page($start_page) 🎀
The set_start_page() method is used to set the number of the starting page when the worksheet is printed out. The default value is 1.
$worksheet->set_start_page(2);set_print_scale($scale) 🧚
Set the scale factor of the printed page. Scale factors in the range 10 <= $scale <= 400 are valid:
$worksheet1->set_print_scale(50);
$worksheet2->set_print_scale(75);
$worksheet3->set_print_scale(300);
$worksheet4->set_print_scale(400);
The default scale factor is 100. Note, set_print_scale() does not affect the scale of the visible page in Excel. For that you should use set_zoom().
Note also that although it is valid to use bothfit_to_pages()andset_print_scale()on the same worksheet, only one of these options can be active at a time. The last method call made will set the active option. Same rule as above, bestie. ⭐
set_h_pagebreaks(@breaks) 🌸
Add horizontal page breaks to a worksheet. A page break causes all the data that follows it to be printed on the next page. Horizontal page breaks act between rows. To create a page break between rows 20 and 21 you must specify the break at row 21. However in zero index notation this is actually row 20. So you can pretend for a small while that you are using 1 index notation:
$worksheet1->set_h_pagebreaks(20); # Break between row 20 and 21The set_h_pagebreaks() method will accept a list of page breaks and you can call it more than once:
$worksheet2->set_h_pagebreaks( 20,  40,  60,  80, 100); # Add breaks
$worksheet2->set_h_pagebreaks(120, 140, 160, 180, 200); # Add some more
Note: If you specify the"fit to page"option via thefit_to_pages()method it will override all manual page breaks. Also, there is a silent limitation of about1000horizontal page breaks per worksheet in line with an Excel internal limitation. 💀
set_v_pagebreaks(@breaks) 🦋
Add vertical page breaks to a worksheet. A page break causes all the data that follows it to be printed on the next page. Vertical page breaks act between columns. To create a page break between columns 20 and 21 you must specify the break at column 21. However in zero index notation this is actually column 20. So you can pretend for a small while that you are using 1 index notation:
$worksheet1->set_v_pagebreaks(20); # Break between column 20 and 21The set_v_pagebreaks() method will accept a list of page breaks and you can call it more than once:
$worksheet2->set_v_pagebreaks( 20,  40,  60,  80, 100); # Add breaks
$worksheet2->set_v_pagebreaks(120, 140, 160, 180, 200); # Add some more
Note: If you specify the"fit to page"option via thefit_to_pages()method it will override all manual page breaks. Same override situation, vertical edition. 🫶
💅 CELL FORMATTING 💅
Okay bestie, this section is where cells get their whole look together ✨ It covers the methods and properties you can use to format cells in Excel. The properties you can format include: fonts, colours, patterns, borders, alignment and number formatting.
🎀 Creating and using a Format object 🎀
Cell formatting is defined through a Format object. You make Format objects by calling the workbook add_format() method, like this:
my $format1 = $workbook->add_format();       # Set properties later
my $format2 = $workbook->add_format(%props); # Set at creation
The format object holds all the formatting properties that can be applied to a cell, a row or a column. Setting those properties is the next-section vibe.
Once a Format object has been constructed and its properties have been set, you can pass it as an argument to the worksheet write methods:
$worksheet->write(0, 0, 'One', $format);
$worksheet->write_string(1, 0, 'Two', $format);
$worksheet->write_number(2, 0, 3, $format);
$worksheet->write_blank(3, 0, $format);
Formats can also be passed to the worksheet set_row() and set_column() methods to define the default property for a row or column:
$worksheet->set_row(0, 15, $format);
$worksheet->set_column(0, 0, 15, $format);
🧸 Format methods and Format properties 🧸
Here's the whole category cheat sheet: Excel format categories, the formatting properties you can apply, and the equivalent object method. All of it, no skips 💖
- Font
- Font type — property
font— methodset_font() - Font size — property
size— methodset_size() - Font color — property
color— methodset_color() - Bold — property
bold— methodset_bold() - Italic — property
italic— methodset_italic() - Underline — property
underline— methodset_underline() - Strikeout — property
font_strikeout— methodset_font_strikeout() - Super/Subscript — property
font_script— methodset_font_script() - Outline — property
font_outline— methodset_font_outline() - Shadow — property
font_shadow— methodset_font_shadow()
- Font type — property
- Number
- Numeric format — property
num_format— methodset_num_format()
- Numeric format — property
- Protection
- Lock cells — property
locked— methodset_locked() - Hide formulas — property
hidden— methodset_hidden()
- Lock cells — property
- Alignment
- Horizontal align — property
align— methodset_align() - Vertical align — property
valign— methodset_align() - Rotation — property
rotation— methodset_rotation() - Text wrap — property
text_wrap— methodset_text_wrap() - Justify last — property
text_justlast— methodset_text_justlast() - Center across — property
center_across— methodset_center_across() - Indentation — property
indent— methodset_indent() - Shrink to fit — property
shrink— methodset_shrink()
- Horizontal align — property
- Pattern
- Cell pattern — property
pattern— methodset_pattern() - Background color — property
bg_color— methodset_bg_color() - Foreground color — property
fg_color— methodset_fg_color()
- Cell pattern — property
- Border
- Cell border — property
border— methodset_border() - Bottom border — property
bottom— methodset_bottom() - Top border — property
top— methodset_top() - Left border — property
left— methodset_left() - Right border — property
right— methodset_right() - Border color — property
border_color— methodset_border_color() - Bottom color — property
bottom_color— methodset_bottom_color() - Top color — property
top_color— methodset_top_color() - Left color — property
left_color— methodset_left_color() - Right color — property
right_color— methodset_right_color()
- Cell border — property
There are two ways of setting Format properties: by using the object method interface, or by setting the property directly. A typical use of the method interface looks like this:
my $format = $workbook->add_format();
$format->set_bold();
$format->set_color('red');
By comparison, you can set the properties directly by passing a hash of properties to the Format constructor:
my $format = $workbook->add_format(bold => 1, color => 'red');Or after the Format has been constructed, by means of the set_format_properties() method:
my $format = $workbook->add_format();
$format->set_format_properties(bold => 1, color => 'red');
You can also store the properties in one or more named hashes and pass them to the required method:
my %font    = (
                font  => 'Arial',
                size  => 12,
                color => 'blue',
                bold  => 1,
              );

my %shading = (
                bg_color => 'green',
                pattern  => 1,
              );

my $format1 = $workbook->add_format(%font);           # Font only
my $format2 = $workbook->add_format(%font, %shading); # Font and shading
Having two ways of setting properties might leave you wondering which one is best. The method mechanism may be better if you prefer setting properties via method calls (which the author did when the code was first written). Otherwise, passing properties to the constructor has proved to be a little more flexible and self-documenting in practice. A bonus advantage of working with property hashes is that it lets you share formatting between workbook objects, as shown in the example above.
The Perl/Tk style of adding properties is also supported:
my %font    = (
                -font      => 'Arial',
                -size      => 12,
                -color     => 'blue',
                -bold      => 1,
              );
🌈 Working with formats 🌈
The default format is Arial 10 with all other properties off.
Each unique format in Spreadsheet::WriteExcel must have a corresponding Format object. It isn't possible to use a Format with a write() method and then redefine the Format for use at a later stage. That's because a Format is applied to a cell not in its current state but in its final state. Consider this example:
my $format = $workbook->add_format();
$format->set_bold();
$format->set_color('red');
$worksheet->write('A1', 'Cell A1', $format);
$format->set_color('green');
$worksheet->write('B1', 'Cell B1', $format);
Cell A1 is assigned the Format $format, which is initially set to the colour red. However, the colour is subsequently set to green. When Excel displays Cell A1, it will display the final state of the Format, which in this case will be the colour green.
In general, a method call without an argument will turn a property on, for example:
my $format1 = $workbook->add_format();
$format1->set_bold();  # Turns bold on
$format1->set_bold(1); # Also turns bold on
$format1->set_bold(0); # Turns bold off
🔥 FORMAT METHODS 🔥
The Format object methods are described in more detail in the following sections. Also, there is a Perl program called formats.pl in the examples directory of the WriteExcel distribution. This program creates an Excel workbook called formats.xls which contains examples of almost all the format types.
The following Format methods are available:
set_font()
set_size()
set_color()
set_bold()
set_italic()
set_underline()
set_font_strikeout()
set_font_script()
set_font_outline()
set_font_shadow()
set_num_format()
set_locked()
set_hidden()
set_align()
set_rotation()
set_text_wrap()
set_text_justlast()
set_center_across()
set_indent()
set_shrink()
set_pattern()
set_bg_color()
set_fg_color()
set_border()
set_bottom()
set_top()
set_left()
set_right()
set_border_color()
set_bottom_color()
set_top_color()
set_left_color()
set_right_color()
The above methods can also be applied directly as properties. For example, $format->set_bold() is equivalent to $workbook->add_format(bold => 1).
🧚 set_format_properties(%properties) 🧚
The properties of an existing Format object can also be set by means of set_format_properties():
my $format = $workbook->add_format();
$format->set_format_properties(bold => 1, color => 'red');
However, this method is here mainly for legacy reasons. It is preferable to set the properties in the format constructor:
my $format = $workbook->add_format(bold => 1, color => 'red');🌸 set_font($fontname) 🌸
- Default state: Font is Arial
- Default action: None
- Valid args: Any valid font name
Specify the font used:
$format->set_font('Times New Roman');Excel can only display fonts that are installed on the system that it is running on. Therefore it is best to use the fonts that come as standard, such as 'Arial', 'Times New Roman' and 'Courier New'. See also the Fonts worksheet created by formats.pl.
🍓 set_size() 🍓
- Default state: Font size is 10
- Default action: Set font size to 1
- Valid args: Integer values from 1 to as big as your screen.
Set the font size. Excel adjusts the height of a row to accommodate the largest font size in the row. You can also explicitly specify the height of a row using the set_row() worksheet method.
my $format = $workbook->add_format();
$format->set_size(30);
👑 set_color() 👑
- Default state: Excel's default color, usually black
- Default action: Set the default color
- Valid args: Integers from
8..63or the following strings:'black''blue''brown''cyan''gray''green''lime''magenta''navy''orange''pink''purple''red''silver''white''yellow'
Set the font colour. The set_color() method is used like this:
my $format = $workbook->add_format();
$format->set_color('red');
$worksheet->write(0, 0, 'wheelbarrow', $format);
Note: Theset_color()method is used to set the colour of the font in a cell. To set the colour of a cell, use theset_bg_color()andset_pattern()methods. 💅
For even more examples, go peep the 'Named colors' and 'Standard colors' worksheets that formats.pl creates in the examples directory. ✨
See also "COLOURS IN EXCEL" 💅
💖 set_bold()
- Default state: bold is off
- Default action: Turn bold on
- Valid args:
0,1[1]
Set the bold property of the font:
$format->set_bold(); # Turn bold on[1] Actually, values in the range 100..1000 are also valid. 400 is normal, 700 is bold, and 1000 is very bold indeed. It is probably best to set the value to 1 and use normal bold. 😭
🦋 set_italic()
- Default state: Italic is off
- Default action: Turn italic on
- Valid args:
0,1
Set the italic property of the font:
$format->set_italic(); # Turn italic on🎀 set_underline()
- Default state: Underline is off
- Default action: Turn on single underline
- Valid args:
0= No underline1= Single underline2= Double underline33= Single accounting underline34= Double accounting underline
Set the underline property of the font.
$format->set_underline(); # Single underline🌸 set_font_strikeout()
- Default state: Strikeout is off
- Default action: Turn strikeout on
- Valid args:
0,1
Set the strikeout property of the font. Slay. 💅
🧚 set_font_script()
- Default state: Super/Subscript is off
- Default action: Turn Superscript on
- Valid args:
0= Normal1= Superscript2= Subscript
Set the superscript/subscript property of the font. This format is currently not very useful. 🙈
⭐ set_font_outline()
- Default state: Outline is off
- Default action: Turn outline on
- Valid args:
0,1
Macintosh only, bestie.
🌈 set_font_shadow()
- Default state: Shadow is off
- Default action: Turn shadow on
- Valid args:
0,1
Macintosh only.
👑 set_num_format()
- Default state: General format
- Default action: Format index
1 - Valid args: See the following table
This method is used to define the numerical format of a number in Excel. It controls whether a number is displayed as an integer, a floating point number, a date, a currency value or some other user defined format.
The numerical format of a cell can be specified by using a format string or an index to one of Excel's built-in formats:
my $format1 = $workbook->add_format();
my $format2 = $workbook->add_format();
$format1->set_num_format('d mmm yyyy'); # Format string
$format2->set_num_format(0x0f);         # Format index

$worksheet->write(0, 0, 36892.521, $format1);      # 1 Jan 2001
$worksheet->write(0, 0, 36892.521, $format2);      # 1-Jan-01
Using format strings you can define very sophisticated formatting of numbers. ✨
$format01->set_num_format('0.000');
$worksheet->write(0,  0, 3.1415926, $format01);    # 3.142

$format02->set_num_format('#,##0');
$worksheet->write(1,  0, 1234.56,   $format02);    # 1,235

$format03->set_num_format('#,##0.00');
$worksheet->write(2,  0, 1234.56,   $format03);    # 1,234.56

$format04->set_num_format('$0.00');
$worksheet->write(3,  0, 49.99,     $format04);    # $49.99

# Note you can use other currency symbols such as the pound or yen as well.
# Other currencies may require the use of Unicode.

$format07->set_num_format('mm/dd/yy');
$worksheet->write(6,  0, 36892.521, $format07);    # 01/01/01

$format08->set_num_format('mmm d yyyy');
$worksheet->write(7,  0, 36892.521, $format08);    # Jan 1 2001

$format09->set_num_format('d mmmm yyyy');
$worksheet->write(8,  0, 36892.521, $format09);    # 1 January 2001

$format10->set_num_format('dd/mm/yyyy hh:mm AM/PM');
$worksheet->write(9,  0, 36892.521, $format10);    # 01/01/2001 12:30 AM

$format11->set_num_format('0 "dollar and" .00 "cents"');
$worksheet->write(10, 0, 1.87,      $format11);    # 1 dollar and .87 cents

# Conditional formatting
$format12->set_num_format('[Green]General;[Red]-General;General');
$worksheet->write(11, 0, 123,       $format12);    # > 0 Green
$worksheet->write(12, 0, -45,       $format12);    # < 0 Red
$worksheet->write(13, 0, 0,         $format12);    # = 0 Default colour

# Zip code
$format13->set_num_format('00000');
$worksheet->write(14, 0, '01209',   $format13);
The number system used for dates is described in "DATES AND TIME IN EXCEL".
The colour format should have one of the following values:
[Black] [Blue] [Cyan] [Green] [Magenta] [Red] [White] [Yellow]Alternatively you can specify the colour based on a colour index as follows: "[Color n]", where n is a standard Excel colour index - 7. See the 'Standard colors' worksheet created by formats.pl.
For more information refer to the documentation on formatting in the docs directory of the Spreadsheet::WriteExcel distro, the Excel on-line help or <http://office.microsoft.com/en-gb/assistance/HP051995001033.aspx>.
You should ensure that the format string is valid in Excel prior to using it in WriteExcel. ⚠️
Excel's built-in formats are shown in the following table:
Index   Index   Format String
0       0x00    General
1       0x01    0
2       0x02    0.00
3       0x03    #,##0
4       0x04    #,##0.00
5       0x05    ($#,##0_);($#,##0)
6       0x06    ($#,##0_);[Red]($#,##0)
7       0x07    ($#,##0.00_);($#,##0.00)
8       0x08    ($#,##0.00_);[Red]($#,##0.00)
9       0x09    0%
10      0x0a    0.00%
11      0x0b    0.00E+00
12      0x0c    # ?/?
13      0x0d    # ??/??
14      0x0e    m/d/yy
15      0x0f    d-mmm-yy
16      0x10    d-mmm
17      0x11    mmm-yy
18      0x12    h:mm AM/PM
19      0x13    h:mm:ss AM/PM
20      0x14    h:mm
21      0x15    h:mm:ss
22      0x16    m/d/yy h:mm
..      ....    ...........
37      0x25    (#,##0_);(#,##0)
38      0x26    (#,##0_);[Red](#,##0)
39      0x27    (#,##0.00_);(#,##0.00)
40      0x28    (#,##0.00_);[Red](#,##0.00)
41      0x29    _(* #,##0_);_(* (#,##0);_(* "-"_);_(@_)
42      0x2a    _($* #,##0_);_($* (#,##0);_($* "-"_);_(@_)
43      0x2b    _(* #,##0.00_);_(* (#,##0.00);_(* "-"??_);_(@_)
44      0x2c    _($* #,##0.00_);_($* (#,##0.00);_($* "-"??_);_(@_)
45      0x2d    mm:ss
46      0x2e    [h]:mm:ss
47      0x2f    mm:ss.0
48      0x30    ##0.0E+0
49      0x31    @
For examples of these formatting codes see the 'Numerical formats' worksheet created by formats.pl. See also the number_formats1.html and the number_formats2.html documents in the docs directory of the distro.
Note 1. Numeric formats 23 to 36 are not documented by Microsoft and may differ in international versions.
Note 2. In Excel 5 the dollar sign appears as a dollar sign. In Excel 97-2000 it appears as the defined local currency symbol.
Note 3. The red negative numeric formats display slightly differently in Excel 5 and Excel 97-2000.
🔒 set_locked()
- Default state: Cell locking is on
- Default action: Turn locking on
- Valid args:
0,1
This property can be used to prevent modification of a cells contents. Following Excel's convention, cell locking is turned on by default. However, it only has an effect if the worksheet has been protected, see the worksheet protect() method.
my $locked  = $workbook->add_format();
$locked->set_locked(1); # A non-op

my $unlocked = $workbook->add_format();
$locked->set_locked(0);

# Enable worksheet protection
$worksheet->protect();

# This cell cannot be edited.
$worksheet->write('A1', '=1+2', $locked);

# This cell can be edited.
$worksheet->write('A2', '=1+2', $unlocked);
Note: This offers weak protection even with a password, see the note in relation to the protect() method. 💀
🙈 set_hidden()
- Default state: Formula hiding is off
- Default action: Turn hiding on
- Valid args:
0,1
This property is used to hide a formula while still displaying its result. This is generally used to hide complex calculations from end users who are only interested in the result. It only has an effect if the worksheet has been protected, see the worksheet protect() method.
my $hidden = $workbook->add_format();
$hidden->set_hidden();

# Enable worksheet protection
$worksheet->protect();

# The formula in this cell isn't visible
$worksheet->write('A1', '=1+2', $hidden);
Note: This offers weak protection even with a password, see the note in relation to the protect() method. 🫶
🧚 set_align()
- Default state: Alignment is off
- Default action: Left alignment
- Valid args:
- Horizontal:
'left','center','right','fill','justify','center_across' - Vertical:
'top','vcenter','bottom','vjustify'
- Horizontal:
This method is used to set the horizontal and vertical text alignment within a cell. Vertical and horizontal alignments can be combined. The method is used as follows:
my $format = $workbook->add_format();
$format->set_align('center');
$format->set_align('vcenter');
$worksheet->set_row(0, 30);
$worksheet->write(0, 0, 'X', $format);
Text can be aligned across two or more adjacent cells using the "center_across" property. However, for genuine merged cells it is better to use the merge_range() worksheet method.
The "vjustify" (vertical justify) option can be used to provide automatic text wrapping in a cell. The height of the cell will be adjusted to accommodate the wrapped text. To specify where the text wraps use the set_text_wrap() method.
For further examples see the 'Alignment' worksheet created by formats.pl. ✨
🌟 set_center_across()
- Default state: Center across selection is off
- Default action: Turn center across on
- Valid args:
1
Text can be aligned across two or more adjacent cells using the set_center_across() method. This is an alias for the set_align('center_across') method call. Iconic. 💅
Only one cell should contain the text, the other cells should stay blank — that's the whole vibe, no cap:
my $format = $workbook->add_format();
$format->set_center_across();

$worksheet->write(1, 1, 'Center across selection', $format);
$worksheet->write_blank(1, 2, $format);
Also go peek at the merge1.pl to merge6.pl programs in the examples directory, plus the merge_range() method 💖
set_text_wrap()
- Default state: Text wrap is off
- Default action: Turn text wrap on
- Valid args:
0,1
Here's the glow-up in action — the escape character "\n" is what marks the end of a line:
my $format = $workbook->add_format();
$format->set_text_wrap();
$worksheet->write(0, 0, "It's\na bum\nwrap", $format);
Excel will adjust the height of the row to accommodate the wrapped text, like it's doing the most to make room 🫶 You can get a similar effect without newlines by using the set_align('vjustify') method. See the textwrap.pl program in the examples directory ✨
set_rotation()
- Default state: Text rotation is off
- Default action: None
- Valid args: Integers in the range
-90to90and270
Sets the rotation of the text in a cell. The rotation can be any angle in the range -90 to 90 degrees 🔥
my $format = $workbook->add_format();
$format->set_rotation(30);
$worksheet->write(0, 0, 'This text is rotated', $format);
The angle 270 is also supported — that one means text where the letters run from top to bottom, iykyk 💅
set_indent()
- Default state: Text indentation is off
- Default action: Indent text 1 level
- Valid args: Positive integers
This method can be used to indent text. The argument, which should be an integer, is taken as the level of indentation:
my $format = $workbook->add_format();
$format->set_indent(2);
$worksheet->write(0, 0, 'This text is indented', $format);
Heads up bestie: indentation is a horizontal alignment property. It will override any other horizontal properties, but it can be used in conjunction with vertical properties 😌
set_shrink()
- Default state: Text shrinking is off
- Default action: Turn "shrink to fit" on
- Valid args:
1
This method can be used to shrink text so that it fits in a cell — literally shrinking, the icon behavior:
my $format = $workbook->add_format();
$format->set_shrink();
$worksheet->write(0, 0, 'Honey, I shrunk the text!', $format);
set_text_justlast()
- Default state: Justify last is off
- Default action: Turn justify last on
- Valid args:
0,1
Only applies to Far Eastern versions of Excel — so if that's not your situation, this one's not for you 🙈
set_pattern()
- Default state: Pattern is off
- Default action: Solid fill is on
- Valid args:
0 .. 18
Sets the background pattern of a cell.
Examples of all the available patterns are shown in the 'Patterns' worksheet created by formats.pl. But real talk? It is unlikely that you will ever need anything other than Pattern 1, which is a solid fill of the background color 🎀
set_bg_color()
- Default state: Color is off
- Default action: Solid fill.
- Valid args: See
set_color()
The set_bg_color() method sets the background colour of a pattern. Patterns are defined via the set_pattern() method. If a pattern hasn't been defined, then a solid fill pattern is used as the default — so you're covered either way 💜
Here's how to set up a solid fill in a cell:
my $format = $workbook->add_format();

$format->set_pattern(); # This is optional when using a solid fill

$format->set_bg_color('green');
$worksheet->write('A1', 'Ray', $format);
For further examples see the 'Patterns' worksheet created by formats.pl 🌈
set_fg_color()
- Default state: Color is off
- Default action: Solid fill.
- Valid args: See
set_color()
The set_fg_color() method sets the foreground colour of a pattern 👑
For further examples see the 'Patterns' worksheet created by formats.pl.
set_border()
- Also applies to:
set_bottom(),set_top(),set_left(),set_right() - Default state: Border is off
- Default action: Set border type
1 - Valid args:
0-13, See below.
A cell border is comprised of a border on the bottom, top, left and right. These can all be set to the same value using set_border(), or individually using the relevant method calls shown above ✨
The following shows the border styles sorted by Spreadsheet::WriteExcel index number:
Index   Name            Weight   Style
=====   =============   ======   ===========
0       None            0
1       Continuous      1        -----------
2       Continuous      2        -----------
3       Dash            1        - - - - - -
4       Dot             1        . . . . . .
5       Continuous      3        -----------
6       Double          3        ===========
7       Continuous      0        -----------
8       Dash            2        - - - - - -
9       Dash Dot        1        - . - . - .
10      Dash Dot        2        - . - . - .
11      Dash Dot Dot    1        - . . - . .
12      Dash Dot Dot    2        - . . - . .
13      SlantDash Dot   2        / - . / - .
The following shows the borders sorted by style:
Name            Weight   Style         Index
=============   ======   ===========   =====
Continuous      0        -----------   7
Continuous      1        -----------   1
Continuous      2        -----------   2
Continuous      3        -----------   5
Dash            1        - - - - - -   3
Dash            2        - - - - - -   8
Dash Dot        1        - . - . - .   9
Dash Dot        2        - . - . - .   10
Dash Dot Dot    1        - . . - . .   11
Dash Dot Dot    2        - . . - . .   12
Dot             1        . . . . . .   4
Double          3        ===========   6
None            0                      0
SlantDash Dot   2        / - . / - .   13
And the following shows the borders in the order shown in the Excel Dialog:
Index   Style             Index   Style
=====   =====             =====   =====
0       None              12      - . . - . .
7       -----------       13      / - . / - .
4       . . . . . .       10      - . - . - .
11      - . . - . .       8       - - - - - -
9       - . - . - .       2       -----------
3       - - - - - -       5       -----------
1       -----------       6       ===========
Examples of the available border styles are shown in the 'Borders' worksheet created by formats.pl 🦋
set_border_color()
- Also applies to:
set_bottom_color(),set_top_color(),set_left_color(),set_right_color() - Default state: Color is off
- Default action: Undefined
- Valid args: See
set_color()
Sets the colour of the cell borders. A cell border is comprised of a border on the bottom, top, left and right. These can all be set to the same colour using set_border_color(), or individually using the relevant method calls shown above 💅 Examples of the border styles and colours are shown in the 'Borders' worksheet created by formats.pl.
copy($format)
This method is used to copy all of the properties from one Format object to another — like a full fit-and-personality transplant for formats:
my $lorry1 = $workbook->add_format();
$lorry1->set_bold();
$lorry1->set_italic();
$lorry1->set_color('red');    # lorry1 is bold, italic and red

my $lorry2 = $workbook->add_format();
$lorry2->copy($lorry1);
$lorry2->set_color('yellow'); # lorry2 is bold, italic and yellow
The copy() method is only useful if you are using the method interface to Format properties. It generally isn't required if you are setting Format properties directly using hashes 🍓
Note: this is not a copy constructor — both objects must exist prior to copying. No sneaky "make a whole new object out of thin air" behavior, bestie 😭
🌈 UNICODE IN EXCEL 🌈
okay bestie, so this is your lil crash course on handling Unicode in Spreadsheet::WriteExcel 💖
if you want a bigger, more general intro to Unicode in Perl, go read perlunitut and perluniintro — they're the real MVPs, iykyk.
So here's the tea: when you're using Spreadsheet::WriteExcel, the best and easiest way to write unicode strings to an Excel file is to use UTF-8 encoded strings plus perl 5.8 (or later). Spreadsheet::WriteExcel also lets you write unicode with older perls, but ngl that usually takes more work — more on that below 🫶
Internally, Excel encodes unicode data as UTF-16LE (LE = little-endian, cute right?). If you're on perl 5.8+, Spreadsheet::WriteExcel will convert UTF-8 strings to UTF-16LE whenever it needs to. Zero extra effort from you, the programmer. Like:
# perl 5.8+ example:
my $smiley = "\x{263A}";

$worksheet->write('A1', 'Hello world'); # ASCII
$worksheet->write('A2', $smiley);       # UTF-8
Spreadsheet::WriteExcel also lets you write unicode data as UTF-16. And since the majority of CPAN modules default to UTF-16BE (big-endian), Spreadsheet::WriteExcel also uses UTF-16BE and converts it internally to UTF-16LE ✨
# perl 5.005 example:
my $smiley = pack 'n', 0x263A;

$worksheet->write               ('A3', 'Hello world'); # ASCII
$worksheet->write_utf16be_string('A4', $smiley);       # UTF-16
So those two examples look similar, but there's a big important diff 👀 With uft8 and perl 5.8+, Spreadsheet::WriteExcel treats UTF-8 strings exactly the same way as any other string. But with UTF16 data, we gotta distinguish it from other strings — either by calling a separate function, or by passing an extra flag to say what the data type is.
If you're dealing with non-ASCII characters that aren't in UTF-8, perl 5.8+ has your back with the Encode module, which helps you convert to whatever format you need. Example time 💅
use Encode 'decode';

my $string = 'some string with koi8-r characters';
   $string = decode('koi8-r', $string); # koi8-r to utf8
Alternatively you can read data from an encoded file and convert it to UTF-8 as you read it in:
my $file = 'unicode_koi8r.txt';
open FH, '<:encoding(koi8-r)', $file  or die "Couldn't open $file: $!\n";

my $row = 0;
while (<FH>) {
    # Data read in is now in utf8 format.
    chomp;
    $worksheet->write($row++, 0,  $_);
}
These methodologies are explained in more detail in perlunitut, perluniintro and perlunicode. Go read them, they're lowkey essential 📚
Also!! peep the unicode_*.pl programs in the examples directory of the distro 🦋
🎨 COLOURS IN EXCEL 🎨
Excel gives you a colour palette of 56 colours. In Spreadsheet::WriteExcel you access these colours via their palette index, in the range 8..63. That index is how you set the colour of fonts, cell patterns and cell borders. Like so:
my $format = $workbook->add_format(
                                    color => 12, # index for blue
                                    font  => 'Arial',
                                    size  => 12,
                                    bold  => 1,
                                 );
The most commonly used colours also have names 💖 The name is just a cute lil alias for the colour index:
black=>8blue=>12brown=>16cyan=>15gray=>23green=>17lime=>11magenta=>14navy=>18orange=>53pink=>33purple=>20red=>10silver=>22white=>9yellow=>13
For example:
my $font = $workbook->add_format(color => 'red');VBA users in Excel, listen up 🙈 the equivalent colour indices are in the range1..56instead of8..63. Don't get caught out bestie.
If the default palette doesn't have the colour you need, you can override one of the built-in values. You do that with the set_custom_color() workbook method, which lets you tweak the RGB (red green blue) components of the colour:
my $ferrari = $workbook->set_custom_color(40, 216, 12, 12);

my $format  = $workbook->add_format(
                                    bg_color => $ferrari,
                                    pattern  => 1,
                                    border   => 1
                                  );

$worksheet->write_blank('A1', $format);
The default Excel colour palette is shown in palette.html in the docs directory of the distro. And you can generate an Excel version of the palette using colors.pl in the examples directory 🎀
📅 DATES AND TIME IN EXCEL 📅
There are two super important things to understand about dates and times in Excel, and honestly? They're the whole vibe:
- A date/time in Excel is a real number plus an Excel number format.
- Spreadsheet::WriteExcel doesn't automatically convert date/time strings in
write()to an Excel date/time.
Both of these get explained in more detail below, plus some suggestions on how to convert times and dates to the format you actually need 💜
⭐ An Excel date/time is a number plus a format
If you write a date string with write() then all you get back is... a string. That's it. That's the whole thing 😭
$worksheet->write('A1', '02/03/04'); # !! Writes a string not a date. !!Dates and times in Excel are represented by real numbers. For example Jan 1 2001 12:30 AM is represented by the number 36892.521.
The integer part of the number stores the number of days since the epoch, and the fractional part stores the percentage of the day. Math, but make it Excel ✨
A date or time in Excel is just like any other number. To have the number display as a date, you must apply an Excel number format to it. Here are some examples 👑
#!/usr/bin/perl -w

use strict;
use Spreadsheet::WriteExcel;

my $workbook  = Spreadsheet::WriteExcel->new('date_examples.xls');
my $worksheet = $workbook->add_worksheet();

$worksheet->set_column('A:A', 30); # For extra visibility.

my $number    = 39506.5;

$worksheet->write('A1', $number);            #     39506.5

my $format2 = $workbook->add_format(num_format => 'dd/mm/yy');
$worksheet->write('A2', $number , $format2); #     28/02/08

my $format3 = $workbook->add_format(num_format => 'mm/dd/yy');
$worksheet->write('A3', $number , $format3); #     02/28/08

my $format4 = $workbook->add_format(num_format => 'd-m-yyyy');
$worksheet->write('A4', $number , $format4); #     28-2-2008

my $format5 = $workbook->add_format(num_format => 'dd/mm/yy hh:mm');
$worksheet->write('A5', $number , $format5); #     28/02/08 12:00

my $format6 = $workbook->add_format(num_format => 'd mmm yyyy');
$worksheet->write('A6', $number , $format6); #     28 Feb 2008

my $format7 = $workbook->add_format(num_format => 'mmm d yyyy hh:mm AM/PM');
$worksheet->write('A7', $number , $format7); #     Feb 28 2008 12:00 PM
⭐ Spreadsheet::WriteExcel doesn't automatically convert date/time strings
Spreadsheet::WriteExcel does not automatically convert input date strings into Excel's formatted date numbers. Why? Because there are SO many possible date formats, and also because of the possibility of misinterpretation 💀
Like, does 02/03/04 mean March 2 2004, February 3 2004, or even March 4 2002?? Nobody knows. Chaos.
So because of that, to handle dates you'll have to convert them to numbers and apply an Excel format yourself. Some methods for converting dates are listed in the next section 👇
The most direct way is to convert your dates to the ISO8601 yyyy-mm-ddThh:mm:ss.sss date format and use the write_date_time() worksheet method:
$worksheet->write_date_time('A2', '2001-01-01T12:20', $format);See the write_date_time() section of the documentation for more details 🫶
A general methodology for handling date strings with write_date_time() goes like this:
- Identify incoming date/time strings with a regex.
- Extract the component parts of the date/time using the same regex.
- Convert the date/time to the ISO8601 format.
- Write the date/time using
write_date_time()and a number format.
Here's an example, and yes it's a whole program, we love a full demo:
#!/usr/bin/perl -w

use strict;
use Spreadsheet::WriteExcel;

my $workbook    = Spreadsheet::WriteExcel->new('example.xls');
my $worksheet   = $workbook->add_worksheet();

# Set the default format for dates.
my $date_format = $workbook->add_format(num_format => 'mmm d yyyy');

# Increase column width to improve visibility of data.
$worksheet->set_column('A:C', 20);

# Simulate reading from a data source.
my $row = 0;

while (<DATA>) {
    chomp;

    my $col  = 0;
    my @data = split ' ';

    for my $item (@data) {

        # Match dates in the following formats: d/m/yy, d/m/yyyy
        if ($item =~ qr[^(\d{1,2})/(\d{1,2})/(\d{4})$]) {

            # Change to the date format required by write_date_time().
            my $date = sprintf "%4d-%02d-%02dT", $3, $2, $1;

            $worksheet->write_date_time($row, $col++, $date, $date_format);
        }
        else {
            # Just plain data
            $worksheet->write($row, $col++, $item);
        }
    }
    $row++;
}

__DATA__
Item    Cost    Date
Book    10      1/9/2007
Beer    4       12/9/2007
Bed     500     5/10/2007
For a slightly more advanced solution, you can modify the write() method to handle whatever date formats you want via the add_write_handler() method. Check out the add_write_handler() section of the docs, plus the write_handler3.pl and write_handler4.pl programs in the examples directory of the distro 🔥
⭐ Converting dates and times to an Excel date or time
The write_date_time() method above is just one way of handling dates and times, bestie. There are more 💅
The Spreadsheet::WriteExcel::Utility module, which is included in the distro, has date/time handling functions:
use Spreadsheet::WriteExcel::Utility;

$date           = xl_date_list(2002, 1, 1);         # 37257
$date           = xl_parse_date("11 July 1997");    # 35622
$time           = xl_parse_time('3:21:36 PM');      # 0.64
$date           = xl_decode_date_EU("13 May 2002"); # 37389
heads up 🫶 some of these functions require additional CPAN modules. Not all of them are plug-and-play, ngl.
For date conversions using the CPAN DateTime framework, go peep DateTime::Format::Excel <http://search.cpan.org/search?dist=DateTime-Format-Excel> 🌸
🎀 OUTLINES AND GROUPING IN EXCEL 🎀
Okay so bestie, Excel has this whole thing where you can group rows or columns together so a single little mouse click hides or shows the whole batch. That feature is called outlines, and honestly it's giving "fold your laundry so your room looks clean" energy.
Outlines can shrink a big messy pile of data down to just a few salient sub-totals or summaries. Iconic. 💅
This feature is best viewed in Excel, but here's an ASCII representation of what a worksheet with three outlines might look like. Rows 3-4 and rows 7-8 are grouped at level 2. Rows 2-9 are grouped at level 1. Those lines on the left hand side? They're called outline level bars.
                   ------------------------------------------
            1 2 3 |   |   A   |   B   |   C   |   D   |  ...
                   ------------------------------------------
             _    | 1 |   A   |       |       |       |  ...
            |  _  | 2 |   B   |       |       |       |  ...
            | |   | 3 |  (C)  |       |       |       |  ...
            | |   | 4 |  (D)  |       |       |       |  ...
            | -   | 5 |   E   |       |       |       |  ...
            |  _  | 6 |   F   |       |       |       |  ...
            | |   | 7 |  (G)  |       |       |       |  ...
            | |   | 8 |  (H)  |       |       |       |  ...
            | -   | 9 |   I   |       |       |       |  ...
            -     | . |  ...  |  ...  |  ...  |  ...  |  ...
Clicking the minus sign on each of the level 2 outlines collapses and hides the data, like in the next figure. The minus sign flips into a plus sign to tell you the data in that outline is hidden 🫶
                   ------------------------------------------
            1 2 3 |   |   A   |   B   |   C   |   D   |  ...
                   ------------------------------------------
             _    | 1 |   A   |       |       |       |  ...
            |     | 2 |   B   |       |       |       |  ...
            | +   | 5 |   E   |       |       |       |  ...
            |     | 6 |   F   |       |       |       |  ...
            | +   | 9 |   I   |       |       |       |  ...
            -     | . |  ...  |  ...  |  ...  |  ...  |  ...
And if you click the minus sign on the level 1 outline, the remaining rows collapse like this:
                   ------------------------------------------
            1 2 3 |   |   A   |   B   |   C   |   D   |  ...
                   ------------------------------------------
                  | 1 |   A   |       |       |       |  ...
            +     | . |  ...  |  ...  |  ...  |  ...  |  ...
Grouping in Spreadsheet::WriteExcel is achieved by setting the outline level via the set_row() and set_column() worksheet methods:
set_row($row, $height, $format, $hidden, $level, $collapsed)
set_column($first_col, $last_col, $width, $format, $hidden, $level, $collapsed)
The following example sets an outline level of 1 for rows 1 and 2 (zero-indexed) and for columns B to G. The parameters $height and $XF are assigned default values since they are undefined:
$worksheet->set_row(1, undef, undef, 0, 1);
$worksheet->set_row(2, undef, undef, 0, 1);
$worksheet->set_column('B:G', undef, undef, 0, 1);
Excel allows up to 7 outline levels. So the $level parameter should be in the range 0 <= $level <= 7. Respect the range, bestie 🙈
Rows and columns can be collapsed by setting the $hidden flag for the hidden rows/columns and setting the $collapsed flag for the row/column that has the collapsed "+" symbol:
$worksheet->set_row(1, undef, undef, 1, 1);
$worksheet->set_row(2, undef, undef, 1, 1);
$worksheet->set_row(3, undef, undef, 0, 0, 1);        # Collapsed flag.

$worksheet->set_column('B:G', undef, undef, 1, 1);
$worksheet->set_column('H:H', undef, undef, 0, 0, 1); # Collapsed flag.
📌 Note: setting the $collapsed flag is particularly important for compatibility with OpenOffice.org and Gnumeric.
For a more complete example, go look at the outline.pl and outline_collapsed.pl programs in the examples directory of the distro. They ate, fr fr ✨
Some additional outline properties can be set via the outline_settings() worksheet method, see above.
🌈 DATA VALIDATION IN EXCEL 🌈
Data validation is a feature of Excel that lets you restrict the data a user enters in a cell, and also display help and warning messages. It also lets you restrict input to values in a drop down list. Main character behaviour honestly 👑
A typical use case might be to restrict data in a cell to integer values in a certain range, provide a help message telling them what's expected, and issue a warning if the input data doesn't meet the stated criteria. In Spreadsheet::WriteExcel we could do that like this:
$worksheet->data_validation('B3',
    {
        validate        => 'integer',
        criteria        => 'between',
        minimum         => 1,
        maximum         => 100,
        input_title     => 'Input an integer:',
        input_message   => 'Between 1 and 100',
        error_message   => 'Sorry, try again.',
    });
The above example would look like this in Excel: http://homepage.eircom.net/~jmcnamara/perl/data_validation.jpg
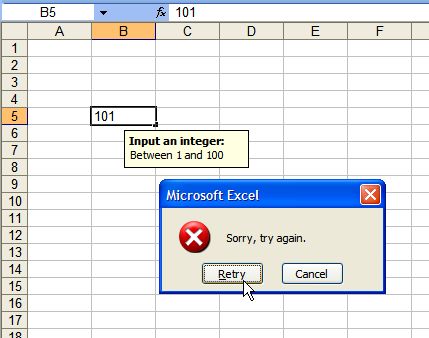
For more info on data validation, check out the following Microsoft support article, "Description and examples of data validation in Excel": http://support.microsoft.com/kb/211485
The following sections describe how to use the data_validation() method and its various options. Let's get into it 💖
🦋 data_validation($row, $col, { parameter => 'value', ... }) 🦋
The data_validation() method is used to construct an Excel data validation.
It can be applied to a single cell or a range of cells. You can pass 3 parameters like ($row, $col, {...}) or 5 parameters like ($first_row, $first_col, $last_row, $last_col, {...}). You can also use "A1" style notation. For example:
$worksheet->data_validation(0, 0,       {...});
$worksheet->data_validation(0, 0, 4, 1, {...});

# Which are the same as:

$worksheet->data_validation('A1',       {...});
$worksheet->data_validation('A1:B5',    {...});
See also the note about "Cell notation" for more information.
The last parameter in data_validation() must be a hash ref containing the parameters that describe the type and style of the data validation. The allowable parameters are:
validatecriteriavalue|minimum|sourcemaximumignore_blankdropdowninput_titleinput_messageshow_inputerror_titleerror_messageerror_typeshow_error
These parameters are explained in the following sections. Most of the parameters are optional, however, you'll generally need the three main options validate, criteria and value.
$worksheet->data_validation('B3',
    {
        validate => 'integer',
        criteria => '>',
        value    => 100,
    });
The data_validation method returns:
0for success.-1for insufficient number of arguments.-2for row or column out of bounds.-3for incorrect parameter or value.
🌸 validate 🌸
This parameter is passed in a hash ref to data_validation().
The validate parameter sets the type of data you wish to validate. It is always required and it has no default value. Allowable values are:
anyintegerdecimallistdatetimelengthcustomany— used to specify that the type of data is unrestricted. This is the same as not applying a data validation at all. It's only provided for completeness and isn't used very often in the context ofSpreadsheet::WriteExcel.integer— restricts the cell to integer values. Excel refers to this as 'whole number'.
validate => 'integer',
criteria => '>',
value => 100,decimal— restricts the cell to decimal values.
validate => 'decimal',
criteria => '>',
value => 38.6,list— restricts the cell to a set of user specified values. These can be passed in an array ref or as a cell range (named ranges aren't currently supported):
validate => 'list',
value    => ['open', 'high', 'close'],
# Or like this:
value    => 'B1:B3',
Excel requires that range references are only to cells on the same worksheet. No wandering off 🧚
date— restricts the cell to date values. Dates in Excel are expressed as integer values but you can also pass an ISO860 style string as used inwrite_date_time(). See also"DATES AND TIME IN EXCEL"for more information about working with Excel's dates.
validate => 'date',
criteria => '>',
value    => 39653, # 24 July 2008
# Or like this:
value => '2008-07-24T',time— restricts the cell to time values. Times in Excel are expressed as decimal values but you can also pass an ISO860 style string as used inwrite_date_time(). See also"DATES AND TIME IN EXCEL"for more information about working with Excel's times.
validate => 'time',
criteria => '>',
value => 0.5, # Noon
# Or like this:
value => 'T12:00:00',length— restricts the cell data based on an integer string length. Excel refers to this as 'Text length'.
validate => 'length',
criteria => '>',
value => 10,custom— restricts the cell based on an external Excel formula that returns a"TRUE/FALSE"value.
validate => 'custom',
value => '=IF(A10>B10,TRUE,FALSE)',💜 criteria 💜
This parameter is passed in a hash ref to data_validation().
The criteria parameter sets the criteria by which the data in the cell gets validated. It's almost always required except for the "list" and "custom" validate options. It has no default value. Allowable values are:
'between'
'not between'
'equal to' | '==' | '='
'not equal to' | '!=' | '<>'
'greater than' | '>'
'less than' | '<'
'greater than or equal to' | '>='
'less than or equal to' | '<='You can either use Excel's textual description strings (first column up there 👆) or the more common operator alternatives. The following are equivalent:
validate => 'integer',
criteria => 'greater than',
value => 100,
validate => 'integer',
criteria => '>',
value => 100,The "list" and "custom" validate options don't require a criteria. If you specify one it will be ignored. Like, it simply does not see it 😭
validate => 'list',
value => ['open', 'high', 'close'],
validate => 'custom',
value => '=IF(A10>B10,TRUE,FALSE)',value | minimum | source 💜
ok so this parameter gets passed in a hash ref to data_validation(), and it's the one that actually does the work.
The value parameter sets the limiting value that criteria gets applied to. It's always required — no default, no skipping it, no "I'll do it later" — and here's the cute part: you can also use the synonyms minimum or source if you want the whole thing to read a little clearer and feel closer to how Excel itself describes the parameter:
# Use 'value'
validate => 'integer',
criteria => '>',
value => 100,
# Use 'minimum'
validate => 'integer',
criteria => 'between',
minimum => 1,
maximum => 100,
# Use 'source'
validate => 'list',
source => '$B$1:$B$3',maximum 🌸
also passed in a hash ref to data_validation(), bestie.
The maximum parameter sets the upper limiting value, and it only kicks in when criteria is either 'between' or 'not between':
validate => 'integer',
criteria => 'between',
minimum => 1,
maximum => 100,ignore_blank 🎀
passed in a hash ref to data_validation(), as ever.
ignore_blank toggles the big 'Ignore blank' option in the Excel data validation dialog. When it's on, the validation just does not apply to blank data in the cell. And it's on by default, iykyk.
ignore_blank => 0, # Turn the option offdropdown 🦋
passed in a hash ref to data_validation().
dropdown toggles the 'In-cell dropdown' option in the Excel data validation dialog. Turn it on and you get a dropdown list shown for "list" validations. On by default, literally.
dropdown => 0, # Turn the option offinput_title ✨
passed in a hash ref to data_validation().
input_title sets the title of the input message that pops up when a cell is entered. No default value, and it only shows if the input message itself is being shown — peep the input_message parameter below.
input_title => 'This is the input title',Max title length is 32 characters. UTF8 strings are handled automatically in perl 5.8 and later, no cap.
input_message 💖
passed in a hash ref to data_validation().
input_message sets the input message displayed when a cell is entered. It has no default value.
validate => 'integer',
criteria => 'between',
minimum => 1,
maximum => 100,
input_title => 'Enter the applied discount:',
input_message => 'between 1 and 100',You can split the message over several lines with newlines, "\n" in double quoted strings:
input_message => "This is\na test.",Max message length is 255 characters. UTF8 strings handled automatically in perl 5.8 and later.
show_input 🫶
passed in a hash ref to data_validation().
show_input toggles the 'Show input message when cell is selected' option in the Excel data validation dialog. When it's off, no input message shows up even if you set one with input_message. On by default.
show_input => 0, # Turn the option offerror_title 🔥
passed in a hash ref to data_validation().
error_title sets the title of the error message shown when the data validation criteria isn't met. The default error title is 'Microsoft Excel'.
error_title => 'Input value is not valid',Max title length is 32 characters. UTF8 strings handled automatically in perl 5.8 and later.
error_message 😭
passed in a hash ref to data_validation().
error_message sets the error message shown when a cell is entered. The default error message is "The value you entered is not valid.\nA user has restricted values that can be entered into the cell.".
validate => 'integer',
criteria => 'between',
minimum => 1,
maximum => 100,
error_title => 'Input value is not valid',
error_message => 'It should be an integer between 1 and 100',You can split the message over several lines with newlines, "\n" in double quoted strings:
input_message => "This is\na test.",Max message length is 255 characters. UTF8 strings handled automatically in perl 5.8 and later.
error_type 💀
passed in a hash ref to data_validation().
error_type says which type of error dialog shows up. Three options, periodt:
'stop'
'warning'
'information'Default is 'stop'.
show_error 🙈
passed in a hash ref to data_validation().
show_error toggles the 'Show error alert after invalid data is entered' option in the Excel data validation dialog. When it's off, no error message displays even if you set one with error_message. On by default, bestie.
show_error => 0, # Turn the option offData Validation Examples 👑
Example 1. Limiting input to an integer greater than a fixed value.
$worksheet->data_validation('A1',
{
validate => 'integer',
criteria => '>',
value => 0,
});Example 2. Limiting input to an integer greater than a fixed value where the value is referenced from a cell.
$worksheet->data_validation('A2',
{
validate => 'integer',
criteria => '>',
value => '=E3',
});Example 3. Limiting input to a decimal in a fixed range.
$worksheet->data_validation('A3',
{
validate => 'decimal',
criteria => 'between',
minimum => 0.1,
maximum => 0.5,
});Example 4. Limiting input to a value in a dropdown list.
$worksheet->data_validation('A4',
{
validate => 'list',
source => ['open', 'high', 'close'],
});Example 5. Limiting input to a value in a dropdown list where the list is specified as a cell range.
$worksheet->data_validation('A5',
{
validate => 'list',
source => '=E4:G4',
});Example 6. Limiting input to a date in a fixed range.
$worksheet->data_validation('A6',
{
validate => 'date',
criteria => 'between',
minimum => '2008-01-01T',
maximum => '2008-12-12T',
});Example 7. Displaying a message when the cell is selected.
$worksheet->data_validation('A7',
{
validate => 'integer',
criteria => 'between',
minimum => 1,
maximum => 100,
input_title => 'Enter an integer:',
input_message => 'between 1 and 100',
});Also go look at the data_validate.pl program in the examples directory of the distro — it's giving demo energy 🌈.
ROW HEIGHTS AND WORKSHEET OBJECTS 🧚
ok so this whole bit is about worksheet objects like images, comments and charts.
If you specify the height of a row that contains a worksheet object, Spreadsheet::WriteExcel will adjust the height of the object to keep its default or user specified dimensions. Slay — that way the object doesn't look all stretched or squished in Excel.
But (and this is the plot twist 😭) Excel can also change a row's height automatically if the row contains cells with the text wrap property set, or contains large fonts. In those cases the row height is genuinely unknown to Spreadsheet::WriteExcel at execution time, so the scaling calculations it does come out wrong. The result? The object gets stretched along with the row when it's displayed in Excel. Not the vibe.
To dodge this whole issue, use the set_row() method to explicitly set the height of any row that Excel might otherwise change automatically. Do it. Future you will thank you 💅.
FORMULAS AND FUNCTIONS IN EXCEL ⭐
Caveats 💀
first things first, bestie — there are still some outstanding issues with how formulas and functions are implemented:
- Writing a formula is much slower than writing the equivalent string.
- You cannot use array constants, i.e.
{1;2;3}, in functions. - Unary minus isn't supported.
- Whitespace is not preserved around operators.
- Named ranges are not supported.
- Array formulas are not supported.
Good news though: these constraints are going to be removed in future versions. They're only here because of a trade-off between features and time. Also — and this is the iconic workaround — you can get around issue 1 using the store_formula() and repeat_formula() methods, which get described later in this section.
Introduction 🦋
here's the quick lil intro to formulas and functions in Excel and Spreadsheet::WriteExcel, no cap.
A formula is just a string that begins with an equals sign:
'=A1+B1'
'=AVERAGE(1, 2, 3)'A formula can contain numbers, strings, boolean values, cell references, cell ranges and functions. Named ranges? Not supported, sorry. And write formulas the way they appear in Excel — cells and functions must be in uppercase.
Cells in Excel are referenced with the A1 notation system, where the column is a letter and the row is a number. Columns range from A to IV, i.e. 0 to 255. Rows range from 1 to 65536. The Spreadsheet::WriteExcel::Utility module included in the distro has helper functions for dealing with A1 notation, like:
use Spreadsheet::WriteExcel::Utility;
($row, $col) = xl_cell_to_rowcol('C2'); # (1, 2)
$str = xl_rowcol_to_cell(1, 2); # C2The Excel "$" notation in cell references is supported too, which lets you say whether a row or column is relative or absolute. It only matters if the cell gets copied. Here's the relative/absolute lineup:
'=A1' # Column and row are relative
'=$A1' # Column is absolute and row is relative
'=A$1' # Column is relative and row is absolute
'=$A$1' # Column and row are absoluteFormulas can also point at cells in other worksheets of the current workbook. Obsessed, honestly:
'=Sheet2!A1'
'=Sheet2!A1:A5'
'=Sheet2:Sheet3!A1'
'=Sheet2:Sheet3!A1:A5'
q{='Test Data'!A1}
q{='Test Data1:Test Data2'!A1}okay so the sheet reference and the cell reference are separated by ! — the exclamation mark, bestie, that's the whole vibe 💅 like Sheet1!A1.
If your worksheet names contain spaces, commas or parentheses, Excel is so picky and requires the name to be wrapped in single quotes — that's exactly what the last two examples up there ☝️ were doing. And to save yourself a million escape characters, you can use the quote operator q{} to protect those quotes. Peep perlop in the main Perl documentation for the deets 🫶.
Huge important thing: only valid sheet names that you've actually added with the add_worksheet() method can be used in formulas. And nope, you cannot reference external workbooks — not happening, not today 🙈.
the operator lineup ✨
The following lists every operator available in Excel's formulas. Most of them are the same as Perl's — the differences are flagged for you 👑
Arithmetic operators:
+— Addition — e.g.1+2-— Subtraction — e.g.2-1*— Multiplication — e.g.2*3/— Division — e.g.1/4^— Exponentiation — e.g.2^3—# Equivalent to **-— Unary minus — e.g.-(1+2)—# Not yet supported%— Percent (Not modulus) — e.g.13%—# Not supported, [1]
Comparison operators:
=— Equal to — e.g.A1 = B1—# Equivalent to ==<>— Not equal to — e.g.A1 <> B1—# Equivalent to !=>— Greater than — e.g.A1 > B1<— Less than — e.g.A1 < B1>=— Greater than or equal to — e.g.A1 >= B1<=— Less than or equal to — e.g.A1 <= B1
String operator:
&— Concatenation — e.g."Hello " & "World!"—# [2]
Reference operators:
:— Range operator — e.g.A1:A4—# [3],— Union operator — e.g.SUM(1, 2+2, B3)—# [4]
Notes:
[1]: You can get a percentage with formatting and modulus withMOD().[2]: Equivalent to ("Hello " . "World!") in Perl.[3]: This range is equivalent to cellsA1,A2,A3andA4.[4]: The comma behaves like the list separator in Perl.
okay so the range and comma operators can literally have different symbols in non-English versions of Excel 😭. Those will be supported in a later version of Spreadsheet::WriteExcel. European Excel users, take note bestie:
$worksheet->write('A1', '=SUM(1; 2; 3)'); # Wrong!!
$worksheet->write('A1', '=SUM(1, 2, 3)'); # Okaythe function hall of fame 👑
The following lists all of the core functions supported by Excel 5 and Spreadsheet::WriteExcel. Any extra functions you can get through the Analysis ToolPak or other add-ins? not supported, sorry bb. All of these ones have been tested to verify that they work 💯.
ABS DB INDIRECT NORMINV SLN
ACOS DCOUNT INFO NORMSDIST SLOPE
ACOSH DCOUNTA INT NORMSINV SMALL
ADDRESS DDB INTERCEPT NOT SQRT
AND DEGREES IPMT NOW STANDARDIZE
AREAS DEVSQ IRR NPER STDEV
ASIN DGET ISBLANK NPV STDEVP
ASINH DMAX ISERR ODD STEYX
ATAN DMIN ISERROR OFFSET SUBSTITUTE
ATAN2 DOLLAR ISLOGICAL OR SUBTOTAL
ATANH DPRODUCT ISNA PEARSON SUM
AVEDEV DSTDEV ISNONTEXT PERCENTILE SUMIF
AVERAGE DSTDEVP ISNUMBER PERCENTRANK SUMPRODUCT
BETADIST DSUM ISREF PERMUT SUMSQ
BETAINV DVAR ISTEXT PI SUMX2MY2
BINOMDIST DVARP KURT PMT SUMX2PY2
CALL ERROR.TYPE LARGE POISSON SUMXMY2
CEILING EVEN LEFT POWER SYD
CELL EXACT LEN PPMT T
CHAR EXP LINEST PROB TAN
CHIDIST EXPONDIST LN PRODUCT TANH
CHIINV FACT LOG PROPER TDIST
CHITEST FALSE LOG10 PV TEXT
CHOOSE FDIST LOGEST QUARTILE TIME
CLEAN FIND LOGINV RADIANS TIMEVALUE
CODE FINV LOGNORMDIST RAND TINV
COLUMN FISHER LOOKUP RANK TODAY
COLUMNS FISHERINV LOWER RATE TRANSPOSE
COMBIN FIXED MATCH REGISTER.ID TREND
CONCATENATE FLOOR MAX REPLACE TRIM
CONFIDENCE FORECAST MDETERM REPT TRIMMEAN
CORREL FREQUENCY MEDIAN RIGHT TRUE
COS FTEST MID ROMAN TRUNC
COSH FV MIN ROUND TTEST
COUNT GAMMADIST MINUTE ROUNDDOWN TYPE
COUNTA GAMMAINV MINVERSE ROUNDUP UPPER
COUNTBLANK GAMMALN MIRR ROW VALUE
COUNTIF GEOMEAN MMULT ROWS VAR
COVAR GROWTH MOD RSQ VARP
CRITBINOM HARMEAN MODE SEARCH VDB
DATE HLOOKUP MONTH SECOND VLOOKUP
DATEVALUE HOUR N SIGN WEEKDAY
DAVERAGE HYPGEOMDIST NA SIN WEIBULL
DAY IF NEGBINOMDIST SINH YEAR
DAYS360 INDEX NORMDIST SKEW ZTESTYou can also modify the module to support function names in the following languages: German, French, Spanish, Portuguese, Dutch, Finnish, Italian and Swedish 🌍. See the function_locale.pl program in the examples directory of the distro.
For a general introduction to Excel's formulas and an explanation of the syntax of the function, refer to the Excel help files or this thing: http://office.microsoft.com/en-us/assistance/CH062528031033.aspx.
if your formula's acting up 😭
If your formula doesn't work in Spreadsheet::WriteExcel, try this checklist bestie:
- Verify that the formula works in Excel (or Gnumeric or OpenOffice.org).
- Ensure that it isn't on the Caveats list shown above.
- Ensure that cell references and formula names are in uppercase.
- Ensure that you are using
:as the range operator,A1:A4. - Ensure that you are using
,as the union operator,SUM(1,2,3). - Ensure that the function is in the above table.
If you go through steps 1-6 and you still have a problem, mail me 🫶.
Improving performance when working with formulas ⚡
Writing a huge number of formulas with Spreadsheet::WriteExcel can be slow. Why? Because every single formula has to be parsed, and with the current implementation that is computationally expensive. it's giving expensive 💀
But! In a lot of cases the formulas you write will be pretty similar, like:
$worksheet->write_formula('B1', '=A1 * 3 + 50', $format);
$worksheet->write_formula('B2', '=A2 * 3 + 50', $format);
...
...
$worksheet->write_formula('B99', '=A999 * 3 + 50', $format);
$worksheet->write_formula('B1000', '=A1000 * 3 + 50', $format);In this example the cell reference changes in iterations from A1 to A1000. The parser treats this variable as a token and arranges it according to predefined rules. But since the parser is oblivious to the value of the token, it is essentially performing the same calculation 1000 times. Inefficient, no cap.
The way to dodge that inefficiency — and thereby speed up the writing of formulas — is to parse the formula once and then repeatedly substitute similar tokens ✨.
A formula can be parsed and stored via the store_formula() worksheet method. Then you can use the repeat_formula() method to substitute $pattern, $replace pairs in the stored formula:
my $formula = $worksheet->store_formula('=A1 * 3 + 50');
for my $row (0..999) {
$worksheet->repeat_formula($row, 1, $formula, $format, 'A1', 'A'.($row +1));
}On an arbitrary test machine this method was 10 times faster than the brute force method shown above 👑🔥.
For more info about how Spreadsheet::WriteExcel parses and stores formulas, see the Spreadsheet::WriteExcel::Formula man page.
It should be noted however that the overall speed of direct formula parsing will be improved in a future version. so watch this space ig 💅
✨ EXAMPLES ✨
See Spreadsheet::WriteExcel::Examples for a full list of examples.
Example 1
The following example shows some of the basic features of Spreadsheet::WriteExcel 🎀
#!/usr/bin/perl -w
use strict;
use Spreadsheet::WriteExcel;
# Create a new workbook called simple.xls and add a worksheet
my $workbook = Spreadsheet::WriteExcel->new('simple.xls');
my $worksheet = $workbook->add_worksheet();
# The general syntax is write($row, $column, $token). Note that row and
# column are zero indexed
# Write some text
$worksheet->write(0, 0, 'Hi Excel!');
# Write some numbers
$worksheet->write(2, 0, 3); # Writes 3
$worksheet->write(3, 0, 3.00000); # Writes 3
$worksheet->write(4, 0, 3.00001); # Writes 3.00001
$worksheet->write(5, 0, 3.14159); # TeX revision no.?
# Write some formulas
$worksheet->write(7, 0, '=A3 + A6');
$worksheet->write(8, 0, '=IF(A5>3,"Yes", "No")');
# Write a hyperlink
$worksheet->write(10, 0, 'http://www.perl.com/');Example 2
The following is a general example which demonstrates some features of working with multiple worksheets 🦋
#!/usr/bin/perl -w
use strict;
use Spreadsheet::WriteExcel;
# Create a new Excel workbook
my $workbook = Spreadsheet::WriteExcel->new('regions.xls');
# Add some worksheets
my $north = $workbook->add_worksheet('North');
my $south = $workbook->add_worksheet('South');
my $east = $workbook->add_worksheet('East');
my $west = $workbook->add_worksheet('West');
# Add a Format
my $format = $workbook->add_format();
$format->set_bold();
$format->set_color('blue');
# Add a caption to each worksheet
foreach my $worksheet ($workbook->sheets()) {
$worksheet->write(0, 0, 'Sales', $format);
}Example 3 💅
Okay so this example is all about using a conditional numerical format with colours to show whether a share price has gone up or down. It’s giving “spreadsheet but make it emotionally readable,” honestly. Slay.
use strict;
use Spreadsheet::WriteExcel;
# Create a new workbook and add a worksheet
my $workbook = Spreadsheet::WriteExcel->new('stocks.xls');
my $worksheet = $workbook->add_worksheet();
# Set the column width for columns 1, 2, 3 and 4
$worksheet->set_column(0, 3, 15);
# Create a format for the column headings
my $header = $workbook->add_format();
$header->set_bold();
$header->set_size(12);
$header->set_color('blue');
# Create a format for the stock price
my $f_price = $workbook->add_format();
$f_price->set_align('left');
$f_price->set_num_format('$0.00');
# Create a format for the stock volume
my $f_volume = $workbook->add_format();
$f_volume->set_align('left');
$f_volume->set_num_format('#,##0');
# Create a format for the price change. This is an example of a
# conditional format. The number is formatted as a percentage. If it is
# positive it is formatted in green, if it is negative it is formatted
# in red and if it is zero it is formatted as the default font colour
# (in this case black). Note: the [Green] format produces an unappealing
# lime green. Try [Color 10] instead for a dark green.
#
my $f_change = $workbook->add_format();
$f_change->set_align('left');
$f_change->set_num_format('[Green]0.0%;[Red]-0.0%;0.0%');
# Write out the data
$worksheet->write(0, 0, 'Company',$header);
$worksheet->write(0, 1, 'Price', $header);
$worksheet->write(0, 2, 'Volume', $header);
$worksheet->write(0, 3, 'Change', $header);
$worksheet->write(1, 0, 'Damage Inc.' );
$worksheet->write(1, 1, 30.25, $f_price ); # $30.25
$worksheet->write(1, 2, 1234567, $f_volume); # 1,234,567
$worksheet->write(1, 3, 0.085, $f_change); # 8.5% in green
$worksheet->write(2, 0, 'Dump Corp.' );
$worksheet->write(2, 1, 1.56, $f_price ); # $1.56
$worksheet->write(2, 2, 7564, $f_volume); # 7,564
$worksheet->write(2, 3, -0.015, $f_change); # -1.5% in red
$worksheet->write(3, 0, 'Rev Ltd.' );
$worksheet->write(3, 1, 0.13, $f_price ); # $0.13
$worksheet->write(3, 2, 321, $f_volume); # 321
$worksheet->write(3, 3, 0, $f_change); # 0 in the font color (black)Lowkey iconic detail: the [Green] format gives you an unappealing lime green. The comment says try [Color 10] instead if you want a dark green. Noted, bestie.
Example 4 ✨
This one is a simple example of using functions. It’s basically “let the spreadsheet do math so you don’t have to,” which is very main character energy. No cap.
#!/usr/bin/perl -w
use strict;
use Spreadsheet::WriteExcel;
# Create a new workbook and add a worksheet
my $workbook = Spreadsheet::WriteExcel->new('stats.xls');
my $worksheet = $workbook->add_worksheet('Test data');
# Set the column width for columns 1
$worksheet->set_column(0, 0, 20);
# Create a format for the headings
my $format = $workbook->add_format();
$format->set_bold();
# Write the sample data
$worksheet->write(0, 0, 'Sample', $format);
$worksheet->write(0, 1, 1);
$worksheet->write(0, 2, 2);
$worksheet->write(0, 3, 3);
$worksheet->write(0, 4, 4);
$worksheet->write(0, 5, 5);
$worksheet->write(0, 6, 6);
$worksheet->write(0, 7, 7);
$worksheet->write(0, 8, 8);
$worksheet->write(1, 0, 'Length', $format);
$worksheet->write(1, 1, 25.4);
$worksheet->write(1, 2, 25.4);
$worksheet->write(1, 3, 24.8);
$worksheet->write(1, 4, 25.0);
$worksheet->write(1, 5, 25.3);
$worksheet->write(1, 6, 24.9);
$worksheet->write(1, 7, 25.2);
$worksheet->write(1, 8, 24.8);
# Write some statistical functions
$worksheet->write(4, 0, 'Count', $format);
$worksheet->write(4, 1, '=COUNT(B1:I1)');
$worksheet->write(5, 0, 'Sum', $format);
$worksheet->write(5, 1, '=SUM(B2:I2)');
$worksheet->write(6, 0, 'Average', $format);
$worksheet->write(6, 1, '=AVERAGE(B2:I2)');
$worksheet->write(7, 0, 'Min', $format);
$worksheet->write(7, 1, '=MIN(B2:I2)');
$worksheet->write(8, 0, 'Max', $format);
$worksheet->write(8, 1, '=MAX(B2:I2)');
$worksheet->write(9, 0, 'Standard Deviation', $format);
$worksheet->write(9, 1, '=STDEV(B2:I2)');
$worksheet->write(10, 0, 'Kurtosis', $format);
$worksheet->write(10, 1, '=KURT(B2:I2)');Example 5 🦋
This example converts a tab separated file called tab.txt into an Excel file called tab.xls. It’s a lil glow-up pipeline: text file in, spreadsheet out. Periodt.
#!/usr/bin/perl -w
use strict;
use Spreadsheet::WriteExcel;
open (TABFILE, 'tab.txt') or die "tab.txt: $!";
my $workbook = Spreadsheet::WriteExcel->new('tab.xls');
my $worksheet = $workbook->add_worksheet();
# Row and column are zero indexed
my $row = 0;
while (<TABFILE>) {
chomp;
# Split on single tab
my @Fld = split('\t', $_);
my $col = 0;
foreach my $token (@Fld) {
$worksheet->write($row, $col, $token);
$col++;
}
$row++;
}NOTE: This is a simple conversion program for illustrative purposes only. For converting a CSV or Tab separated or any other type of delimited text file to Excel I recommend the more rigorouscsv2xlsprogram that is part of H.Merijn Brand'sText::CSV_XSmodule distro.
See the examples/csv2xls link here: http://search.cpan.org/~hmbrand/Text-CSV_XS/MANIFEST.
Additional Examples 🎀
Here’s the rundown of the example files that ship in the standard Spreadsheet::WriteExcel distribution — they show off the different features and options of the module. See Spreadsheet::WriteExcel::Examples for more details. Basically a whole demo folder of fun.
Getting started ✨
a_simple.pl— a get-started example with some basic features.demo.pl— a demo of some of the available features.regions.pl— a simple example of multiple worksheets.stats.pl— basic formulas and functions.formats.pl— all the available formatting on several worksheets.bug_report.pl— a template for submitting bug reports.
Advanced 🚀
autofilter.pl— examples of worksheet autofilters.autofit.pl— simulate Excel's autofit for column widths.bigfile.pl— write past the 7MB limit withOLE::Storage_Lite.cgi.pl— a simple CGI program.chart_area.pl— a demo of area style charts.chart_bar.pl— a demo of bar (vertical histogram) style charts.chart_column.pl— a demo of column (histogram) style charts.chart_line.pl— a demo of line style charts.chart_pie.pl— a demo of pie style charts.chart_scatter.pl— a demo of scatter style charts.chart_stock.pl— a demo of stock style charts.chess.pl— an example of reusing formatting via properties.colors.pl— a demo of the colour palette and named colours.comments1.pl— add comments to worksheet cells.comments2.pl— add comments with advanced options.copyformat.pl— example of copying a cell format.data_validate.pl— an example of data validation and dropdown lists.date_time.pl— write dates and times withwrite_date_time().defined_name.pl— example of how to create defined names.diag_border.pl— a simple example of diagonal cell borders.easter_egg.pl— expose the Excel97 flight simulator.filehandle.pl— examples of working with filehandles.formula_result.pl— formulas with user specified results.headers.pl— examples of worksheet headers and footers.hide_sheet.pl— simple example of hiding a worksheet.hyperlink1.pl— shows how to create web hyperlinks.hyperlink2.pl— examples of internal and external hyperlinks.images.pl— adding images to worksheets.indent.pl— an example of cell indentation.merge1.pl— a simple example of cell merging.merge2.pl— a simple example of cell merging with formatting.merge3.pl— add hyperlinks to merged cells.merge4.pl— an advanced example of merging with formatting.merge5.pl— an advanced example of merging with formatting.merge6.pl— an example of merging with Unicode strings.mod_perl1.pl— a simple mod_perl 1 program.mod_perl2.pl— a simple mod_perl 2 program.outline.pl— an example of outlines and grouping.outline_collapsed.pl— an example of collapsed outlines.panes.pl— an example of how to create panes.properties.pl— add document properties to a workbook.protection.pl— example of cell locking and formula hiding.repeat.pl— example of writing repeated formulas.right_to_left.pl— change default sheet direction to right to left.row_wrap.pl— how to wrap data from one worksheet onto another.sales.pl— an example of a simple sales spreadsheet.sendmail.pl— send an Excel email attachment usingMail::Sender.stats_ext.pl— same asstats.plwith external references.stocks.pl— demonstrates conditional formatting.tab_colors.pl— example of how to set worksheet tab colours.textwrap.pl— demonstrates text wrapping options.win32ole.pl— a sampleWin32::OLEexample for comparison.write_arrays.pl— example of writing 1D or 2D arrays of data.write_handler1.pl— example of extending thewrite()method. Step 1.write_handler2.pl— example of extending thewrite()method. Step 2.write_handler3.pl— example of extending thewrite()method. Step 3.write_handler4.pl— example of extending thewrite()method. Step 4.write_to_scalar.pl— example of writing an Excel file to a Perl scalar.
🌈 Unicode 🌈
okay bestie, these are the Unicode example scripts, and they are absolutely serving range:
unicode_utf16.pl— simple example of using Unicode UTF16 strings. ✨unicode_utf16_japan.pl— write Japanese Unicode strings using UTF-16.unicode_cyrillic.pl— write Russian Cyrillic strings using UTF-8.unicode_list.pl— list the chars in a Unicode font.unicode_2022_jp.pl— Japanese:ISO-2022-JPto utf8 in perl 5.8.unicode_8859_11.pl— Thai:ISO-8859_11to utf8 in perl 5.8.unicode_8859_7.pl— Greek:ISO-8859_7to utf8 in perl 5.8.unicode_big5.pl— Chinese:BIG5to utf8 in perl 5.8.unicode_cp1251.pl— Russian:CP1251to utf8 in perl 5.8.unicode_cp1256.pl— Arabic:CP1256to utf8 in perl 5.8.unicode_koi8r.pl— Russian:KOI8-Rto utf8 in perl 5.8.unicode_polish_utf8.pl— Polish:UTF8to utf8 in perl 5.8.unicode_shift_jis.pl— Japanese:Shift JISto utf8 in perl 5.8.
🧰 Utility 🧰
these are the little utility besties, no cap:
csv2xls.pl— program to convert a CSV file to an Excel file.tab2xls.pl— program to convert a tab separated file to xls.datecalc1.pl— convert Unix/Perl time to Excel time.datecalc2.pl— calculate an Excel date usingDate::Calc.lecxe.pl— convert Excel to WriteExcel usingWin32::OLE.
🛠️ Developer 🛠️
for the devs poking at the internals, we have:
convertA1.pl— helper functions for dealing with A1 notation.function_locale.pl— add non-English function names toFormula.pm.writeA1.pl— example of how to extend the module.
💀 LIMITATIONS 💀
the following limits are imposed by Excel:
- maximum number of chars in a string —
32767 - maximum number of columns —
256 - maximum number of rows —
65536 - maximum chars in a sheet name —
31 - maximum chars in a header/footer —
254
for Excel 2007+ file limits see the Excel::Writer::XLSX module.
the minimum file size is 6K due to the OLE overhead. the maximum file size is approximately 7MB (7087104 bytes) of BIFF data. this can be extended by installing Takanori Kawai's OLE::Storage_Lite module — http://search.cpan.org/search?dist=OLE-Storage_Lite — see the bigfile.pl example in the examples directory of the distro.
🍓 DOWNLOADING 🍓
the latest version of this module is always available at:
http://search.cpan.org/search?dist=Spreadsheet-WriteExcel/🎀 REQUIREMENTS 🎀
this module requires Perl >= 5.005, Parse::RecDescent, File::Temp and OLE::Storage_Lite:
http://search.cpan.org/search?dist=Parse-RecDescent/ # For formulas.
http://search.cpan.org/search?dist=File-Temp/ # For set_tempdir().
http://search.cpan.org/search?dist=OLE-Storage_Lite/ # For files > 7MB.note, these aren't strict requirements. Spreadsheet::WriteExcel will work without these modules if you don't use write_formula(), set_tempdir() or create files greater than 7MB. however, it is best to install them if possible and they will be installed automatically if you use a tool such as CPAN.pm or ppm.
🧚 INSTALLATION 🧚
see the INSTALL or install.html docs that come with the distribution or:
http://search.cpan.org/src/JMCNAMARA/Spreadsheet-WriteExcel-2.31/INSTALL🌈 PORTABILITY 🌈
Spreadsheet::WriteExcel will work on the majority of Windows, UNIX and Macintosh platforms. specifically, the module will work on any system where perl packs floats in the 64 bit IEEE format. the float must also be in little-endian format but it will be reversed if necessary. thus:
print join(' ', map { sprintf '%#02x', $_ } unpack('C*', pack 'd', 1.2345)), "\n";should give (or in reverse order):
0x8d 0x97 0x6e 0x12 0x83 0xc0 0xf3 0x3fin general, if you don't know whether your system supports a 64 bit IEEE float or not, it probably does. if your system doesn't, WriteExcel will croak() with the message given in the DIAGNOSTICS section. you can check which platforms the module has been tested on at the CPAN testers site:
http://testers.cpan.org/search?request=dist&dist=Spreadsheet-WriteExcel💅 DIAGNOSTICS 💅
Filename required by Spreadsheet::WriteExcel->new()— a filename must be given in the constructor.Can't open filename. It may be in use or protected.— the file cannot be opened for writing. the directory that you are writing to may be protected or the file may be in use by another program.Unable to create tmp files via File::Temp::tempfile()...— this is a-wwarning. you will see it if you are usingSpreadsheet::WriteExcelin an environment where temporary files cannot be created, in which case all data will be stored in memory. the warning is for information only: it does not affect creation but it will affect the speed of execution for large files. see theset_tempdirworkbook method.Maximum file size, 7087104, exceeded.— the current OLE implementation only supports a maximum BIFF file of this size. this limit can be extended, see the LIMITATIONS section.Can't locate Parse/RecDescent.pm in @INC ...—Spreadsheet::WriteExcelrequires theParse::RecDescentmodule. download it from CPAN:http://search.cpan.org/search?dist=Parse-RecDescentCouldn't parse formula ...— there are a large number of warnings which relate to badly formed formulas and functions. see the FORMULAS AND FUNCTIONS IN EXCEL section for suggestions on how to avoid these errors. you should also check the formula in Excel to ensure that it is valid.Required floating point format not supported on this platform.— operating system doesn't support 64 bit IEEE float or it is byte-ordered in a way unknown to WriteExcel.'file.xls' cannot be accessed. The file may be read-only ...— you may sometimes encounter the following error when trying to open a file in Excel: "file.xls cannot be accessed. The file may be read-only, or you may be trying to access a read-only location. Or, the server the document is stored on may not be responding."
this error generally means that the Excel file has been corrupted. there are two likely causes of this: the file was FTPed in ASCII mode instead of binary mode or else the file was created with UTF-8 data returned by an XML parser. see "Warning about XML::Parser and perl 5.6" for further details.
👑 THE EXCEL BINARY FORMAT 👑
the following is some general information about the Excel binary format for anyone who may be interested.
Excel data is stored in the "Binary Interchange File Format" (BIFF) file format. details of this format are given in "Excel 97-2007 Binary File Format Specification" — http://www.microsoft.com/interop/docs/OfficeBinaryFormats.mspx.
Daniel Rentz of OpenOffice.org has also written a detailed description of the Excel workbook records, see http://sc.openoffice.org/excelfileformat.pdf.
Charles Wybble has collected together additional information about the Excel file format. see "The Chicago Project" at http://chicago.sourceforge.net/devel/.
the BIFF data is stored along with other data in an OLE Compound File. this is a structured storage which acts like a file system within a file. a Compound File is comprised of storages and streams which, to follow the file system analogy, are like directories and files.
the OLE format is explained in the "Windows Compound Binary File Format Specification" — http://www.microsoft.com/interop/docs/supportingtechnologies.mspx.
the Digital Imaging Group have also detailed the OLE format in the JPEG2000 specification: see Appendix A of http://www.i3a.org/pdf/wg1n1017.pdf.
please note that the provision of this information does not constitute an invitation to start hacking at the BIFF or OLE file formats. there are more interesting ways to waste your time. ;-)
✨ WRITING EXCEL FILES ✨
Okay bestie, depending on ur requirements, background, and general sensibilities, you may prefer one of these methods of getting data into Excel. Pick ur fighter:
- Win32::OLE module and office automation — This requires a Windows platform and an installed copy of Excel. This is the most powerful and complete method for interfacing with Excel. See
<http://www.activestate.com/ASPN/Reference/Products/ActivePerl-5.6/faq/Windows/ActivePerl-Winfaq12.html>and<http://www.activestate.com/ASPN/Reference/Products/ActivePerl-5.6/site/lib/Win32/OLE.html>. If your main platform is UNIX but you have the resources to set up a separate Win32/MSOffice server, you can convert office documents to text, postscript or PDF using Win32::OLE. For a demonstration of how to do this using Perl see Docserver:<http://search.cpan.org/search?mode=module&query=docserver>. - CSV, comma separated variables or text — If the file extension is
csv, Excel will open and convert this format automatically. Generating a valid CSV file isn't as easy as it seems. Have a look at theDBD::RAM,DBD::CSV,Text::xSVandText::CSV_XSmodules. - DBI with DBD::ADO or DBD::ODBC — Excel files contain an internal index table that allows them to act like a database file. Using one of the standard Perl database modules you can connect to an Excel file as a database.
- DBD::Excel — You can also access
Spreadsheet::WriteExcelusing the standard DBI interface via Takanori Kawai'sDBD::Excelmodule<http://search.cpan.org/dist/DBD-Excel>. - Spreadsheet::WriteExcelXML — This module allows you to create an Excel XML file using the same interface as
Spreadsheet::WriteExcel. See:<http://search.cpan.org/dist/Spreadsheet-WriteExcelXML>. - Excel::Template — This module allows you to create an Excel file from an XML template in a manner similar to
HTML::Template. See<http://search.cpan.org/dist/Excel-Template/>. - Spreadsheet::WriteExcel::FromXML — This module allows you to turn a simple XML file into an Excel file using
Spreadsheet::WriteExcelas a back-end. The format of the XML file is defined by a supplied DTD:<http://search.cpan.org/dist/Spreadsheet-WriteExcel-FromXML>. - Spreadsheet::WriteExcel::Simple — This provides an easier interface to
Spreadsheet::WriteExcel:<http://search.cpan.org/dist/Spreadsheet-WriteExcel-Simple>. - Spreadsheet::WriteExcel::FromDB — This is a useful module for creating Excel files directly from a DB table:
<http://search.cpan.org/dist/Spreadsheet-WriteExcel-FromDB>. - HTML tables — This is an easy way of adding formatting via a text based format.
- XML or HTML — The Excel XML and HTML file specification are available from
<http://msdn.microsoft.com/library/officedev/ofxml2k/ofxml2k.htm>.
For other Perl-Excel modules try the following search: <http://search.cpan.org/search?mode=module&query=excel>.
👀 READING EXCEL FILES 👀
To read data from Excel files try:
- Spreadsheet::ParseExcel — This uses the
OLE::Storage-Litemodule to extract data from an Excel file.<http://search.cpan.org/dist/Spreadsheet-ParseExcel>. - Spreadsheet::ParseExcel_XLHTML — This module uses
Spreadsheet::ParseExcel's interface but usesxlHtml(see below) to do the conversion:<http://search.cpan.org/dist/Spreadsheet-ParseExcel_XLHTML>and then, yes, the manpage just saysSpreadsheet::ParseExcel_XLHTMLagain right after the link. Iconic. - xlHtml — This is an open source
Excel to HTML ConverterC/C++ project at<http://chicago.sourceforge.net/xlhtml/>. - DBD::Excel (reading) — You can also access
Spreadsheet::ParseExcelusing the standard DBI interface via Takanori Kawai'sDBD::Excelmodule<http://search.cpan.org/dist/DBD-Excel>. - Win32::OLE module and office automation (reading) — See the section
WRITING EXCEL FILES. - HTML tables (reading) — If the files are saved from Excel in a HTML format the data can be accessed using
HTML::TableExtract<http://search.cpan.org/dist/HTML-TableExtract>. - DBI with DBD::ADO or DBD::ODBC — See the section
WRITING EXCEL FILES. - XML::Excel — Converts Excel files to XML using
Spreadsheet::ParseExcel<http://search.cpan.org/dist/XML-Excel>. - OLE::Storage, aka LAOLA — This is a Perl interface to OLE file formats. In particular, the distro contains an Excel to HTML converter called Herbert,
<http://user.cs.tu-berlin.de/~schwartz/pmh/>. This has been superseded by theSpreadsheet::ParseExcelmodule.
For other Perl-Excel modules try the following search: <http://search.cpan.org/search?mode=module&query=excel>.
If you wish to view Excel files on a UNIX/Linux platform check out the excellent Gnumeric spreadsheet application at <http://www.gnome.org/projects/gnumeric/> or OpenOffice.org at <http://www.openoffice.org/>.
If you wish to view Excel files on a Windows platform which doesn't have Excel installed you can use the free Microsoft Excel Viewer <http://office.microsoft.com/downloads/2000/xlviewer.aspx>.
🛠️ MODIFYING AND REWRITING EXCEL FILES 🛠️
An Excel file is a binary file within a binary file. It contains several interlinked checksums and changing even one byte can cause it to become corrupted. Literally one byte, bestie. Do not play with it.
As such you cannot simply append or update an Excel file. The only way to achieve this is to read the entire file into memory, make the required changes or additions and then write the file out again.
You can read and rewrite an Excel file using the Spreadsheet::ParseExcel::SaveParser module which is a wrapper around Spreadsheet::ParseExcel and Spreadsheet::WriteExcel. It is part of the Spreadsheet::ParseExcel package: <http://search.cpan.org/search?dist=Spreadsheet-ParseExcel>.
However, you can only rewrite the features that Spreadsheet::WriteExcel supports so macros, graphs and some other features in the original Excel file will be lost. Also, formulas aren't rewritten, only the result of a formula is written.
Here is an example:
#!/usr/bin/perl -w
use strict;
use Spreadsheet::ParseExcel;
use Spreadsheet::ParseExcel::SaveParser;
# Open the template with SaveParser
my $parser = new Spreadsheet::ParseExcel::SaveParser;
my $template = $parser->Parse('template.xls');
my $sheet = 0;
my $row = 0;
my $col = 0;
# Get the format from the cell
my $format = $template->{Worksheet}[$sheet]
->{Cells}[$row][$col]
->{FormatNo};
# Write data to some cells
$template->AddCell(0, $row, $col, 1, $format);
$template->AddCell(0, $row+1, $col, "Hello", $format);
# Add a new worksheet
$template->AddWorksheet('New Data');
# The SaveParser SaveAs() method returns a reference to a
# Spreadsheet::WriteExcel object. If you wish you can then
# use this to access any of the methods that aren't
# available from the SaveParser object. If you don't need
# to do this just use SaveAs().
#
my $workbook;
{
# SaveAs generates a lot of harmless warnings about unset
# Worksheet properties. You can ignore them if you wish.
local $^W = 0;
# Rewrite the file or save as a new file
$workbook = $template->SaveAs('new.xls');
}
# Use Spreadsheet::WriteExcel methods
my $worksheet = $workbook->sheets(0);
$worksheet->write($row+2, $col, "World2");
$workbook->close();⚠️ Warning about XML::Parser and perl 5.6 ⚠️
You must be careful when using Spreadsheet::WriteExcel in conjunction with perl 5.6 and XML::Parser (and other XML parsers) due to the fact that the data returned by the parser is generally in "UTF-8" format.
When "UTF-8" strings are added to Spreadsheet::WriteExcel's internal data it causes the generated Excel file to become corrupt.
Note, this doesn't affect perl 5.005 (which doesn't try to handle "UTF-8") or 5.8 (which handles it correctly).
To avoid this problem you should upgrade to perl 5.8, if possible, or else you should convert the output data from XML::Parser to ASCII or ISO-8859-1 using one of the following methods:
$new_str = pack 'C*', unpack 'U*', $utf8_str;
use Unicode::MapUTF8 'from_utf8';
$new_str = from_utf8({-str => $utf8_str, -charset => 'ISO-8859-1'});⚠️ Warning about Office Service Pack 3 ⚠️
If you have Office Service Pack 3 (SP3) installed you may see the following warning when you open a file created by Spreadsheet::WriteExcel:
"File Error: data may have been lost"This is usually caused by multiple instances of data in a cell.
SP3 changed Excel's default behaviour when it encounters multiple data in a cell so that it issues a warning when the file is opened and it displays the first data that was written. Prior to SP3 it didn't issue a warning and displayed the last data written.
For a longer discussion and some workarounds see the following: <http://groups.google.com/group/spreadsheet-writeexcel/browse_thread/thread/3dcea40e6620af3a>.
🐛 BUGS 🐛
- Formulas are formulae.
- XML and
"UTF-8"data on perl 5.6 can cause Excel files created bySpreadsheet::WriteExcelto become corrupt. See"Warning about XML::Parser and perl 5.6"for further details. - The format object that is used with a
merge_range()method call is marked internally as being associated with a merged range. It is a fatal error to use a merged format in a non-merged cell. The current workaround is to use separate formats for merged and non-merged cell. This restriction will be removed in a future release. - Nested formulas sometimes aren't parsed correctly and give a result of
"#VALUE". If you come across a formula that parses like this, let me know. Spreadsheet::ParseExcel: All formulas created bySpreadsheet::WriteExcelare read as having a value of zero. This is becauseSpreadsheet::WriteExcelonly stores the formula and not the calculated result.OpenOffice.org: No known issues in this release.Gnumeric: No known issues in this release.
If you wish to submit a bug report run the bug_report.pl program in the examples directory of the distro.
🚀 Migrating to Excel::Writer::XLSX 🚀
okay so real talk bestie: Spreadsheet::WriteExcel is in maintenance only mode and has effectively been superseded by Excel::Writer::XLSX. no cap.
Excel::Writer::XLSX is an API compatible, drop-in replacement for Spreadsheet::WriteExcel. it also has way more features, like conditional formats, better charts, better formula handling, Excel tables and even sparklines. it's giving glow-up 💅✨
to convert your Spreadsheet::WriteExcel program to Excel::Writer::XLSX you only need to do this:
- Substitute
Excel::Writer::XLSXforSpreadsheet::WriteExcelin your program. - Change the file extension of the output file from
.xlsto.xlsx. - Optionally replace
store_formula()andrepeat_formula()withwrite_formula(), which is no longer an expensive operation inExcel::Writer::XLSX. but you can leave them unchanged if required — lowkey flexible.
there are some differences between the formats and the modules that are worth noting:
- The default font in the XLSX format is Calibri 11, not Arial 10.
- Default column widths and row heights are different between XLS and XLSX.
- The
Excel::Writer::XLSXmodule uses more memory by default but has an optimisation mode to reduce usage for large files. - The XLSX format doesn't have reading support that is as complete as
Spreadsheet::ParseExcel.
📦 REPOSITORY 📦
the Spreadsheet::WriteExcel source code is hosted on github:
http://github.com/jmcnamara/spreadsheet-writeexcel
go stare at it, it's iconic.
💌 MAILING LIST 💌
there's a Google group for discussing and asking questions about Spreadsheet::WriteExcel. it's a good place to search first and see if your question has been asked before:
http://groups.google.com/group/spreadsheet-writeexcel
alternatively you can keep up to date with future releases by subscribing at:
http://freshmeat.net/projects/writeexcel/
💸 DONATIONS 💸
if you'd care to donate to the Spreadsheet::WriteExcel project, you can do so via PayPal:
no pressure, but if you're feeling generous, slay 🫶
👀 SEE ALSO 👀
Spreadsheet::ParseExcel:http://search.cpan.org/dist/Spreadsheet-ParseExcelSpreadsheet-WriteExcel-FromXML:http://search.cpan.org/dist/Spreadsheet-WriteExcel-FromXMLSpreadsheet::WriteExcel::FromDB:http://search.cpan.org/dist/Spreadsheet-WriteExcel-FromDBExcel::Template:http://search.cpan.org/~rkinyon/Excel-Template/DateTime::Format::Excel:http://search.cpan.org/dist/DateTime-Format-Excel- "Reading and writing Excel files with Perl" by Teodor Zlatanov, at IBM developerWorks:
http://www-106.ibm.com/developerworks/library/l-pexcel/ - "Excel-Dateien mit Perl erstellen - Controller im Gluck" by Peter Dintelmann and Christian Kirsch in the German Unix/web journal iX:
http://www.heise.de/ix/artikel/2001/06/175/ Spreadsheet::WriteExceldocumentation in Japanese by Takanori Kawai:http://member.nifty.ne.jp/hippo2000/perltips/Spreadsheet/WriteExcel.htm- Oesterly user brushes with fame:
http://oesterly.com/releases/12102000.html - The
csv2xlsprogram that is part ofText::CSV_XS:http://search.cpan.org/~hmbrand/Text-CSV_XS/MANIFEST
🌸 ACKNOWLEDGMENTS 🌸
the following people contributed to the debugging and testing of Spreadsheet::WriteExcel:
Alexander Farber, Andre de Bruin, Arthur@ais, Artur Silveira da Cunha, Bob Rose, Borgar Olsen, Brian Foley, Brian White, Bob Mackay, Cedric Bouvier, Chad Johnson, CPAN testers, Damyan Ivanov, Daniel Berger, Daniel Gardner, Dmitry Kochurov, Eric Frazier, Ernesto Baschny, Felipe Perez Galiana, Gordon Simpson, Hanc Pavel, Harold Bamford, James Holmes, James Wilkinson, Johan Ekenberg, Johann Hanne, Jonathan Scott Duff, J.C. Wren, Kenneth Stacey, Keith Miller, Kyle Krom, Marc Rosenthal, Markus Schmitz, Michael Braig, Michael Buschauer, Mike Blazer, Michael Erickson, Michael W J West, Ning Xie, Paul J. Falbe, Paul Medynski, Peter Dintelmann, Pierre Laplante, Praveen Kotha, Reto Badertscher, Rich Sorden, Shane Ashby, Sharron McKenzie, Shenyu Zheng, Stephan Loescher, Steve Sapovits, Sven Passig, Svetoslav Marinov, Tamas Gulacsi, Troy Daniels, Vahe Sarkissian.
the following people contributed patches, examples or Excel information:
Andrew Benham, Bill Young, Cedric Bouvier, Charles Wybble, Daniel Rentz, David Robins, Franco Venturi, Guy Albertelli, Ian Penman, John Heitmann, Jon Guy, Kyle R. Burton, Pierre-Jean Vouette, Rubio, Marco Geri, Mark Fowler, Matisse Enzer, Sam Kington, Takanori Kawai, Tom O'Sullivan.
many thanks to Ron McKelvey, Ronzo Consulting for Siemens, who sponsored the development of the formula caching routines.
many thanks to Cassens Transport who sponsored the development of the embedded charts and autofilters.
additional thanks to Takanori Kawai for translating the documentation into Japanese.
Gunnar Wolf maintains the Debian distro.
thanks to Damian Conway for the excellent Parse::RecDescent.
thanks to Tim Jenness for File::Temp.
thanks to Michael Meeks and Jody Goldberg for their work on Gnumeric.
⚠️ DISCLAIMER OF WARRANTY ⚠️
because this software is licensed free of charge, there is no warranty for the software, to the extent permitted by applicable law. except when otherwise stated in writing the copyright holders and/or other parties provide the software "as is" without warranty of any kind, either expressed or implied, including, but not limited to, the implied warranties of merchantability and fitness for a particular purpose. the entire risk as to the quality and performance of the software is with you. should the software prove defective, you assume the cost of all necessary servicing, repair, or correction. 😭
in no event unless required by applicable law or agreed to in writing will any copyright holder, or any other party who may modify and/or redistribute the software as permitted by the above licence, be liable to you for damages, including any general, special, incidental, or consequential damages arising out of the use or inability to use the software (including but not limited to loss of data or data being rendered inaccurate or losses sustained by you or third parties or a failure of the software to operate with any other software), even if such holder or other party has been advised of the possibility of such damages.
like… fr fr read that one carefully bestie.
📜 LICENSE 📜
either the Perl Artistic Licence:
http://dev.perl.org/licenses/artistic.html
or the GPL:
http://www.opensource.org/licenses/gpl-license.php
👑 AUTHOR 👑
John McNamara jmcnamara@cpan.org
The ashtray says
You were up all night.
When you went to bed
With your darkest mind.
Your pillow wept
And covered your eyes.
And you finally slept
While the sun caught fire.
You've changed.
-- Jeff Tweedy©️ COPYRIGHT ©️
Copyright MM-MMXII, John McNamara.
All Rights Reserved. This module is free software. It may be used, redistributed and/or modified under the same terms as Perl itself.
and that's the whole vibe bestie 💖 this page came from perl v5.42.0, dated 2023-10-05, and the footer squished the name into Spreads...iteExcel(3) — iconic honestly ✨🎀
📦 where this page comes from
- opensuse-leap 16.0: perl-Spreadsheet-WriteExcel 2.40-bp160.1.11 · Artistic-1.0 OR GPL-1.0-or-later
- opensuse-leap 16.0: perl-Spreadsheet-WriteExcel 2.40-bp160.1.11 · Artistic-1.0 OR GPL-1.0-or-later
- opensuse-leap 16.0: perl-Spreadsheet-WriteExcel 2.40-bp160.1.11 · Artistic-1.0 OR GPL-1.0-or-later
- opensuse-leap 16.0: perl-Spreadsheet-WriteExcel 2.40-bp160.1.11 · Artistic-1.0 OR GPL-1.0-or-later
- 💖 girlified by deepseek-ai/DeepSeek-V4.1-Flash-1017 on : a language model's rewrite of the original, under its terms