VIRT-SCENARIO(1)
🦋 virt-scenario(1) — the manual page, but make it make sense 💅
okay bestie, so this is virt-scenario — a lil tool that creates an XML config AND preps your host for a specific scenario. one manual page, two parts, and this is part 1, so buckle up 🎀
✨ NAME ✨
virt-scenario — Create XML config and prepare host for a specific scenario 🌸
🔥 GOALS 🔥
So this is an EXPERIMENTATION project for SUSE ALP MICRO — the docs live at https://documentation.suse.com/alp/all/ if you wanna go read them, ngl.
What it does: it prepares a libvirt XML guest configuration and the host, so you can run a customized guest. The whole idea is to use multiple templates and concatenate them together to build the expected Guest XML file. Iconic behavior, honestly 🫶
Like, example: setting up a secure VM from scratch is not easy, and this tool just... does it for you. It prepares the host, the XML guest config with the secure parameters, and it deals with all the certificate stuff, the attestation, and the launch measurement. In literally only 2 commands you can start a secure VM on an AMD SEV system! And it also simplifies using disk image encryption. Obsessed 💖
Now, customization to match a specific scenario is not graved in stone — the idea is that the config you get should improve the usage compared to a basic setting. But this will NOT guarantee that it's perfect, because that highly depends on your current system. No cap, it's your machine's vibe that decides.
- Interactive screenshot:
https://i.postimg.cc/rsHLgQMw/vs-interactive.jpg - Gtk screenshot:
https://img.youtube.com/vi/6JdvKknc-2A/0.jpg - Gtk demo video:
https://www.youtube.com/watch?v=6JdvKknc-2A
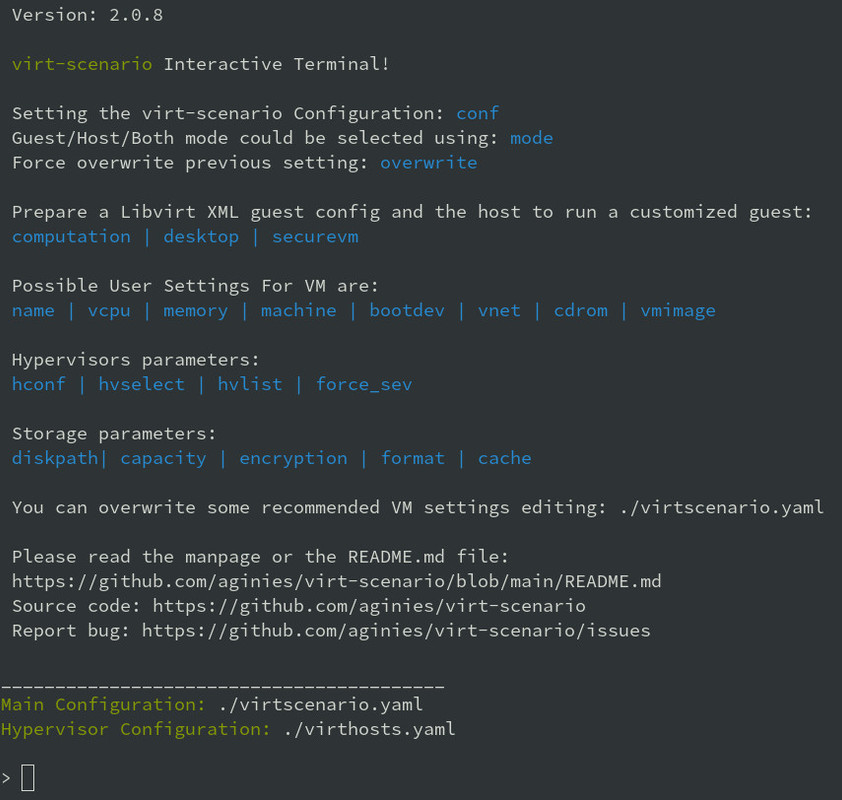
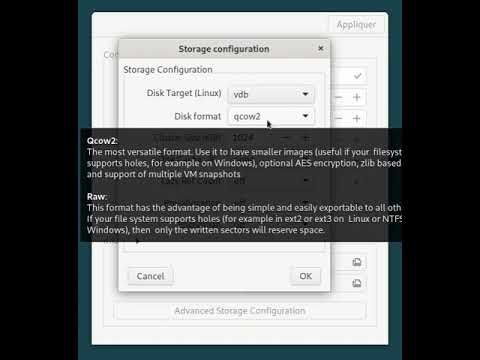
🎀 USER SETTINGS 🎀
You, yes you, can set some parameters in /etc/virt-scenario/virtscenario.yaml. These override the scenario settings. And a table gets displayed showing the recommended settings VS the current one, so you can literally see what you changed. Main character energy fr ✨
Example:
# WARNING: INCORRET PARAMATERS WILL LEAD TO BAD VM CONFIGURATION
# Dont change the section name
# This will overwrite scenario settings....
config:
  - path: /etc/virt-scenario
  - vm-config-store: /etc/virts-scenario/vmconfig
emulator:
  - emulator: /usr/bin/qemu-system-x86_64
input:
  - keyboard: virtio
  - mouse: virtio
architecture:
  - arch: x86_64
STORAGE_DATA:
# some options are only available with qcow2 format and
# will be ignored in case of any other image format
  - disk_type: file
#  - disk_cache: none
  - disk_target: vda
  - disk_bus: virtio
  - path: /var/livirt/images
  - format: qcow2
# host side: qemu-img creation options (-o), qemu-img --help
  - unit: G
  - capacity: 20
  - cluster_size: 1024
  - lazy_refcounts: on
# preallocation: off, metadata (qcow2), falloc, full
  - preallocation: off
  - compression_type: zlib
  - encryption: off
host_filesystem:
  - fmode: 644
  - dmode: 755
  - source_dir: /tmp
  - target_dir: /tmp/host
💀 bestie read the warning: INCORRET PARAMATERS WILL LEAD TO BAD VM CONFIGURATION. And don't change the section name, that's the one thing that'll ruin your whole day.
Then /etc/virt-scenario/virthosts.yaml is used to define a Hypervisors list, mostly for secure VM configuration:
localhost:
  url: qemu:///system
# Generate with 'sevctl export --full filename.pdh' on the given host
  sev-cert: /path/to/host-cert-chain.pdh
🌈 USAGE 🌈
💜 Get it and use it
🧚 From source code
main.py will create an xml based file from a template and validate it. It will also prepare the host system and create the VM image file. Currently desktop, computation and securevm are available. slay.
git clone https://github.com/aginies/virt-scenario.git
cd virt-scenario/src
python3 -m virtscenario
> conf virtscenario.yaml
> desktop
Tool to select a firmware based on feature:
python3 -m virt_select_firmwareTool to launch the VM from the config file generated by virt-scenario:
python3 -m virtscenario-launchGTK virt-scenario:
python3 -m vsmygtk🍓 From Package
Get the package for your Distribution and install it. For openSUSE, SLES:
- devel stable project —
https://build.opensuse.org/package/show/Virtualization/virt-scenario - devel unstable —
https://build.opensuse.org/package/show/home:aginies/virt-scenario
You should run this tool as root to configure the host part. For the Gtk you can use gnomesu to launch it as root 👑
virt-scenario: CMD Interactive mode (console)virt-scenario-gtk: The GTK interface
🌸 virt-scenario as an API
virt-scenario is usable from Cmd Interactive or using a GTK interface. It also provides an API ✨ A commented Demo example file is available, so you're not just out here guessing, iykyk.
⭐ Default configuration
The default configuration for VM definition are:
- disk path image:
/var/libvirt/qemu - arch:
x86_64 - machine:
pc-q35-6.2 - boot_dev:
hd - emulator:
/usr/bin/qemu-system-x86_64 - input: keyboard and mouse as
virtio
They could be overwriten by the choosen scenario 💅
Depending on scenario the default will change to some other value. So like, don't be surprised when it does.
🦋 Interactive commands
💖 virt-scenario configuration
overwrite: Force overwrite previous settingmode: Guest/Host/Both modeconf: Setting the virt-scenario configuration file
🎀 Hypervisor configuration
hvconf: Load Hypervisor configurationhvselect: Set hypervisor for which VMs are configuredhvlist: List available hypervisorsforce_sev: Force the extract of alocalhostPDH file. This is NOT secure as this file should be stored in a secure place! Only for demo purpose 😭
🙈 for real, force_sev is demo-only. Store that PDH file somewhere safe like it's your Notes app.
🌟 Guest configuration
name: Define a name for the VMvcpu: Choose how many VCPUmemory: Choose the Memory size (in GiB)vnet: Virtual Network for the VMmachine: Select the Machine type (from a list)bootdev: Select the boot dev (from a list)cdrom: File Path to CD/DVD installation mediavmimage: File path to an already existing VM image
🧁 Storage Guest configuration
capacity: Disk Size image (GiB)format: Select the Disk Image format (qcow2/raw)cache: Specify the Disk Cache modeencryption: Encrypt the VM Disk imagediskpath: Directory where to store disk image
🔥 Generate the XML configuration and prepare the host
computation: Create an XML configuration and host config to do computation VMdesktop: Create an XML configuration and host config for Desktop VMsecurevm: Create an XML configuration and host config for Secure VM
💜 Others
shell: Execution of a system commandinfo: Get current host information about CPU and Memory
🌈 POSSIBLE SCENARIOS 🌈
👑 Default Settings Comparison
These settings should be better than the default one. Of course this is not perfect, and there is maybe some mistakes. Feel free to comment on these parameters or request addition of new ones — feedback is cute ✨
default_settings
💀 Not yet ready
- Testing an OS
- Easy migration of VM
- Soft RT VM (latency improvments)
🛠️ Devel Information
Okay bestie, real talk: this part is still WIP, but the code is relatively stable — so like, it works, it slays, just don't be weird about it. 💅
📝 Devel planning / TODO
Everything crossed out below is already done (the original literally strikes them out, so we're celebrating 🎉). The one thing still standing is the actual to-do:
- ~~mechanism to create the Guest XML file from template~~
- ~~define all scenarios (list)~~
- ~~post customization of XML config~~
- ~~show host configuration~~
- ~~implement interactive shell~~
- ~~check if running inside a container (for host configuration)...~~
- ~~do more configuration on the Host side~~
- ~~create needed files on host: images, network definition, etc...~~
- ~~define conflict/compatibility between scenarios (is this still needed?)~~
- improve customization based on scenario (need to get some QA on this...)
💻 Code
- Source —
https://github.com/aginies/virt-scenario - Issues —
https://github.com/aginies/virt-scenario/issues
🧩 Class / Functions
All scenarios are defined in the Scenarios class. It can do direct configuration by calling BasicConfiguration.XXX or ComplexConfiguration.XXX, or it can request specific features by calling Features.XXX. And the golden rule: user settings always overwrite any value a scenario set automatically. Periodt. 👑
Scenarios()
class Scenarios()
    -> BasicConfiguration.XXX
    -> ComplexConfiguration.XXX
    -> Features.XXX
Features()
class Features()
    -> XXX_perf() -> BasicConfiguration.XXX
                  -> ComplexConfiguration.XXX
BasicConfiguration()
The whole roster, no notes:
class BasicConfiguration()
    name(self, name)
    vcpu(self, vcpu)
    cpumode_pass(self, migratable, extra)
    power(self, suspend_to_mem, suspend_to_disk)
    audio(self, model)
    input(self, inputtype, bus)
    usb(self, model)
    watchdog(self, model, action)
    emulator(self, emulator)
    memory(self, unit, max_memory, memory)
    osdef(self, arch, machine, boot_dev)
    ondef(self, on_poweroff, on_reboot, on_crash)
    features(self, features)
    clock(self, clock_offset, clock)
    iothreads(self, iothreads)
    security_f(self, sectype, secdata)
    video(self, model_type)
ComplexConfiguration()
ComplexConfiguration()
    disk(self, disk)
    network(self, mac, network, intertype, iommu)
    access_host_fs(self)
    tpm(self, tpm_model, tpm_type, device_path)
    tpm_emulated(self, tpm_model, tpm_type, version)
    access_host_fs(self, fmode, dmode, source_dir, target_dir)
Yes, access_host_fs shows up twice in there — that's exactly how the original lays it out, bestie, don't come for me. 🙈
📄 Templates definition
All the templates live in the python lib virt-scenario/template.py file. That's the spot. 🫶
🗂️ Files (virtscenario)
virtscenario.yaml— user setting (overwrite scenario settings)virthosts.yaml— Hypervisors list and settingslibvirt.py— Wrapper for getting libVirt domain capabilitiesfirmware.py— Select the firmware with the required feature-setsev.py— Get parameters for configuring an SEV or SEV-ES VM and do detectiontemplate.py— libvirt XML template definitionscenario.py— different call to create the XML based on the selected scenariodict.py— create the dict with data to file the templateconfiguration.py— all stuff related to configurationfeatures.py— prepare some features for the VMhost.py— create the storage and prepare the hostguest.py— create dict to file all the templatesimmutable.py— Immutable data (to be removed when implementation will be done...)qemulist.py— provide list of available options in qemu and some default pathutil.py— internal needed functionscmd.py— Python CMD interactive partmain.py— launch the tool and create the final XML file and host configurationhypervisors.py— list, select, connect to an hypervisor (or any other HV action)configstore.py— Guest configuration store (used mostly for Confidential computing)
🖥️ Host configuration
What it can do to your host, in no particular order:
- check CPU flag:
sev,sev-es,pdpe1gb,pse - check SEV on the system and libvirt enablement
- enable an AMD SEV system
- generate SEV attestation and update VM XML
- configure HugePages and THP
- enable/disable KSM
- adjust swappiness
- manage IO scheduler
✨ Possible Guest VM Features
The little menu of goodies a guest can get:
- CPU performance
- System features
- Security
- Memory performance
- Storage performance
- Video (virtio or others)
- Network performance
- Clock performance
- Using host hardware
- Access host OS filesystem
- AMD SEV
- select right firmware for VM guest
- Disk Encryption
🧊 Stuff currently immutable
This is currently not changeable using the template, and it needs to be adjusted in the futur (or not...):
console_datachannel_datamemballoon_datarng_data- Memory Backing
metadata_data- only support 1 disk per VM
👆 that last one is a real limit, not a vibe. One disk per VM, bestie. That's the rule rn.
🎀 Example with securevm (Confidential Computing)
virt-scenario currently only supports setting a secure Virtual Machine on an AMD SEV or SEV-ES system. For more information about SUSE and SEV, please refer to SLES AMD SEV.
💖 Prepare Your VM
virt-scenario provides different options to configure the Virtual Machine. In our example we'll set different parameters to suit our needs — and most of them provide completion using the Tab key, which is honestly so clutch:
name ALPOS
vcpu 4
memory 8
vnet default
bootdev hd
vmimage /var/lib/libvirt/images/ALP-VM.x86_64-0.0.1-kvm_encrypted-Snapshot20230309.qcow2
force_sev on
This ends up with a prompt like:
---------- User Settings ----------
Disk Path: /var/lib/libvirt/images
Main Configuration: /etc/virt-scenario/virtscenario.yaml
Hypervisor Configuration: /etc/virt-scenario/virthosts.yaml
Force SEV PDH extraction: on
Name: ALPOS
Vcpu: 4
Memory: 8
Boot Device: hd
Virtual Network: default
VM Image file: /var/lib/libvirt/images/ALP-VM.x86_64-0.0.1-kvm_encrypted-Snapshot20230309.qcow2
🚀 Generate XML and prepare the host
You're ready, bestie — run securevm to prepare the host system and generate the XML libvirt config:
securevmThe generated XML file lands in ~/etc/virt-scenario/vmconfig/ALPOS/domain.xml. You can also find a config.yaml which contains host data about this VM. In our case attestation will be set to true, and the host will be localhost. The /etc/virt-scenario/virthosts.yaml will be updated to configure the correct path to the extracted PDH file (sev-cert). 🦋
🌈 Launch the VM
Launch the VM with the virt-scenario-launch tool:
# virt-scenario-launch --start ALPOS
Connected to libvirtd socket; Version: 7001000
SEV(-ES) attestation passed!
Validation successfull for domain ALPOS
Look at that attestation passing. We love to see it. 🔥
👑 Authors
Written by Antoine Ginies
Contributors: Joerg Roedel
And that's the whole page, bestie 🫶 this one comes from the virt-scenario source, and the footer line is literally just an empty () — no version, no date, nothing 💀 which is honestly iconic of it. Now go forth and build a secure VM. 🎀
📦 where this page comes from
- opensuse-leap 16.0: python3-virt-scenario 2.1.2-160000.2.2 · GPL-3.0-or-later
- 💖 girlified by deepseek-ai/DeepSeek-V4.1-Flash-1017 on : a language model's rewrite of the original, under its terms